BEGIN CODING WITH AN EXTERNAL EDITOR
- ESTIMATED COMPLETION TIME: 20-30 minutes
- CORE VERSION: 1.0.219
- SUGGESTED PREREQUISITES: None, but it helps to have basic PC navigation and basic internet browsing knowledge
What will you learn ?
In this tutorial we will install an External Editor ( Visual Studio Code ), the useful plugins, a Source Control Software ( Git with Github Desktop ) and we will make sure that everything's working properly, so that you can begin coding right away !
Tutorial:
Hey there, I'm Gabriele AKA PiousLachance and I will guide you through the steps of this tutorial.
The Downloads
First of all we have a bit of downloading, so open your browser and search the names I'm going to write or just click the link I'll give you ( way easier ) :
- We need an External Editor to write in Lua , such as Visual Studio Code ( or VS-Code shortened ), which you can download from this page ( https://code.visualstudio.com/ )
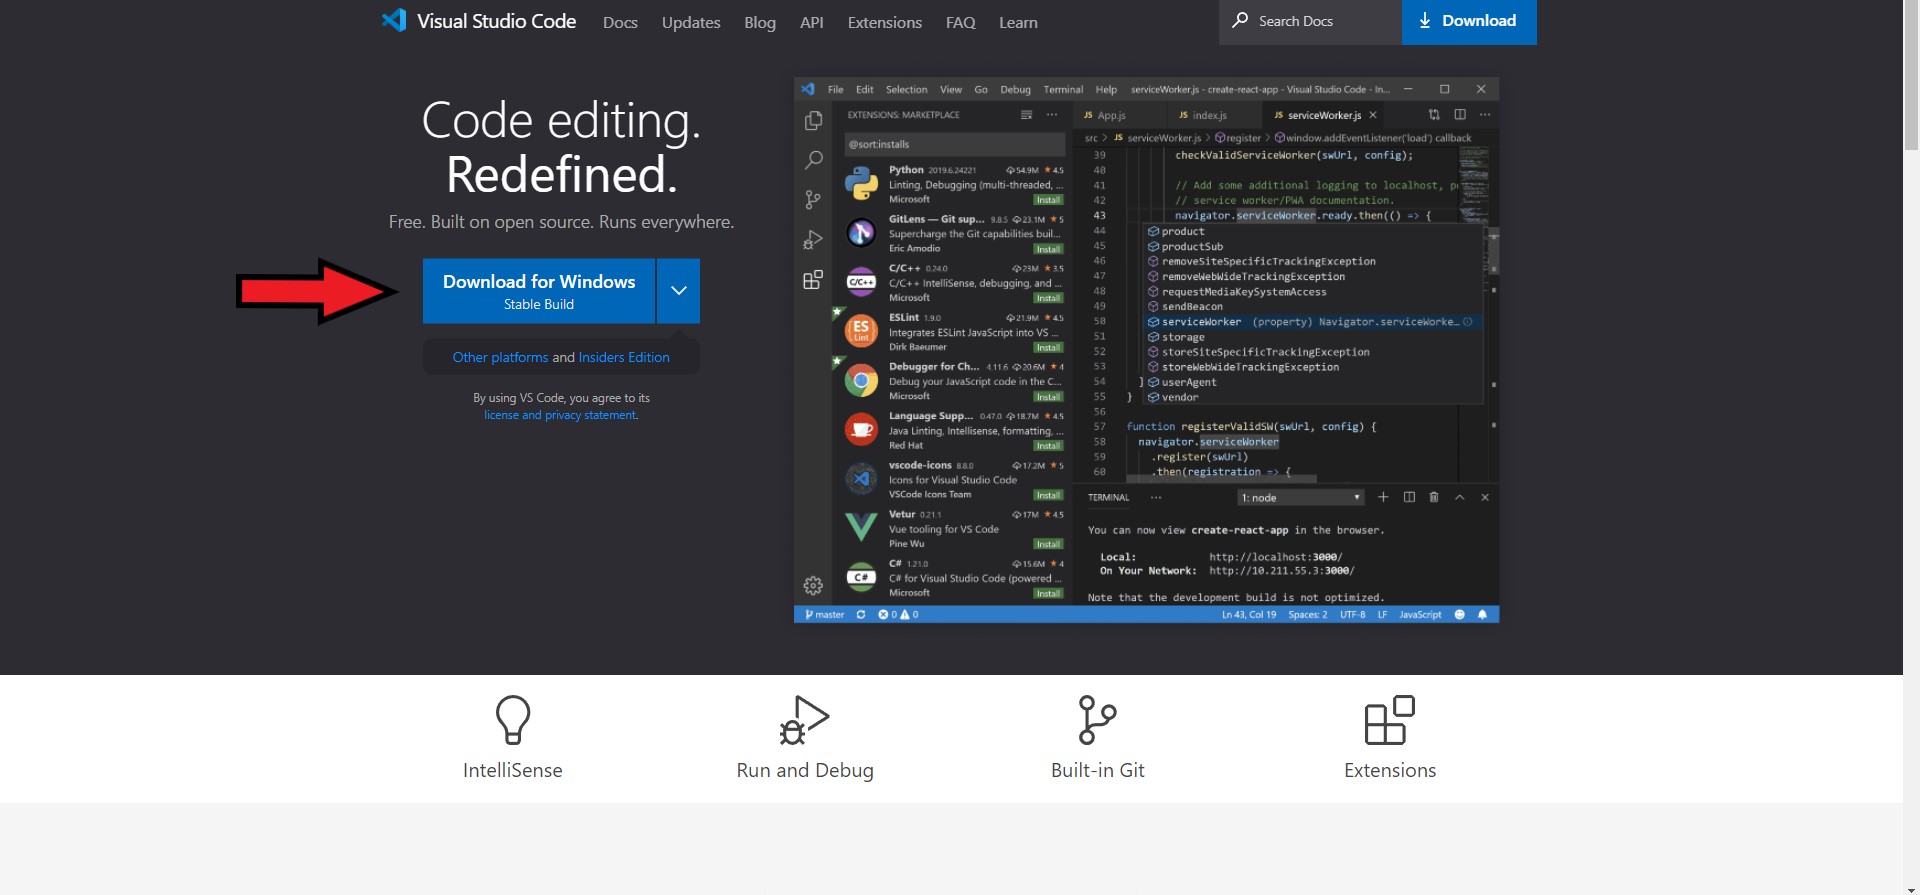
(An external editor is something where you can write in programming language with a better graphical UI and with plugins that will help you checking your grammar and even showing you definitions.)
- We need a source control software to write safer code, because, with this, you can save whenever you want and rollback after making mistakes; the most popular one is Git, of which there are also guides on the Core Documentation, and you can download it from here ( https://git-scm.com/ ).
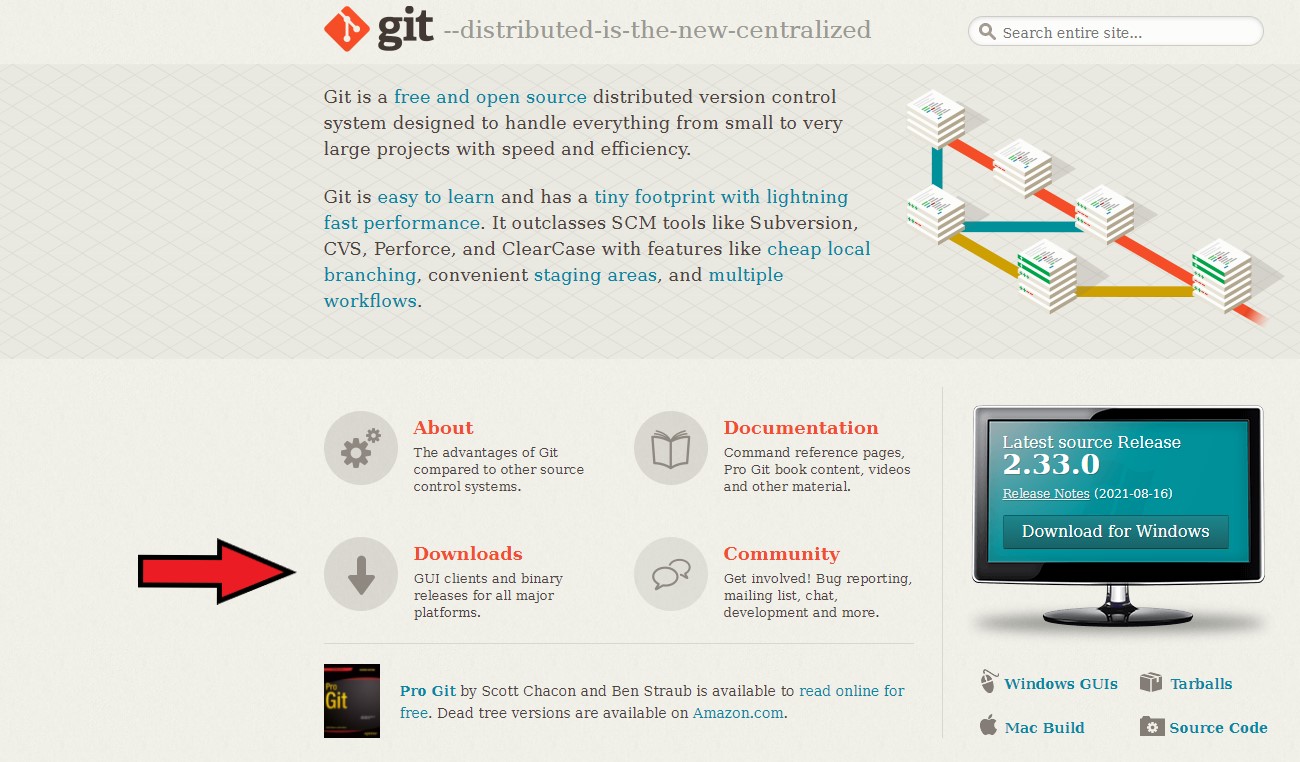
(A source control software basically will create a “starting state” in a repository ( more on this after ) and will give you the power to commit whenever you want a new “intermediate state” of the script(s) you're writing or let you take one of these states and branch it outwards, making you modify only this branch without touching the others, thus providing a more safer coding, because you'll be able to “roll back” if you make mistakes)
- We need a place where to store all of our work that isn't just our computer, because sometimes many person will work on the same project, or just because it's safer storing your scripts into a cloud; the solution is GitHub, where you're gonna make your own account and your own first repository ( https://github.com/ ).

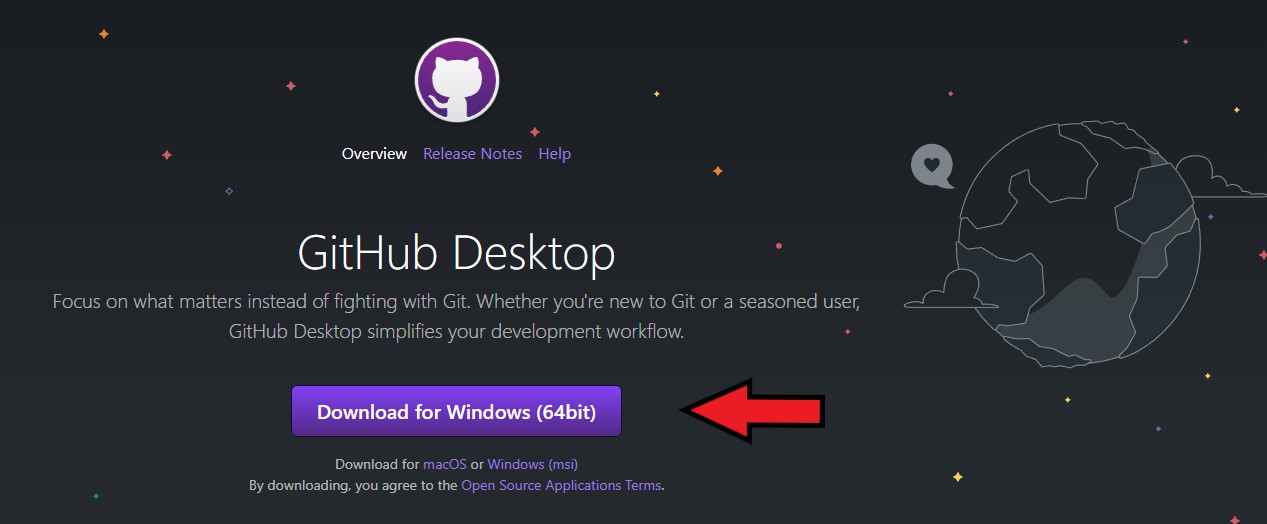
- Lastly a really useful tool that will help you understand the source control software and will make everything smoother is GitHub Desktop, which is basically a more advanced graphical UI for Git, that will help a lot, particularly in the beginning, when nothing is making sense yet: you can download it from here ( https://desktop.github.com/ ) or, if you want to search it, remember to click only on the GitHub URL, because there are ADS on the first positions.
The Installations
- First of all we will install VS Code, which is pretty straightforward, because the only things you are in need of reviewing are the destination folder and the options on the last page of installation. Nevertheless if you have any problems check the following images ( they're in Italian, but you can still guess what's what )
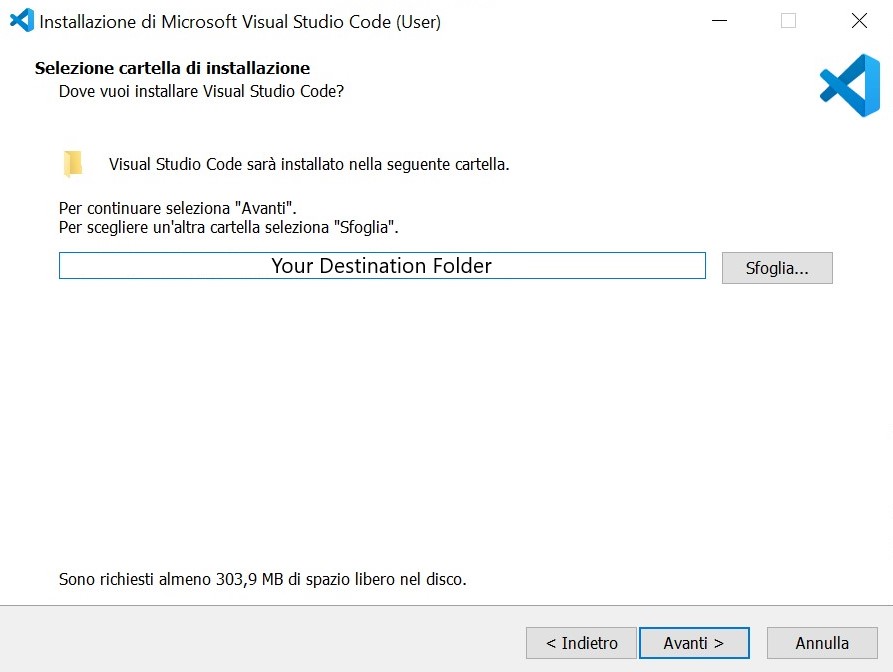

-
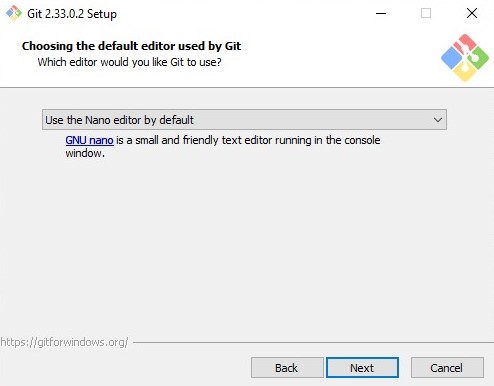
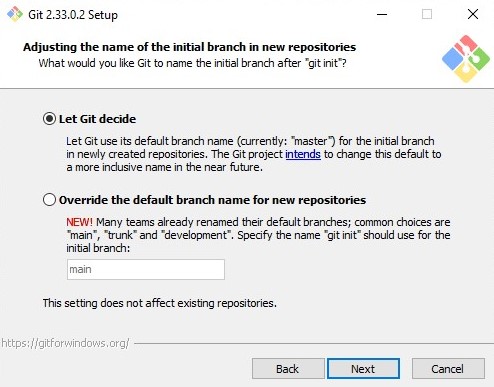
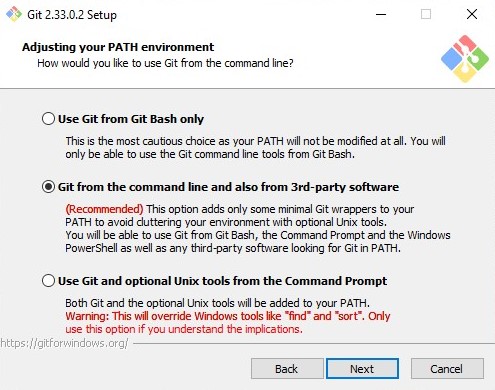
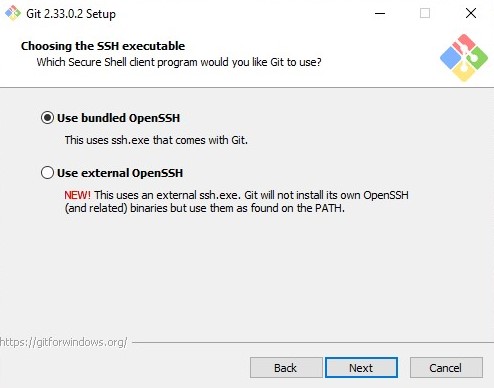
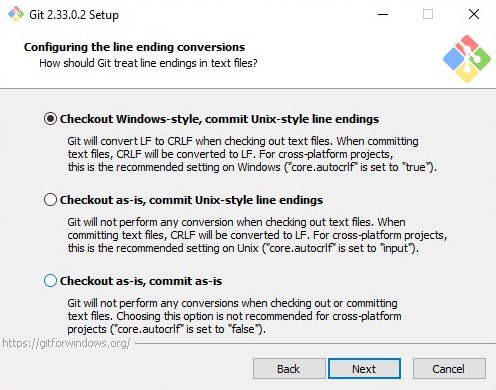
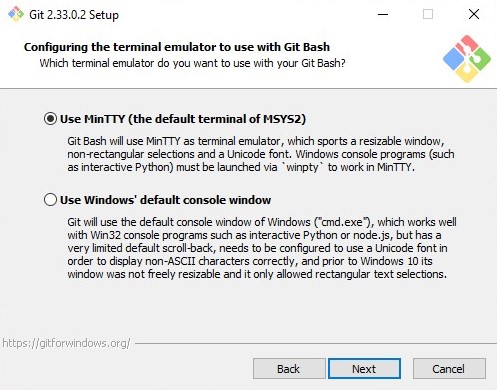
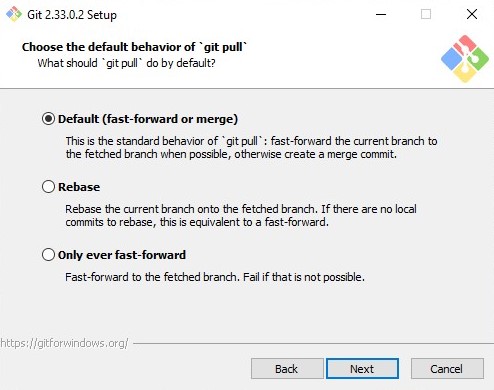
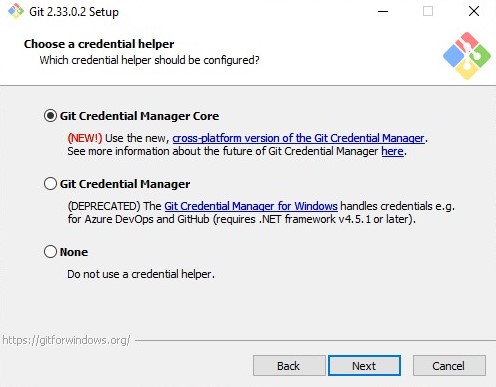
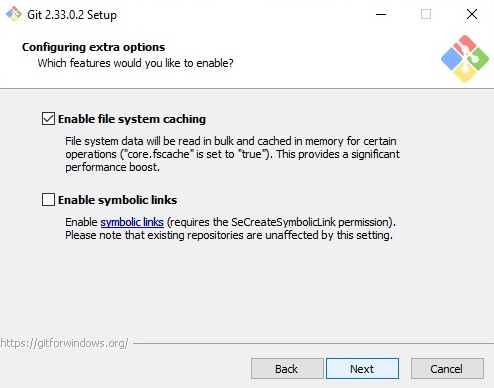
Our next step is installing Git, and that could be a bit more intimidating, but in reality there are next to none things to change from the default ones if you're not someone with Git background already.
After the first two windows, where there is the agreement to check and the file to use by default with Git, there are almost a dozen windows where you have to check what you want: here you can safely let everything by default if you don't really know what are you doing; here onward there are all the choices


- Now install the Github Desktop App ( this installation shoudn't give you any problem )
The First Time
-
Let's run Visual Studio Code: here you'll be greeted with a simple tutorial on various commands of this editor, that you can follow if you have the need to learn the basic skills ( remember that you've already downloaded and installed Git, because it'll be one of the last points of this editor tutorial ).
After the tutorial or after you've skipped it you'll find yourself in front of something like this ( the GitHub Repositories Opened is from a plugin we'll install, so don't worry ).
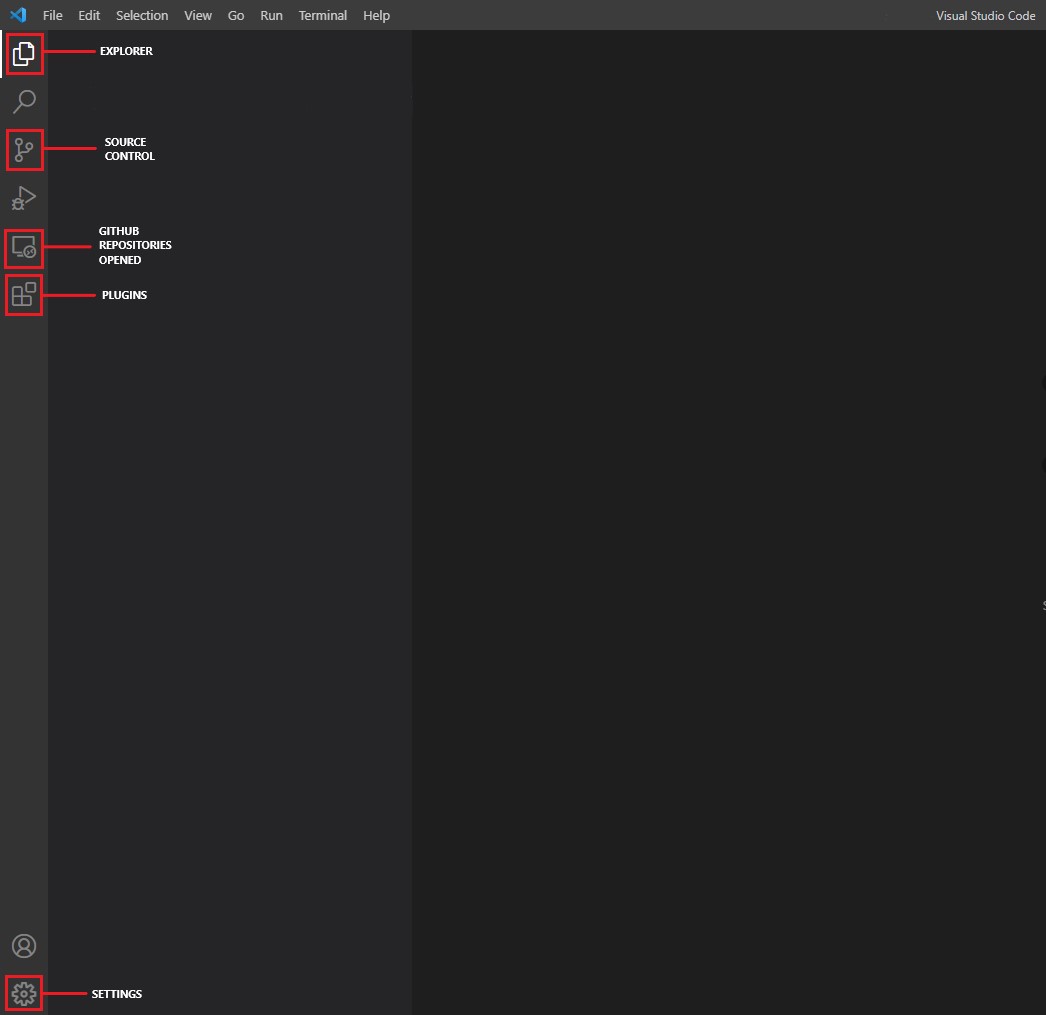
- Let's head to the Plugins Tab, the middle one on the left side, because here we have to search the marketplace for multiple Plugins:
-
Lua; autor sumneko ( if not already installed ). This is the basic lua coding plugin, needed to let the editor know what we are writing.
This is everything you need to have to code, but it would be pretty hard, because you wouldn't have anything that helps you code faster and smarter. -
Core Lua API; autor Manticore Games. Plugin that adds the documentation and API of Core Lua Coding, because what you will use to program is not the basic Lua, but a modified version. Clicking on this plugin and scrolling down until the Related Repositories title will make you able to open the Core Lua API documentation website by opening the platform-documentation link.
In addition it adds many features that will help with almost any aspect of coding by giving you a ton of different options: from finding the definitions to make findable comments, from Synthax Highlighting to the implementation of in-editor Documentation, with the help of the Autocompletion and Linting.
- The Autocompletion, or Intellisense for VS-Code, is a code completion feature that speeds up the process of coding by reducing typos and other common mistakes, using auto-completion popups while typing, querying parameters of functions, query hints related to syntax errors, etc.
An example of Auto Completion and Synthax Highlighting ( to auto complete you can scroll the side tab that shows up writing using the mouse wheel, and selecting the completion you want to use or, if you want to use the first one you can simply press Tab on your keyboard )
- Linting is similar, but different, because is the process of running a program that will analyse code for potential errors, so it will help you find possible mistakes you're making during the coding process.
An example of Linting
Togheter and with a Synthax Highlighting feature they will help you a ton finding what's wrong inside your program and help you correct the most common mistakes without any headaches.

An example of Definitions and Documentations showing In-Editor
-
GitHub Repositories; autor GitHub. Plugin used in combination with the Source control softwares you've downloaded.

The Wrap Up
With this we are almost done, because now you have just to close and reopen Visual Studio to be ready to code; what we'll se as the last Point of Interest is how to use the Source ( or Version ) Control.
You have three different methods: the easy one, the natural one and the hard one, which I strongly advise you against;
-
The easy one is to open GitHub Desktop and use it to link VS Code to your GitHub Repositories, then, branching, merging, pulling etc from this useful app ( there are multiple guides about it, an helpful tutorial on the GitHub Desktop App, and a post which talks about aspects of it by CommanderFoo on the Core Forum: How to Handle Publish Data in Group Projects using Git )
-
The ( in my opinion ) more natural one is to use the VS Code internal Source Control tab, where you can do every action you want on the repository and, utilising the GitHub repository Plugin we installed, we can get from out GitHub every piece of code we created. It's a bit more difficult to use, because here every command and button is a bit more cramped up than in the GitHub App, but it's still pretty straightforward and being in the same editor you use to code it's pretty easy to fit in the flow of coding.
-
The hard one is to use the Git Editor, which you choose installing it, but it's pretty much the worse option to use, because there are more commands to learn than the other two methods and it's more obscure; this said is also the more complete mean and, coupled with a good knowledge of the OS commands you can do whatever you want with it. Still I strongly suggest you to begin with one of the other two options and in the future decide, if you want, to learn it.
To finish up this Tutorial we'll now see how to link our External Editor to the Core Platform:
-
Open Core, then a Project ( new or not is indifferent )
-
Click on the
Editdrop down, then, the last option on the list, onSettings -
Here, in the second point of the list, you can add a Path to the External Editor .exe. For example, for VS-Code is
C:\Users\[Username]\AppData\Local\Programs\Microsoft VS Code\Code.exe. -
Exit the window
Now we can open any scripts with our External Editor by Left clicking them two times rapidly or by Right clicking them and selecting the "Open in External Editor" option.
Last tips: start with easy scripts and build confidence into using Lua, then, with small steps, add into each new script some new ideas, try more advanced algorithms and don't back up from challenges, because if you make mistakes you'll be able to come back in a couple minutes, using the Source Control. Try also to understand how each Object can dialogue with your World and with other Objects; lastly search and begin to learn from online guides and questions on Lua and remember always to check the Core API / Core Documentation ( https://docs.coregames.com/ ) because maybe there are already implemented more easy ways to do what you want.
I hope that this tutorial will be useful and that I'll be seeing you coding in Core soon and, as always, feel free to ask about anything you need on Discord.
See ya !