Hey,
In this post I'm going to discuss setting up a Core project that can have multiple branches with different publish data for each branch. This will allow you to have a live published version of your game, as well as an unlisted development version all working from the same project, and easy to switch between them.
See the docs for more information on using GitHub.
Core Project Setup
I'm going to go over how you can set up your project so that it is version controlled, but you have different branches.
Publish the Game
An important part to having a live version and a development version you can switch between easily, is to make sure the publish config data is different for each branch. So I'm going to cover this now for the main branch, though you can add the publish data at any point.
If for some reason the publish data is overwritten in the main branch, you can revert that file to an earlier version. This is the benefit of using Git to keep track of changes.
Publish your game (unlisted is fine).
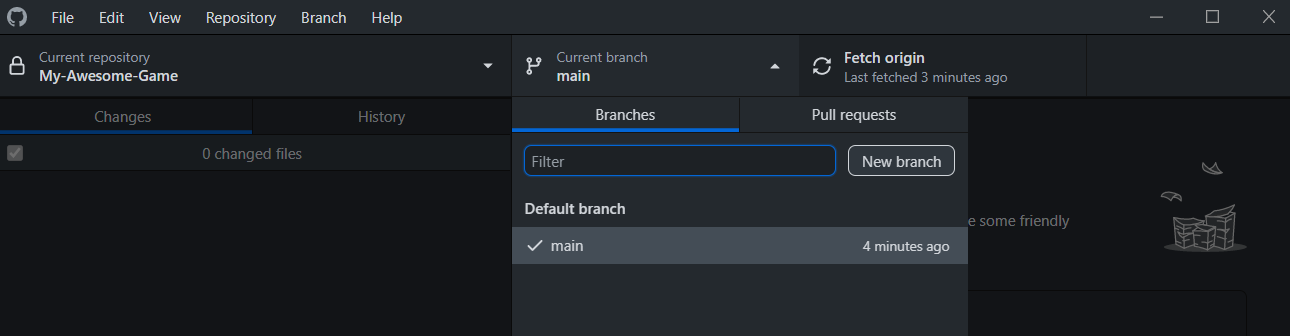
Creating the Main Branch
First step is to setup the main branch. The main branch will be the default branch, and will hold the live version of your game.
This branch should never be worked on directly, changes from other branches should be merged into it.
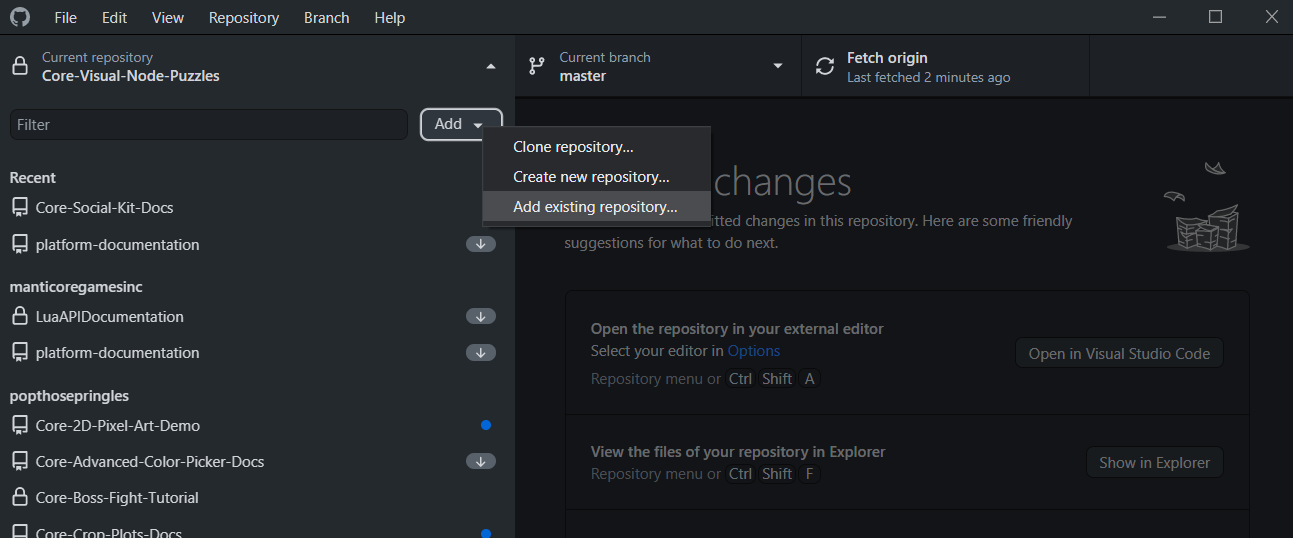
Add Existing Repository
In GitHub Desktop, click Add, and select Add Existing Repository from the menu.
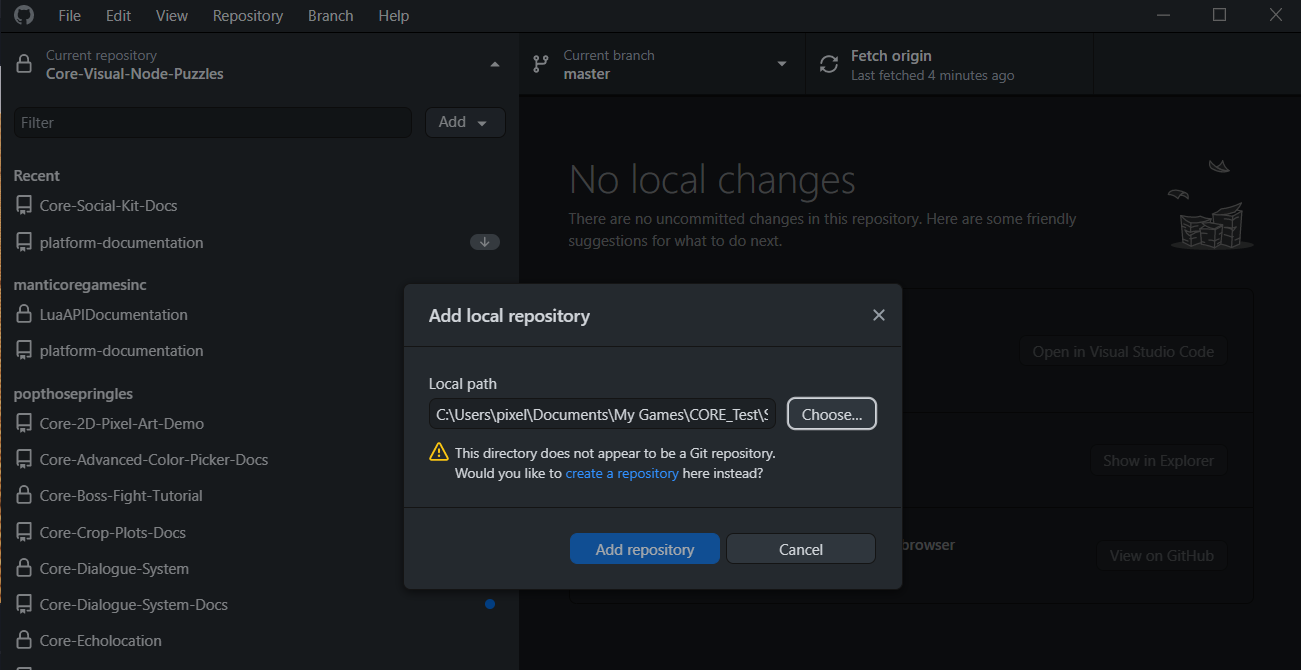
Select Core Project Folder
Find and select your Core project folder. This is the folder that Core creates inside the Maps folder.
After selecting the folder, GitHub Desktop will then warn you that the directory isn't a Git repository, and if you want to create one instead, which is what you need to do.
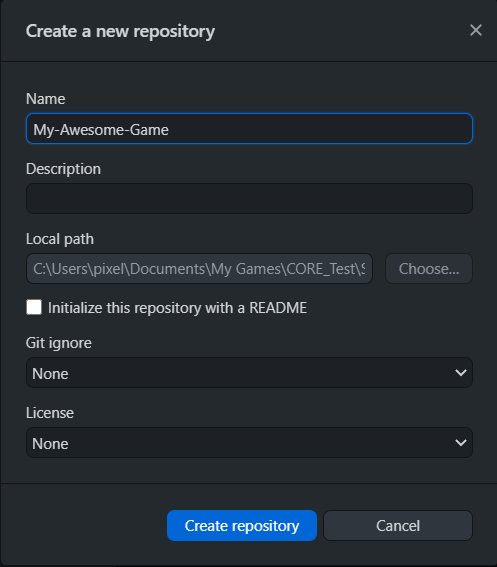
Create a Repository
Select Create Repository. This will create a local repository that is ready for publishing.
Create Ignore File
Some folders and files in a Core project don't need to be in the repository, and this is more true if you are collaborating with other people.
Create a .gitignore file in the project folder. This file is used by Git to determine which folders and files it should ignore. Any folder or file listed will not show up in the changes list.
It's recommended to at least ignore the following.
TempUserSettings
There are other files (i.e. Visual Studio Code related) and folders you may want to add to the list. This really depends you, and your team members. If you are unsure on what else to add, take a look at existing repositories on GitHub.
https://github.com/topics/coregames
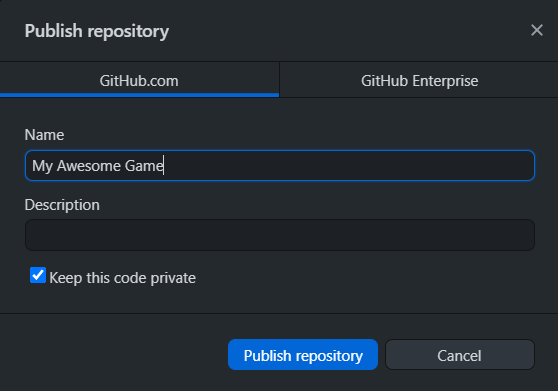
Publish Repository
Click on Publish repository. A window will popup with some options that can be set before publishing.
If your project is closed source, meaning you don't wish to share any of it to the public, then make sure the option Keep this code private is checked. Once you are happy with the name and options, click Publish Repository.
Creating a Development Branch
So a big advantage of having a development branch, is so that bug fixes, and maybe new features can be tested in a development version of the game. Once you are happy with the changes, they can be merged into the main branch for the live game.
Don't publish the new branch you are about to create just yet.
Click the Current Branch button, and select New branch. Enter a name for the new branch.
After the branch has been created, it may appear like nothing much happened. Basically the files from the main branch have been copied to the new branch.
Delete PublishConfig File
Inside the project folder, delete the file called PublishConfig.pbt that is inside the PublishData folder. This file holds the publish information for the live game that is in the main branch. You either want to have no publish data, or a separate one for each branch, otherwise if you use the existing one in the branch, when you come to publishing a development version of your game, you will overwrite your live version.
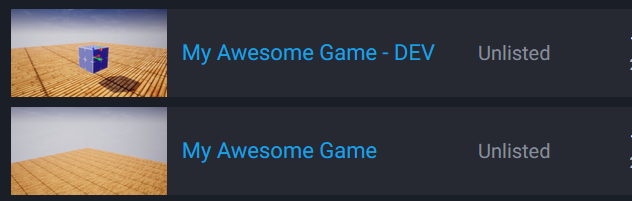
Rename Core Project
Something that might be helpful, is to rename the Core project to something else. For example, adding "DEV" to the end of the project name. This way, when opening Core and viewing your project list, you will see which branch is currently active based on the name of the project.
Publish Development Game
Open up the project and publish the game. This can be unlisted since it will be the development version of your game.
If you don't feel that you need a published version of the development branch, then you could ignore this step.
You will now have a live, and development version of your game.
Publish Branch
In GitHub Desktop, you can now publish the branch, and push your changes.
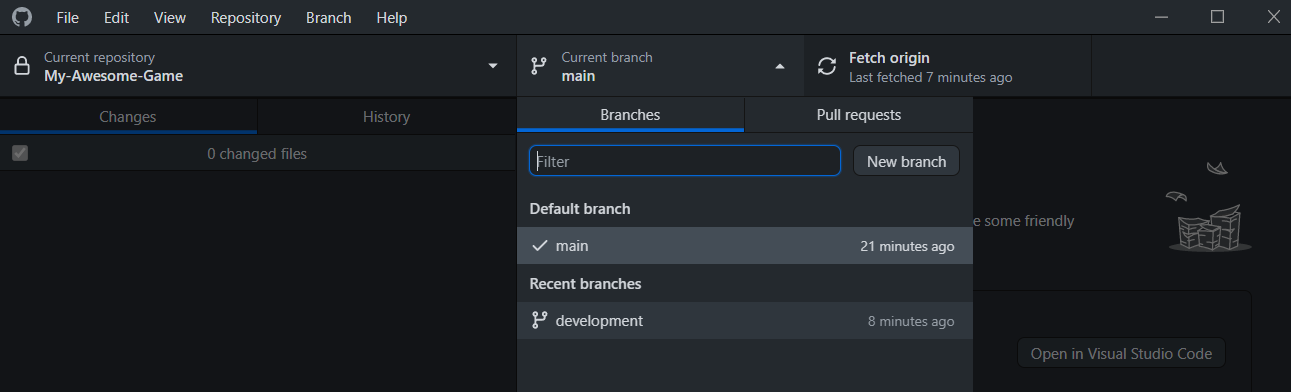
Switching Branches
So now that you have 2 branches set up, you can easily switch between them. In doing so, Github Desktop is actually switching all the files out to the branch you select.
Tip: You don't need to restart Core when switching branches.
Cherry Picking Commits
So you have changes on the development branch that are ready to be pushed to the live version of your game. To do this, you will need to merge the changes from the development branch into the main branch.
One way to do this, and is my preferred method, is by cherry picking the commits you want to merge into the main branch.
In the development branch, goto the History, and right click on the commit you want to cherry pick, and select Cherry-pick commit, then select the branch to merge into (main in this case).
So in my case, I want to merge the changes made to the Cube.
You may get a conflict message. Because you want the changes from development merged into the main branch, you can select to use the modified file from the development branch.
You can then commit and push the changes to the main branch, and republish your game.

Summary
There is a bit of learning to be done, but once you know how to use Git, even if it is the basics, you can apply it to anything.
Using it for different stages is really ideal. This way, the live version should never ever be used for testing, as you will have separate branches at different development stages (i.e. experimental feature branch, dev branch for bug fixing)
At the very least, put your project on GitHub. There really isn't an excuse not too. It supports private repositories.
If you have any questions, feedback, or additional information that other creators would benefit from, please post below.