GUIDE TITLE: Landscape tutorial
ESTIMATED COMPLETION TIME: 40 Minutes
CORE VERSION: 1.0.224
SUGGESTED PREREQUISITES: Introduction to the Core Editor
TUTORIAL SUMMARY:
In this tutorial you go to learn all related to landscapes. Create, sculpt, paint, decor and make swimmable rivers, lakes or oceans.
EXPECT TO LEARN:
· Create a landscape
· Sculpt the terrain
· Materials
· Paint the terrain
· Paint the foliage
· Create swimmable water volumes
· Tips and tricks about landscapes
END PRODUCT VISUALS:
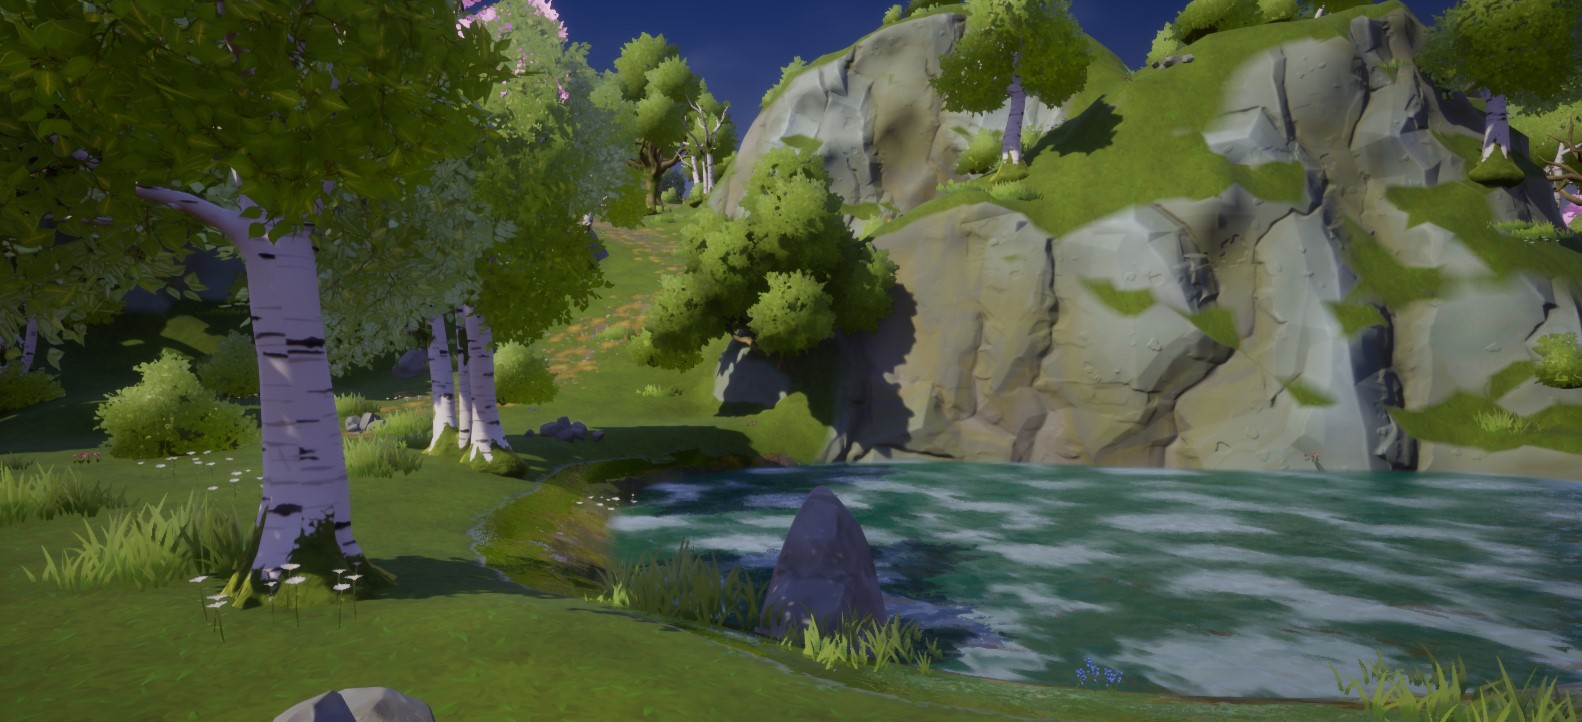
OVERVIEW:
The main goal of this tutorial is help people to go through the landscape tools until we get full functional terrain set up with lakes, trees, flowers, rocks... where you can build whatever you want to make amazing playable games.
TUTORIAL:
The Landscape tools in Core
Let’s take a look into the tools that Core have to work with a Landscape first.
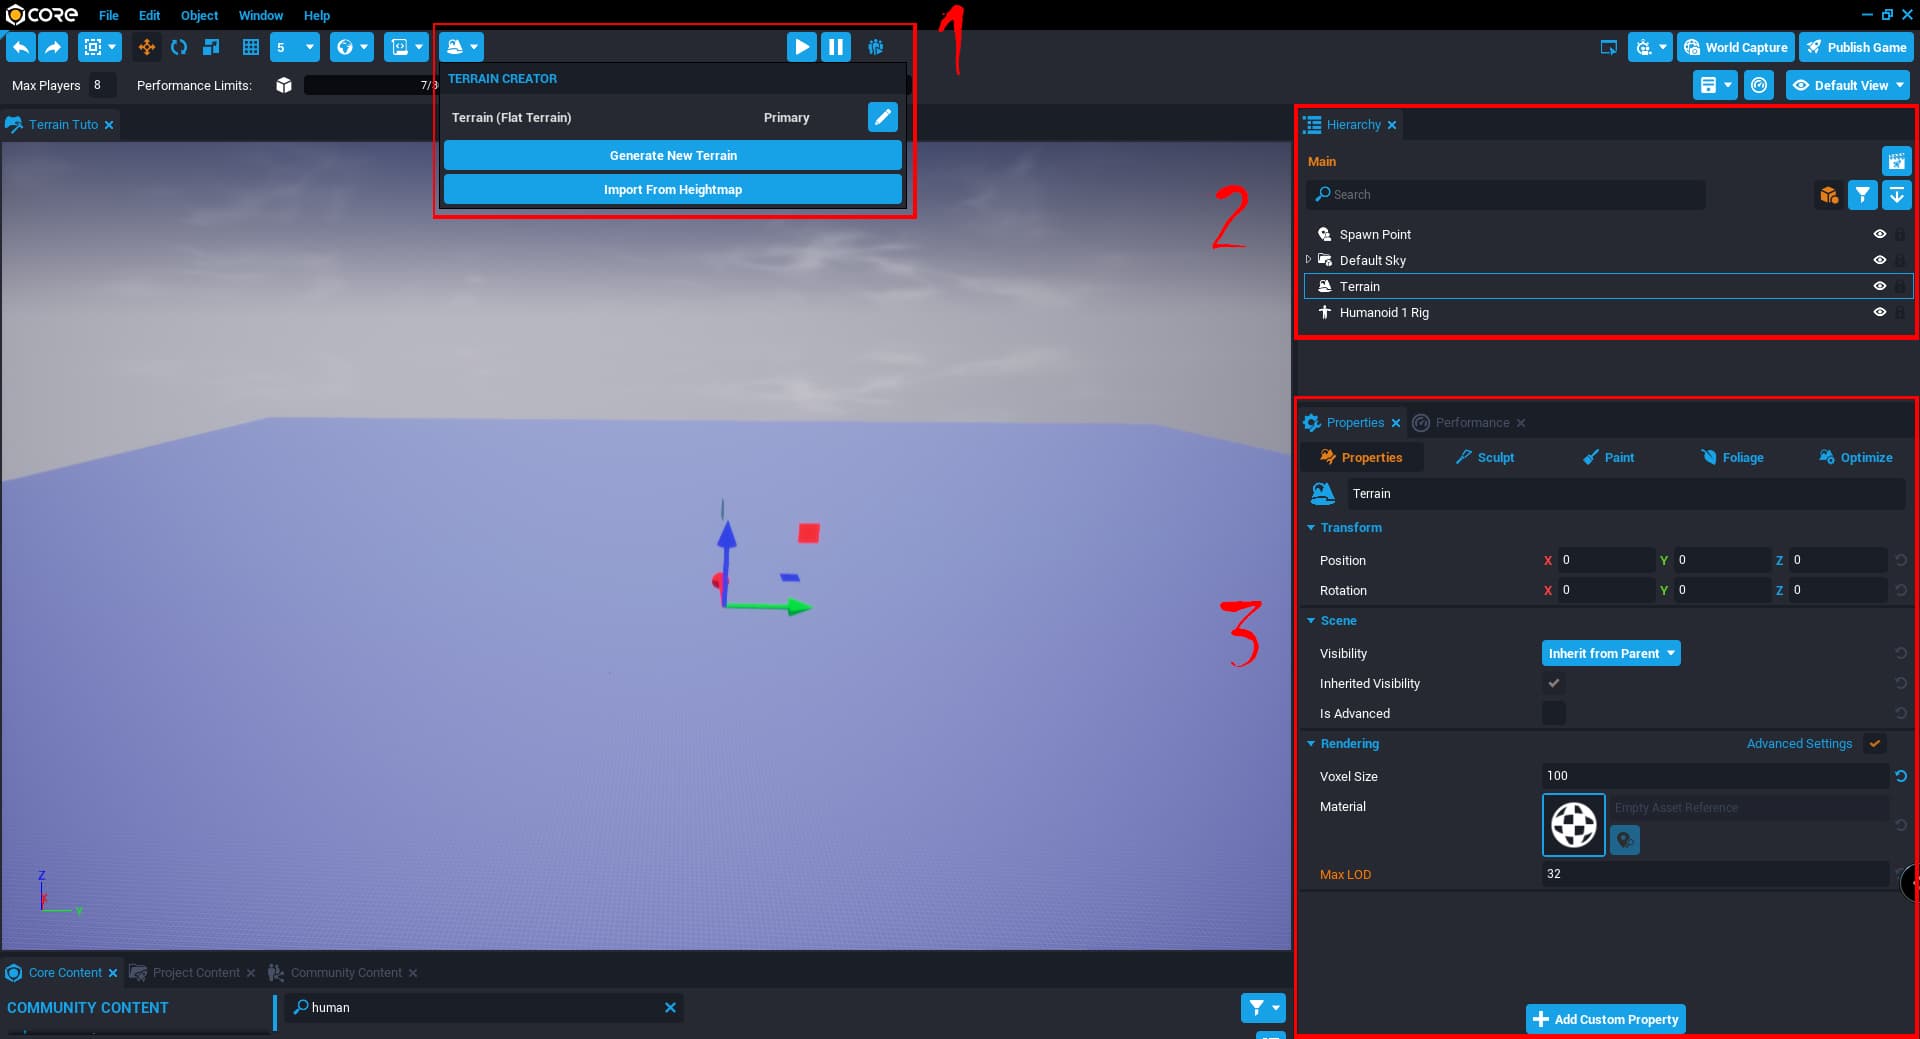
Down the main toolbar, you can see the Terrain Creator and once the landscape is selected you can see it in the hierarchy and the properties tabs.
1 – Terrain Creator: From here you create your landscape(s).
2 – Hierarchy tab: Here you have your landscape(s) in the project.
3 – Properties tab: From here you can tweak your landscape as you need.
By now we go to select the basic flat landscape but later we go through the other possibilities the editor has for the terrain.
1 – Terrain Creator
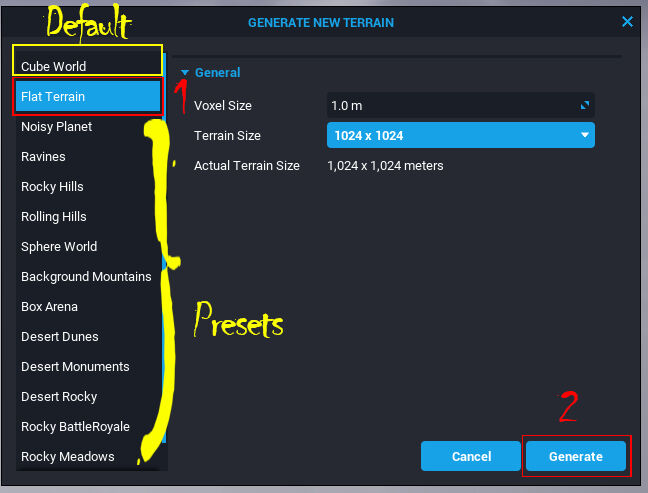
Click on the Terrain Creator button and click on the first button Generate New Terrain.

Now we can see a window with some examples and properties of that examples. By default, the editor has selected the Cube, we go to select the Flat Terrain and click on Generate.
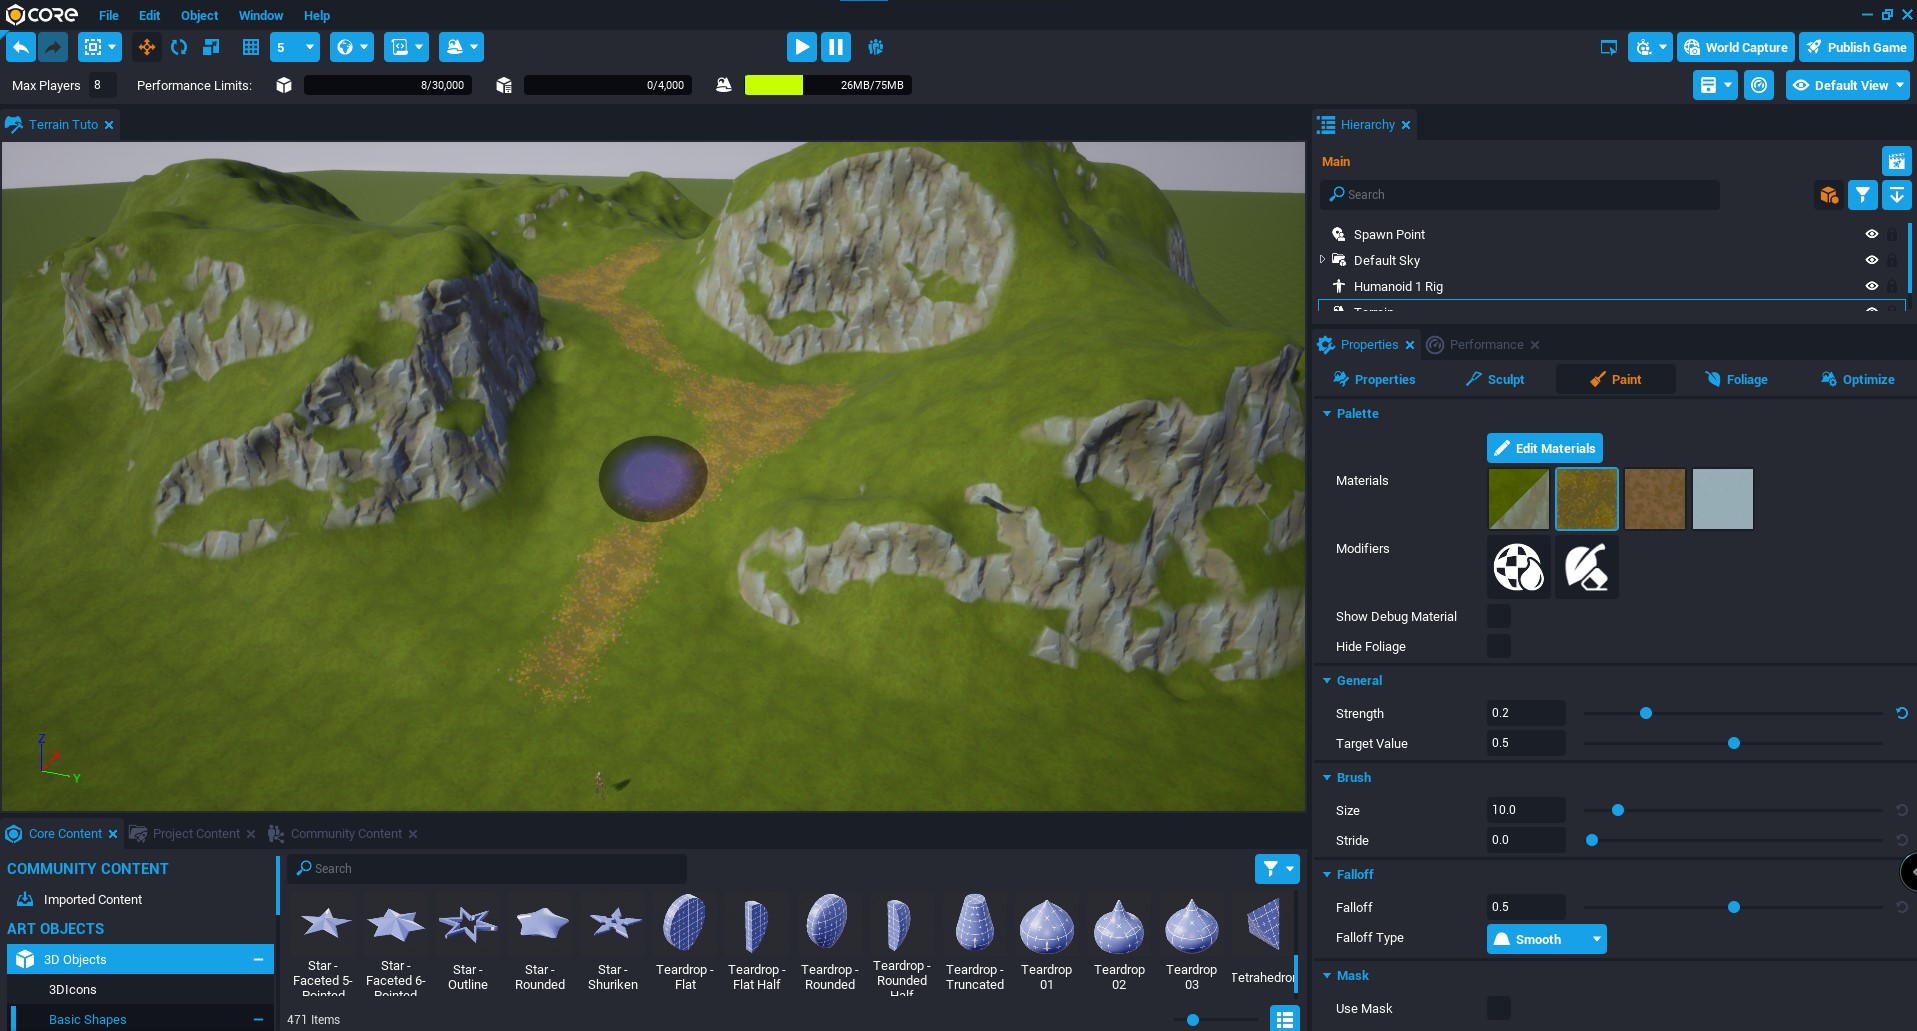
We have a landscape to work! Your editor should look that way:
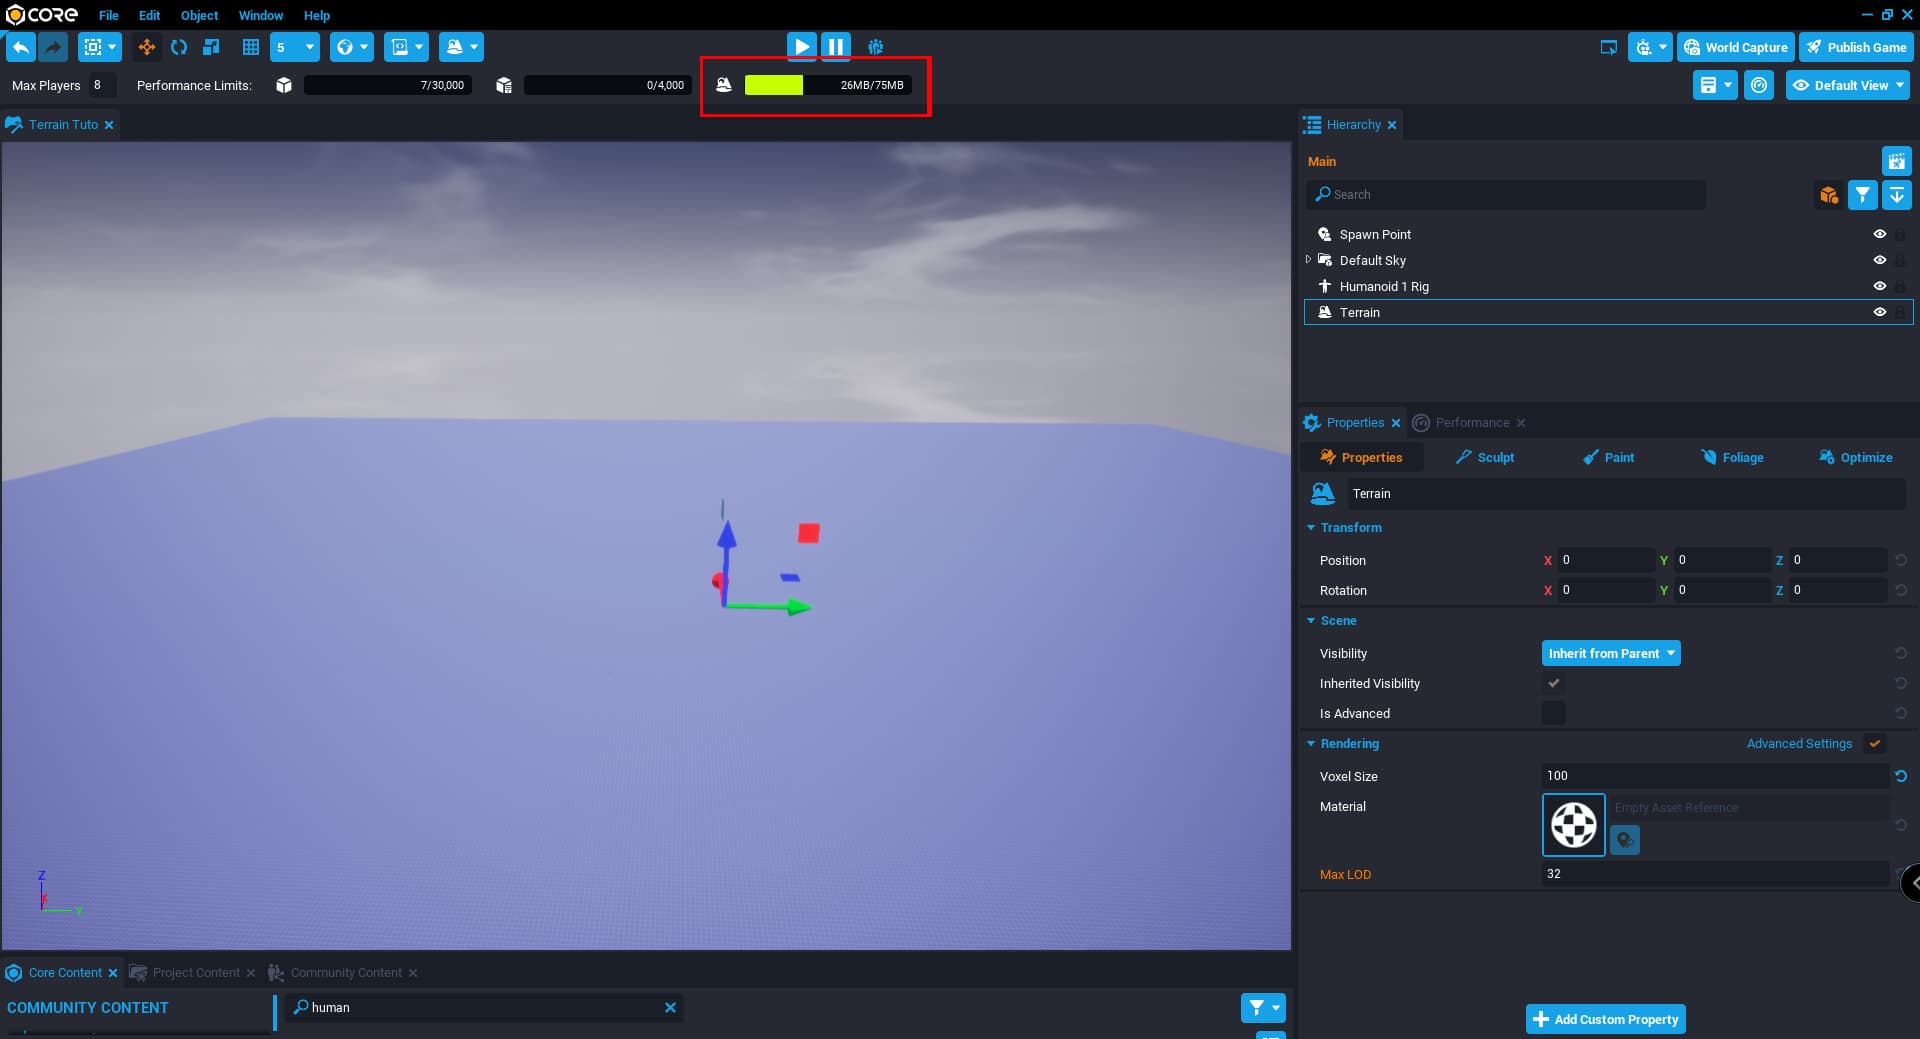
As we can see in the red rectangle, now the amount of memory used for the terrain has increased. If you add players to the game, that amount of memory available for the landscape increase. If the number of players decrease, the landscape takes more available memory. By default, is setup at 8 players with 75MB of memory for the terrain. Hoover over the rectangle to get information.
Terrain or landscape has 2 properties in Core that helps to build big maps. That are the PRIMARY feature. The primary terrain can have collision but any other terrain added not. That way you can use your primary landscape to be playable since can have collision and make others to surround your main just for visuals.
Other things are:
- Voxel size:
- Terrain size:
- Actual Terrain size:
- LOD:
HEIGHTMAPS
We can also make a terrain based on a heightmap. To do so, we just click on the Terrain Creator and click on the Import From Heightmap.
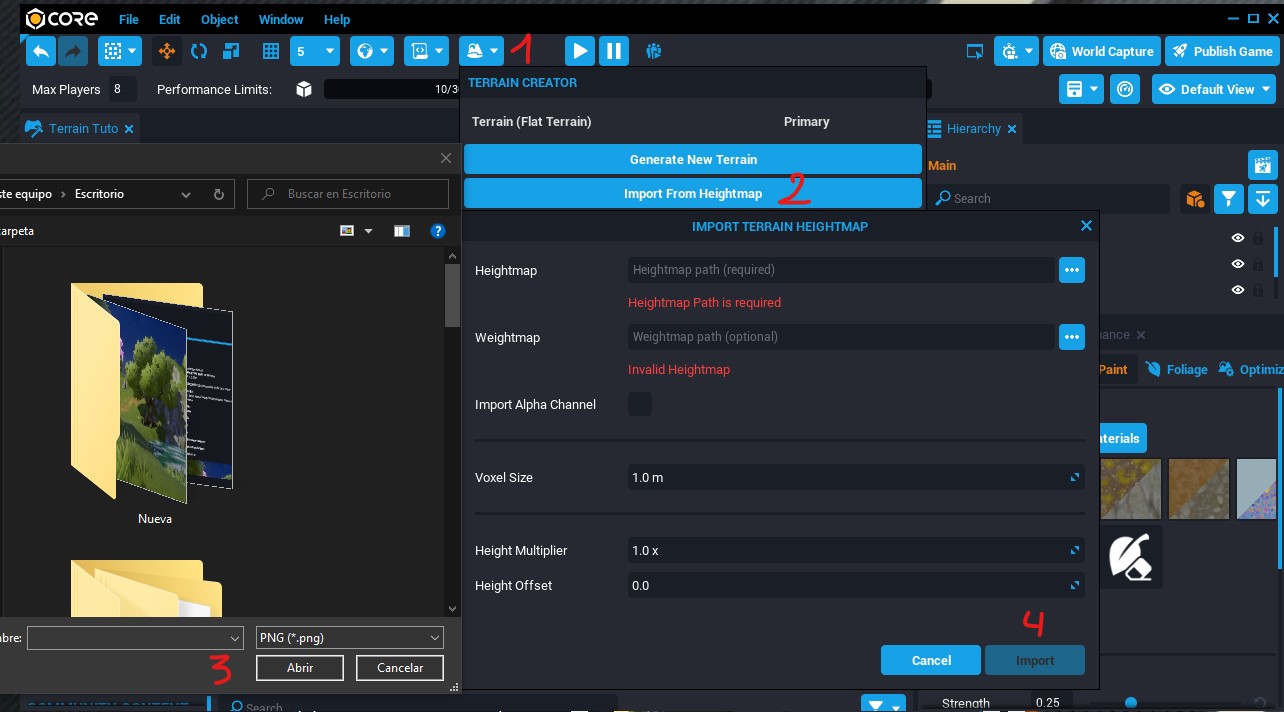
1 - Click on Terrain Creator button.
2 - Click on Import From Heightmap.
3 - Click to search for your heightmap.
4 - Select it and click Import.
Heightmaps has his own properties to be compatible with Core. The dimensions should be:
· 128x128
· 256x256
· 512x512
· 1024x1024
Also, needs to be a .png file in gray scale. Depth needs to be 16 bits. Heightmaps goes from darker that goes to be the lowest areas of your map to clear white that goes to be the highest areas of your map. You can use any image to test it but usually, heightmaps are taken from real world places or premade with other applications.
A heightmap once imported into Core needs some tweaks before you get it right. It can be too high or low, have too much roughtness, etc. There are some tools we can use to avoid unpredicted effects on the landscape:
- Smooth:
- Scale:
- Sculpt:
- Offset:
- Multiplier:
Let's see an example of a heightmap into Core:

NOTE: A 1024x1024 png file for a 8 players map with no optimization exceed the available memory for the landscape. You can see how the bar turns in red color.
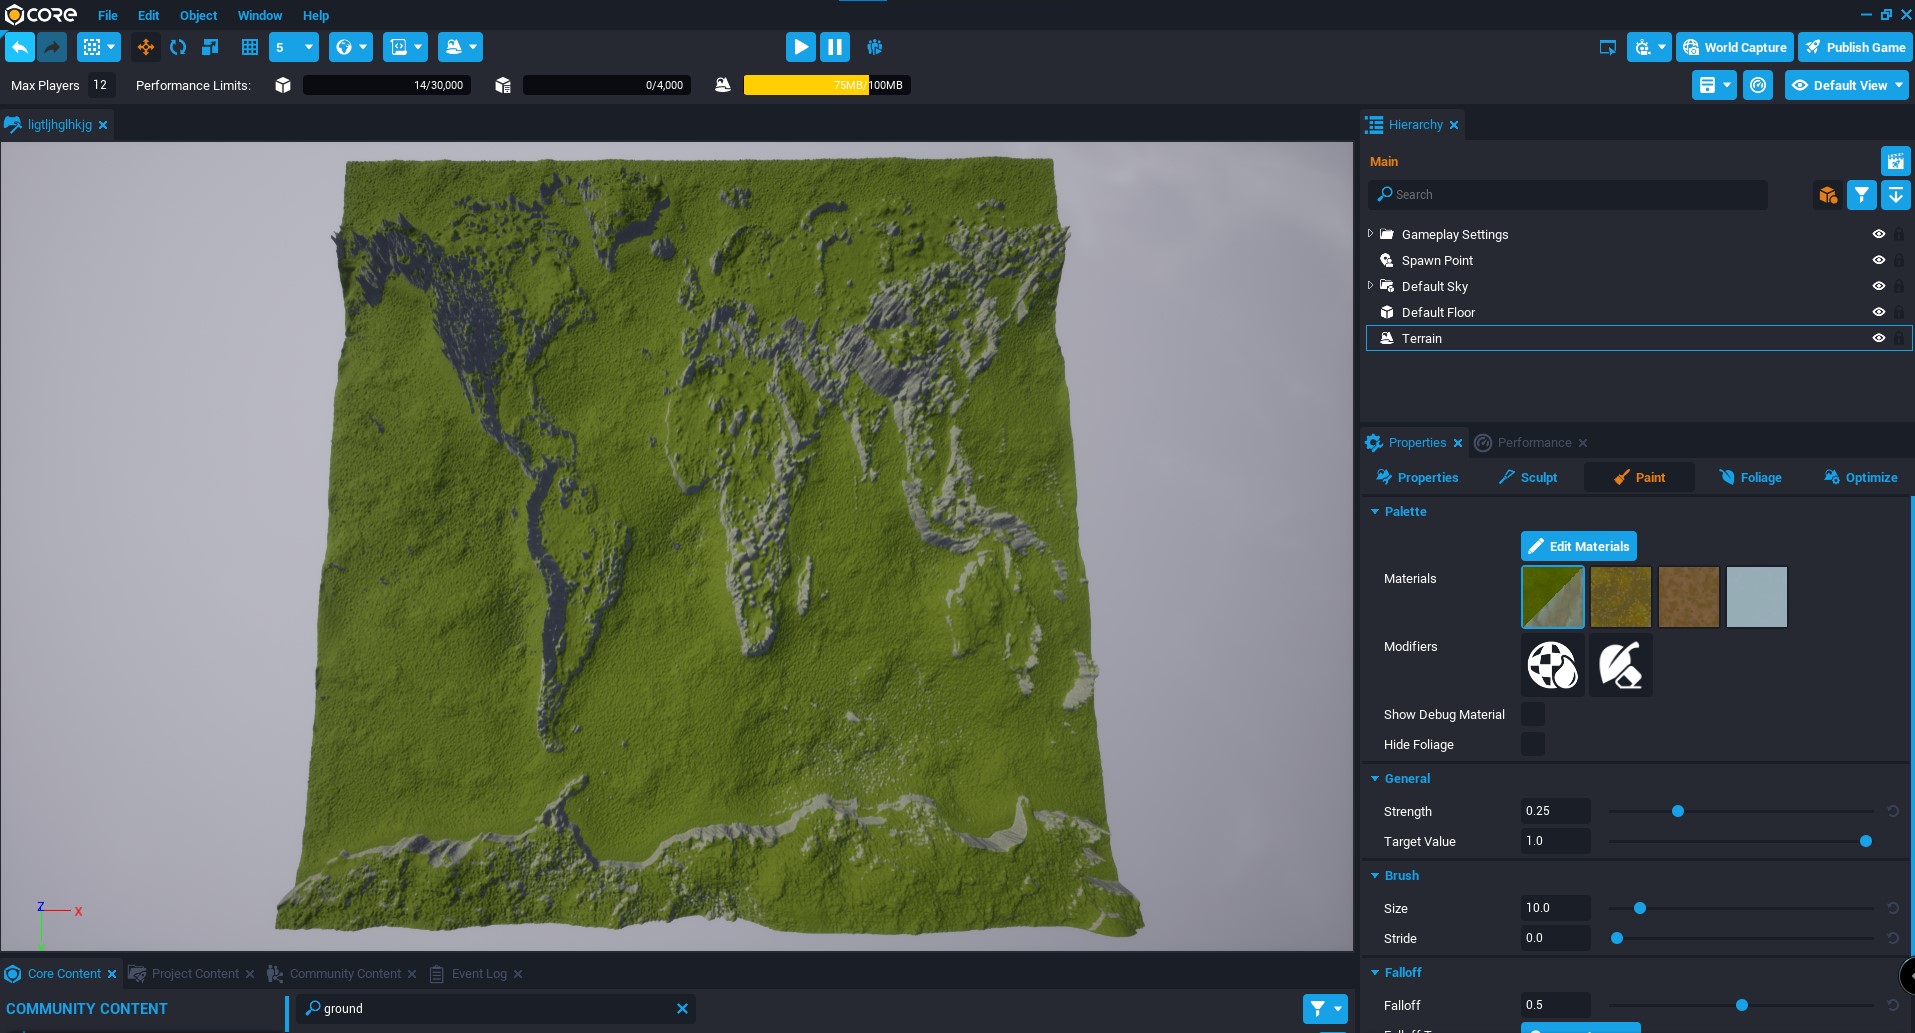
If we set the max number of players to 12, we get more available memory. Also note that the material applied is different and you can change to your needs as we go to see later.
2 – Hierarchy
In the Hierarchy, you can see your landscape(s) that are in your project. From here you can switch between your landscapes, block it, hide it, etc. Right click to see all possibilities the editor has for the landscapes.
3 – Properties
That’s the most important area. Here we have all tools to work with a landscape. No matter if is a flat terrain, a premade or a heightmap, all tools are here. Let’s look the tabs and what they offer to us.
- Properties: The main properties of the landscape.
- Sculpt: The tools to sculpt manually the landscape.
- Paint: The tools to paint the landscape with the material selected in the main Properties tab.
- Foliage: The tools to paint all rocks, plants, trees, etc. of the landscape.
- Optimize: The tools to optimize the memory usage of the landscape.
Properties section
Here is where we go to make most of the tweaks for our tools to create our landscape.
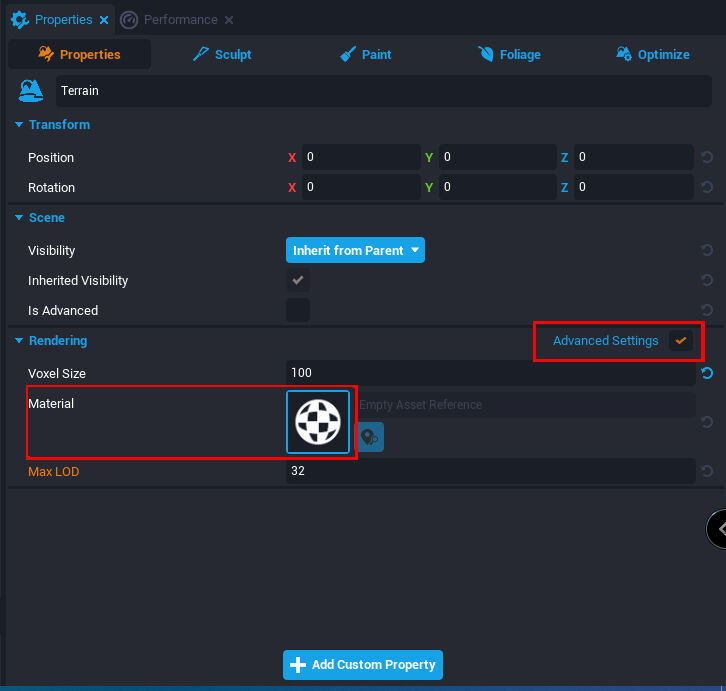
PROPERTIES TAB :
First, remember to click on the Advanced Settings option.
The second rectangle we see is the material field. Here we add a material to the landscape and later we tweak to our desires the terrain and the material.
You can move, hide change the Voxel size, the material and the Maximum LOD (Level Of Detail) of the terrain.
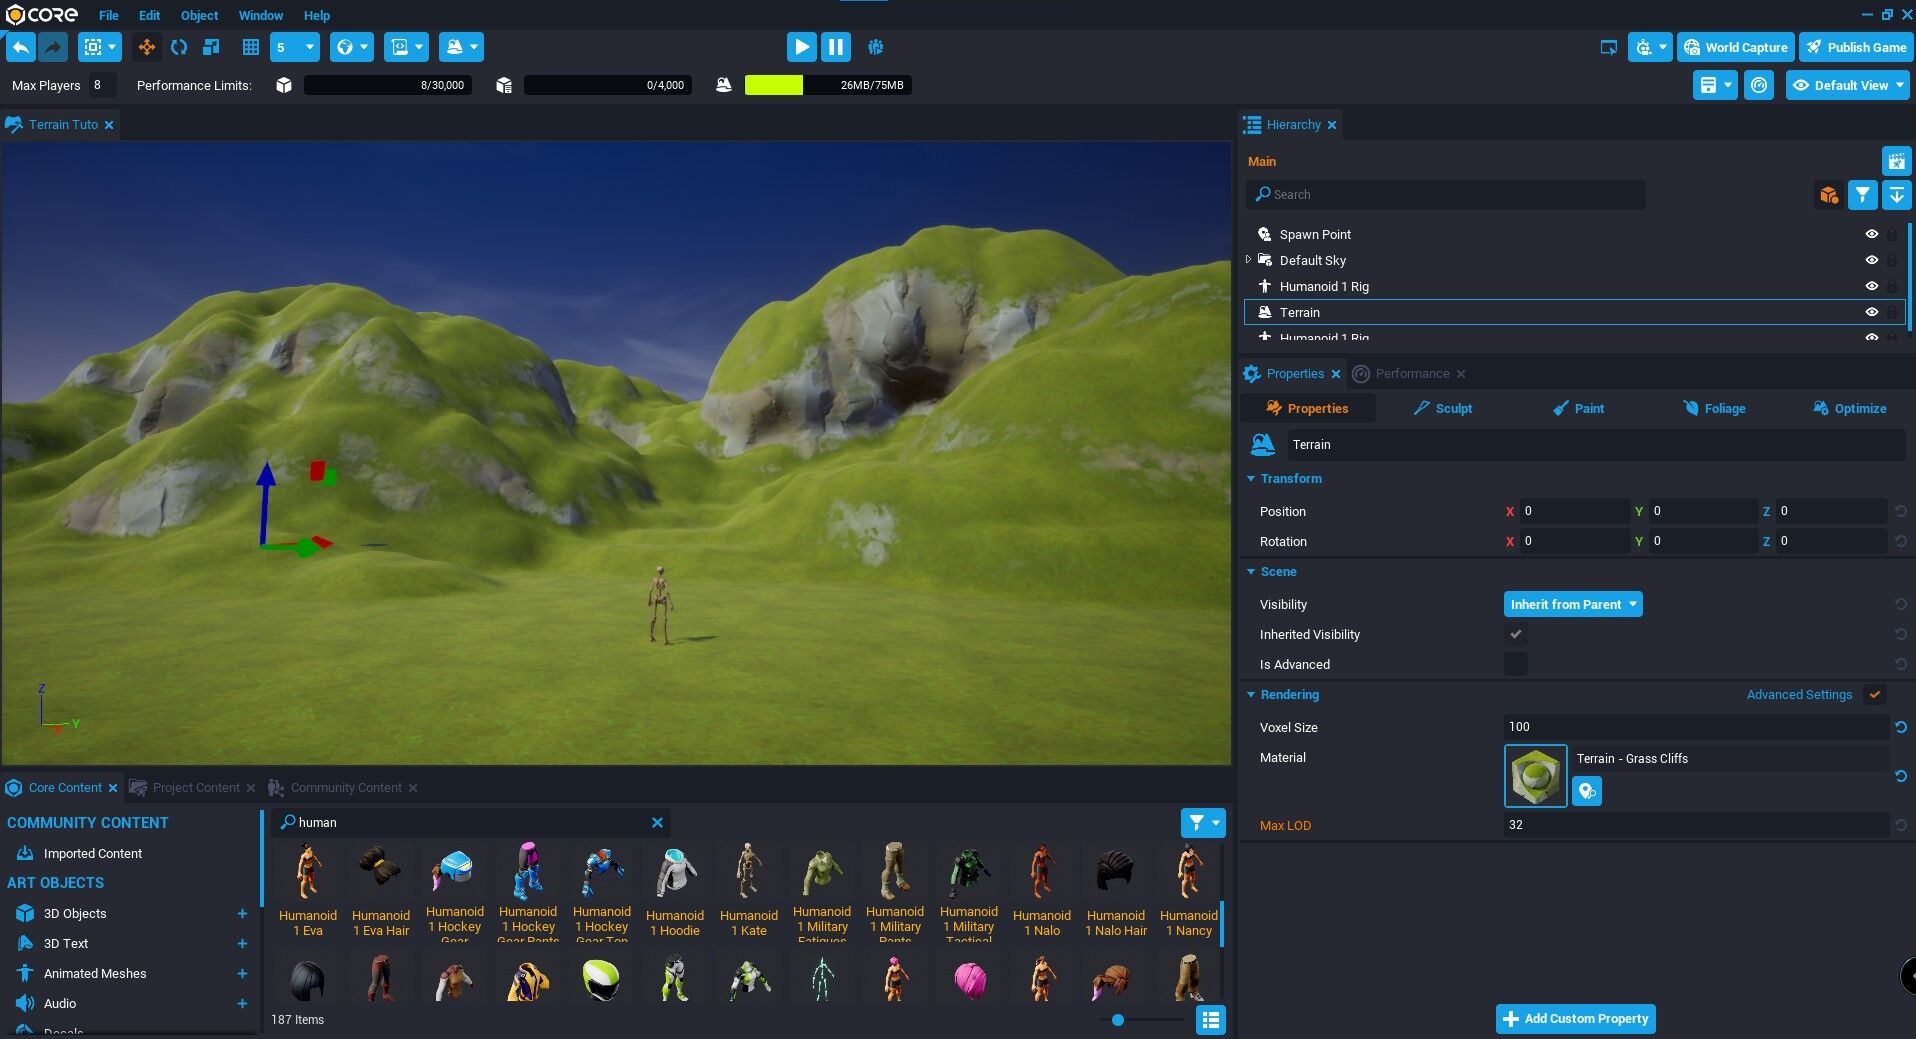
Let’s add a material. In the Core Content tab, search for terrain . Some premade materials are available. Select Terrain – Grass Cliffs and drag it to the Material field under Properties>Properties tab. Once done, you see that the material applies to all landscape. We go deep into that later.
SCULPT TAB:
That are the tools to make our terrain look like a grassland, a mountain or the base for a city. That tab doesn’t have Advanced Settings but have a field you can tik to use a mask combined with the tool you are using. All the settings in this tab should be used with very low strength. By default, they can be tricky to use if you are not familiar with these tools.
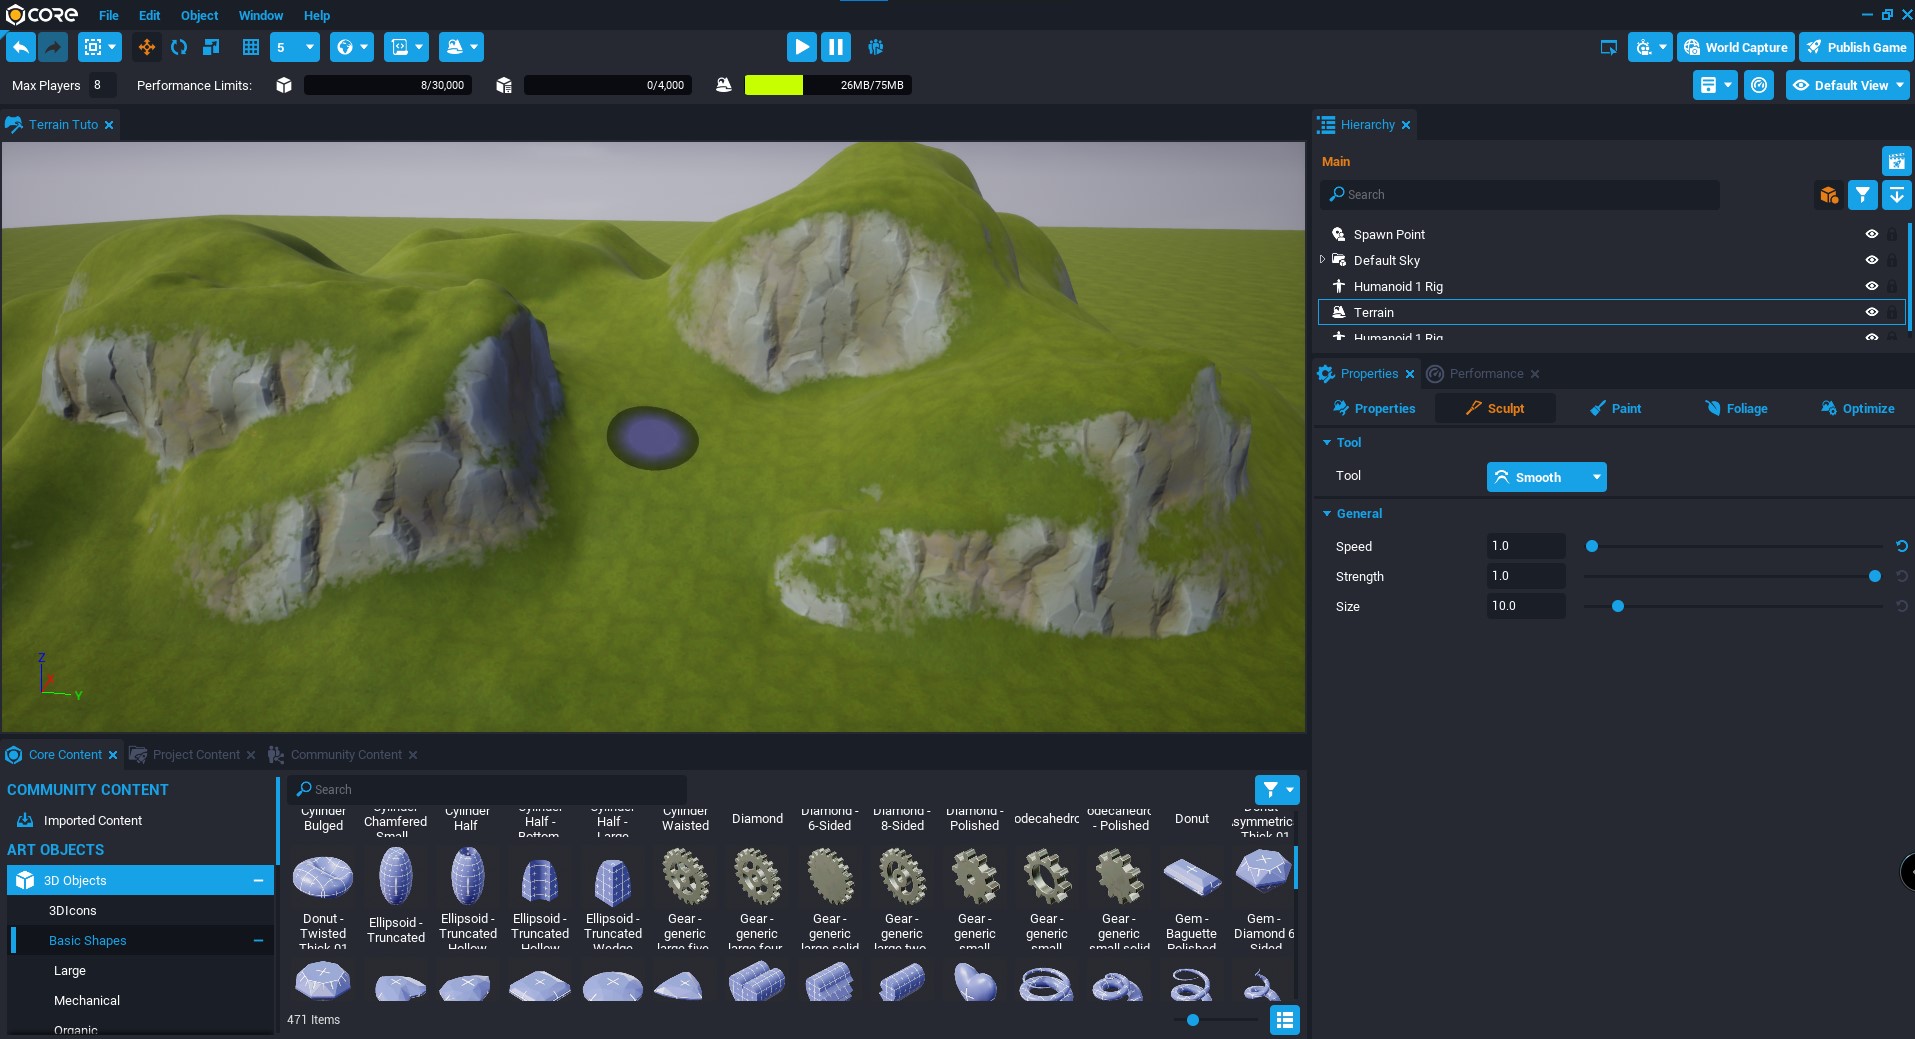
At the Tool section we can select the tool we need. All except Smooth have 2 positions: Up or down. Let’s select Surface with the arrow in position up, and a strength of 0.2 with the rest of the settings as they come. Now let’s brush something on the landscape.

As we can see, even a very small amount of strength on the pencil, sculpts fast the terrain. What we get is far from something we can consider cool but with the tools, that sponge cake can turn into something special. We go thought the tools until we have a small mountain.
Now let’s tweak a bit our pencil. With the same tool selected and the same strength, change the size of the pencil to 30 and the falloff to 0.3. We leave the type as Smooth by now. Now sculpt a bit more up the sponge cake until you have enough to start to make a mountain. See the image below for reference.
Now with the Smooth tool set up at speed of 1, strength of 0.2 and size of 100 we go through our sponge cake to smooth a bit.

Now, specially the edges, slim down a bit. Click on the Sculpt tool, scroll down to Shape and go to the Core Content window to select other object instead of the ball. I select Clay Form 04 to create some cliffs. Drag it and leave the rest of the settings by default but remember to use a small amount of strength.
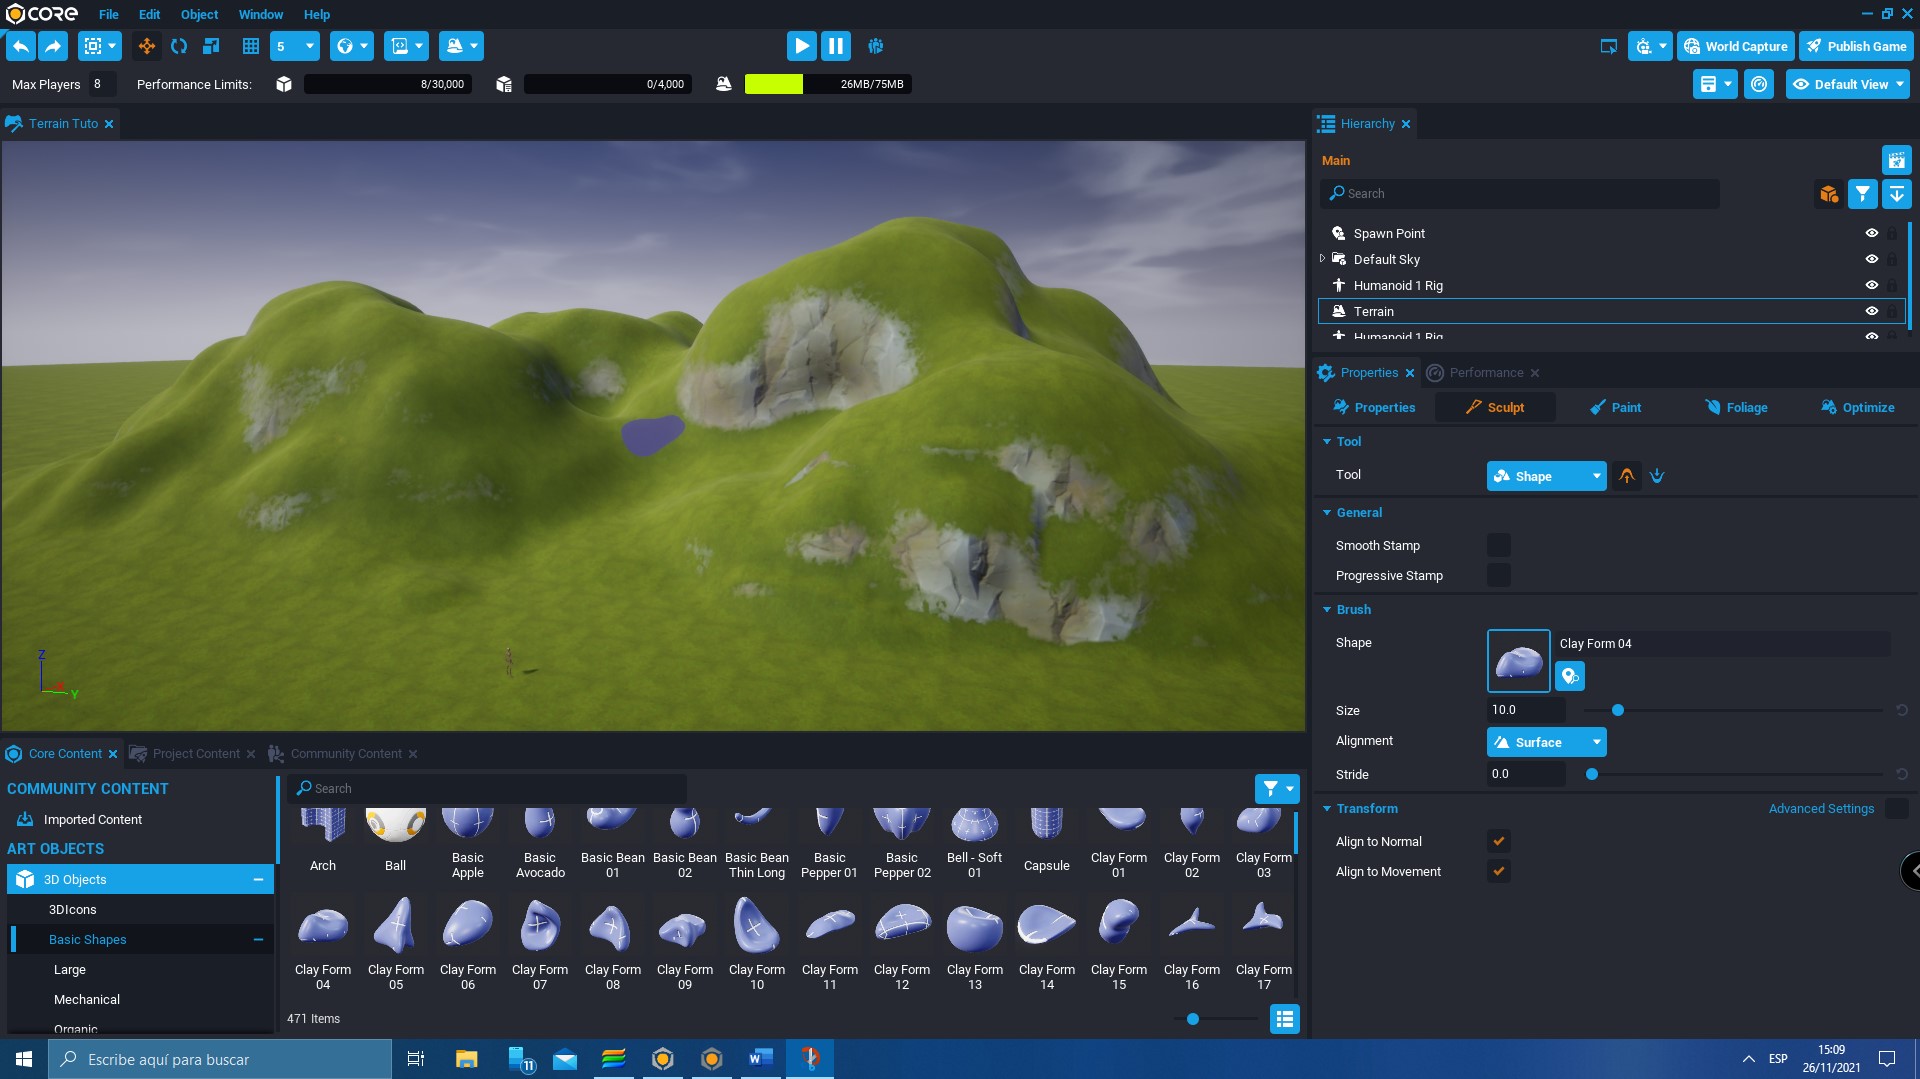
Now let’s make some cliffs. To do this, start painting a top of actual cliffs and expand it alongside.
That stills looking like a sponge cake but we can appreciate some light shapes. Now select the tool Smooth and set to 1 - 1 - 10 (1 for Speed, 1 for Strength and 10 for the Size). With those settings, now you can draw horizontally or vertically over the cliffs until you get something you like. I do mine that way and yours should look similar to this:

Now we go to use the Shape tool with 10 in size, a falloff of 0.5 and a roughness of 0.0 to draw a small path as show in the next pic:
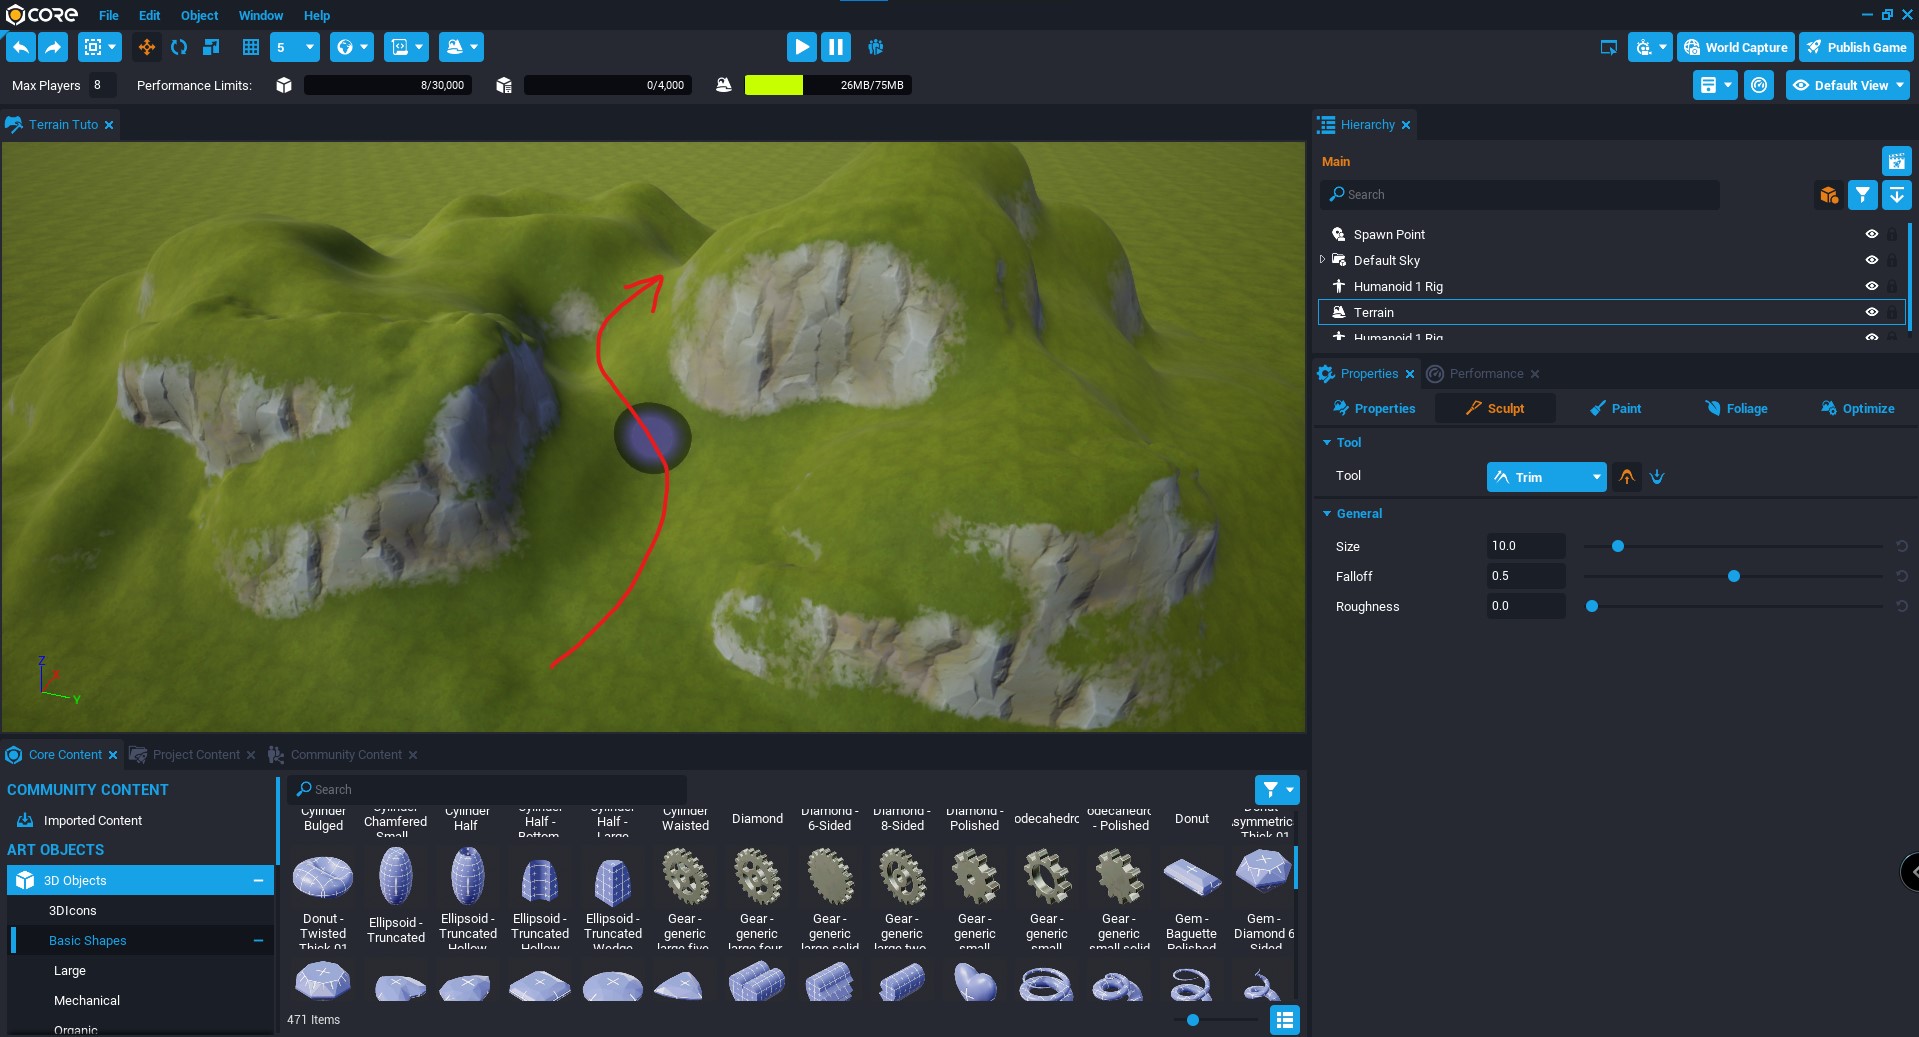
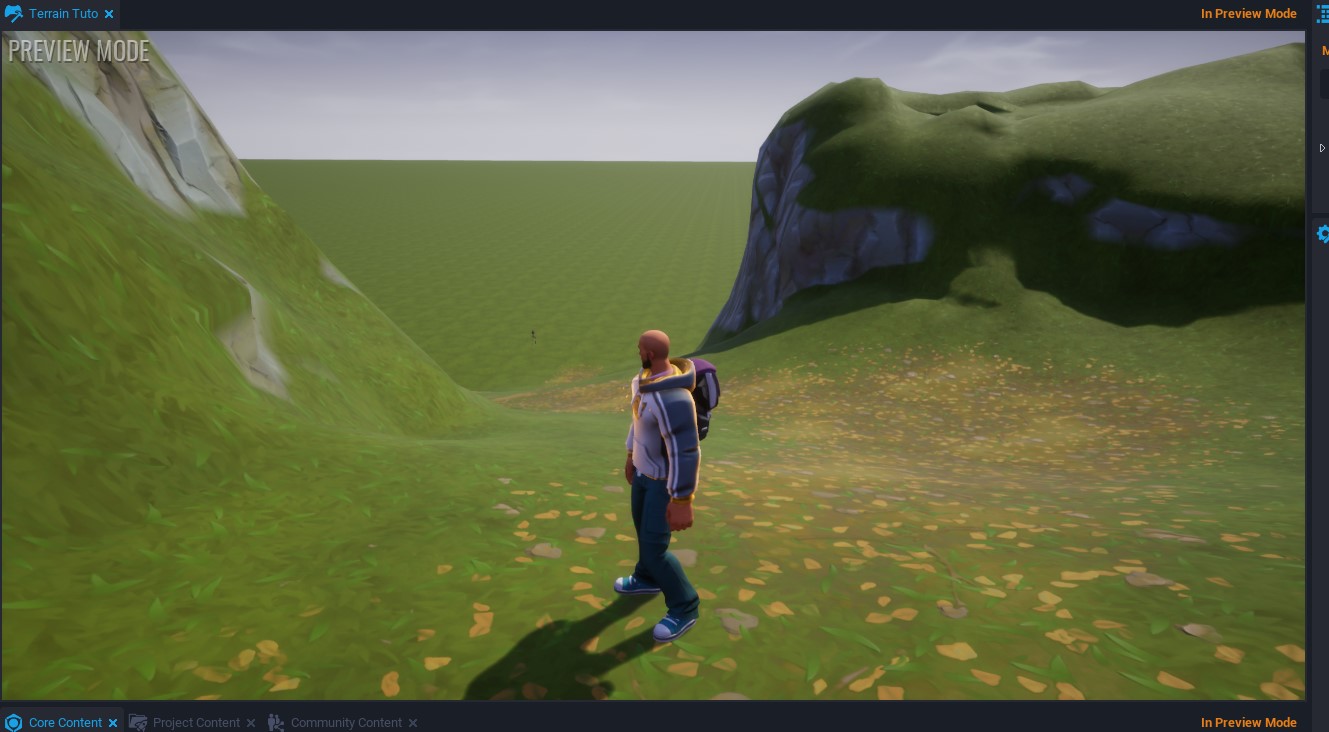
We start painting from down to up following the arrow. You should get something similar to this, that’s a walkable path for players.
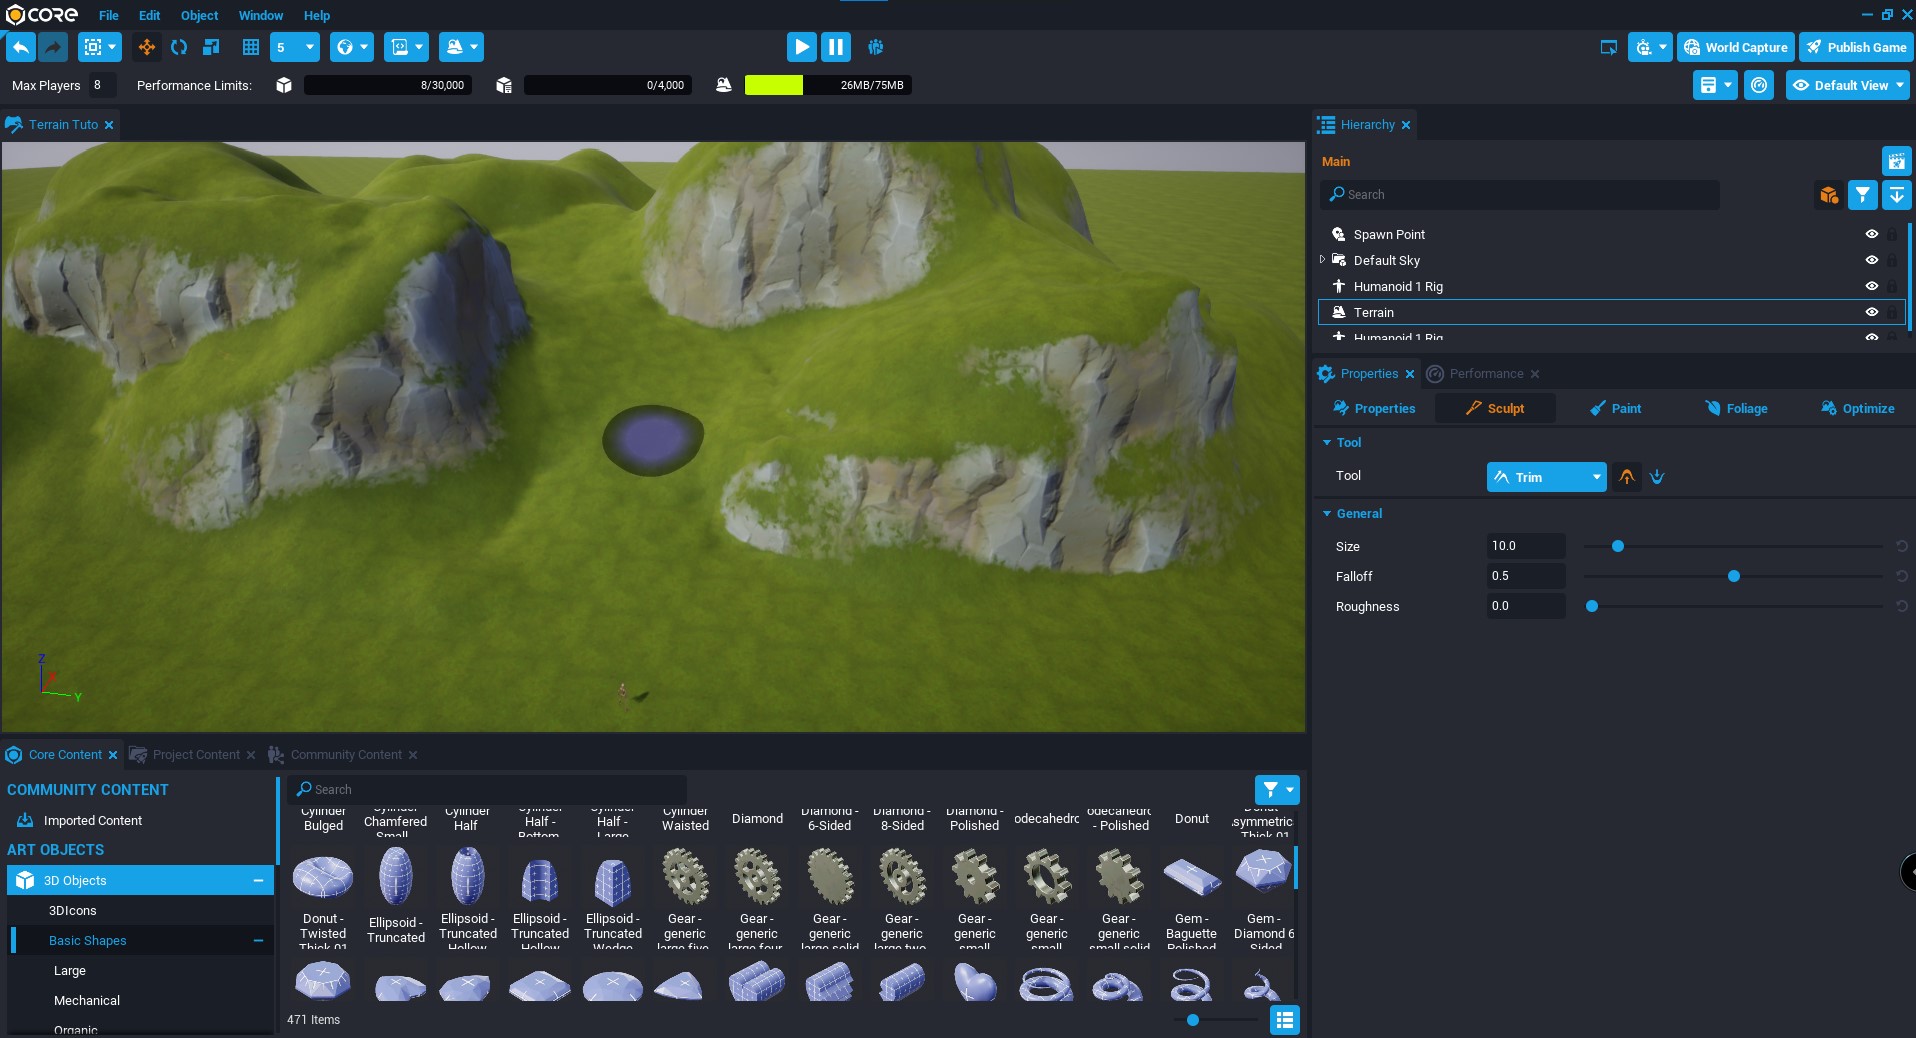
Now, with a bit of use of the Smooth tool we have a path for a players between those big rocks. Leave the settings at 1 - 1 - 10.
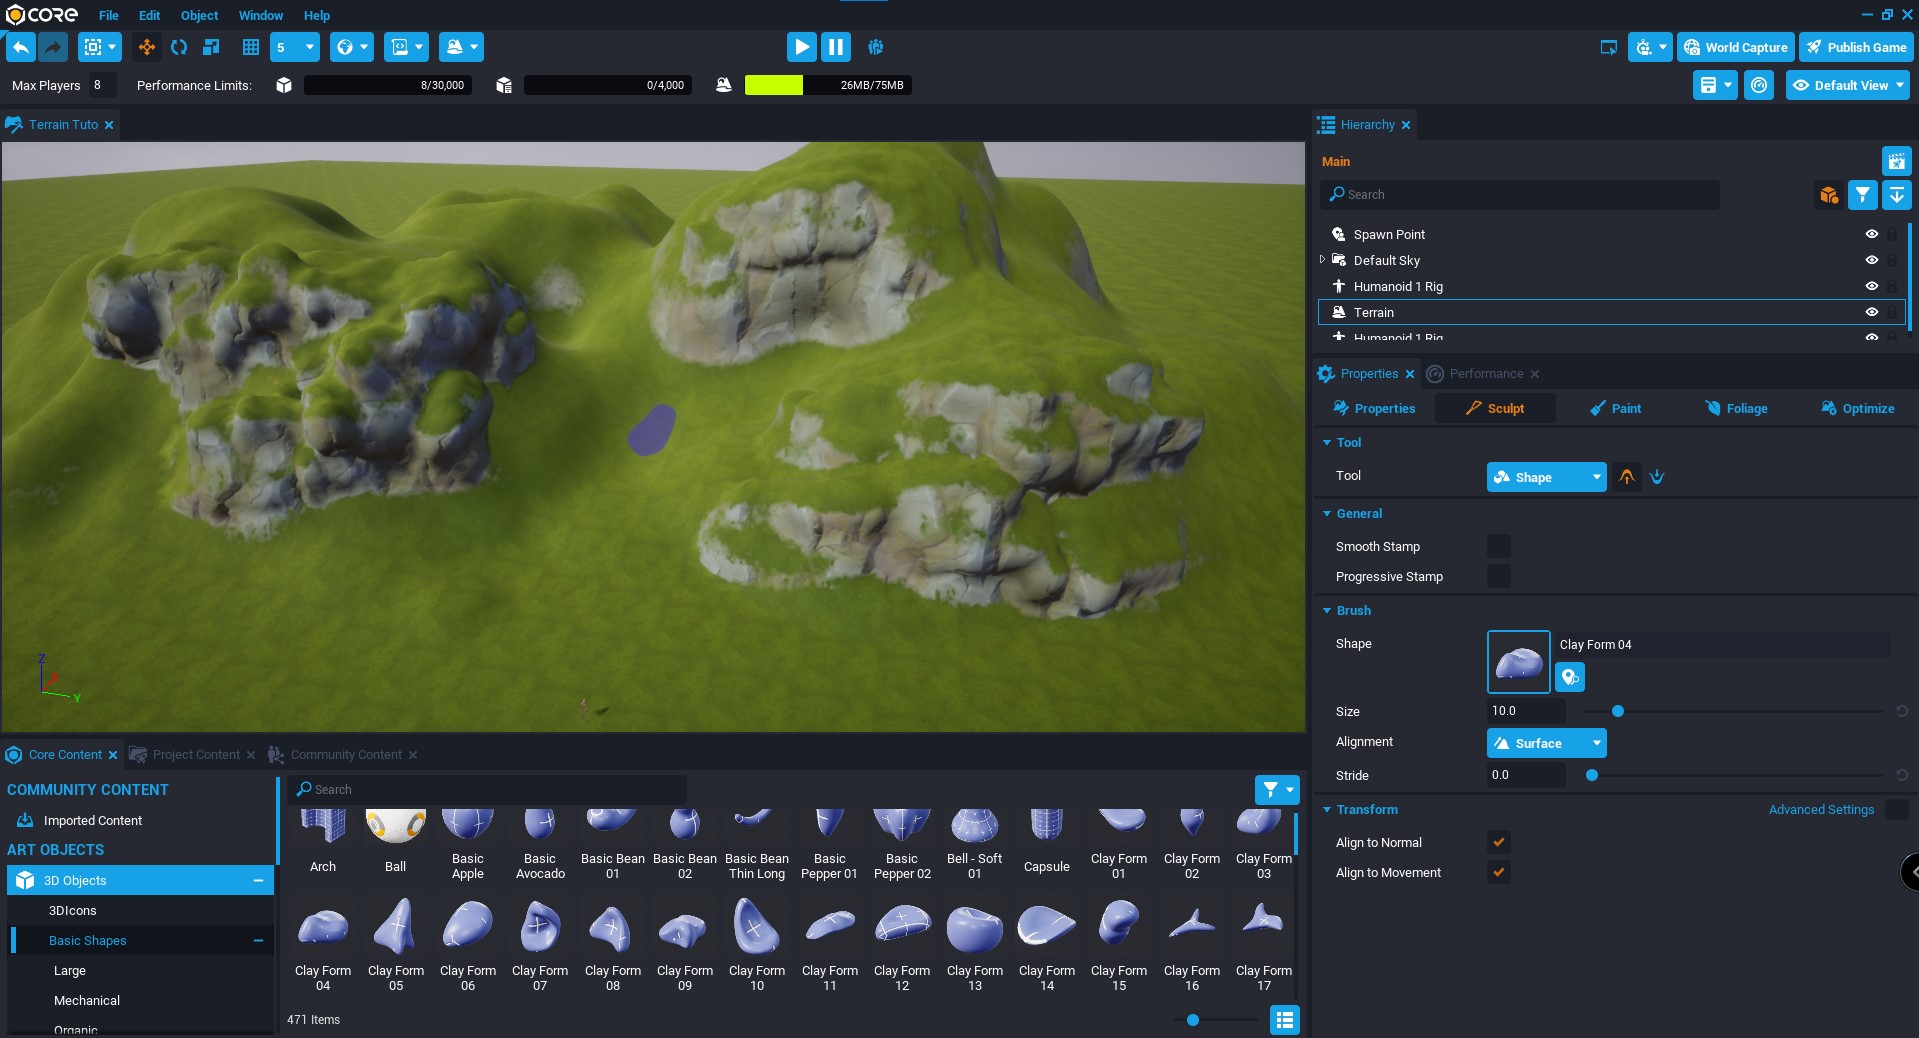
Now is kind of recognizable shape but can be more accurate adding some hardness to the still sponge cake. Select again the Shape tool but in the Core Content search for Star - Faceted 6-Pointed and drag it to the shape field. With the same settings as before, you can add some hardness like the next pic:
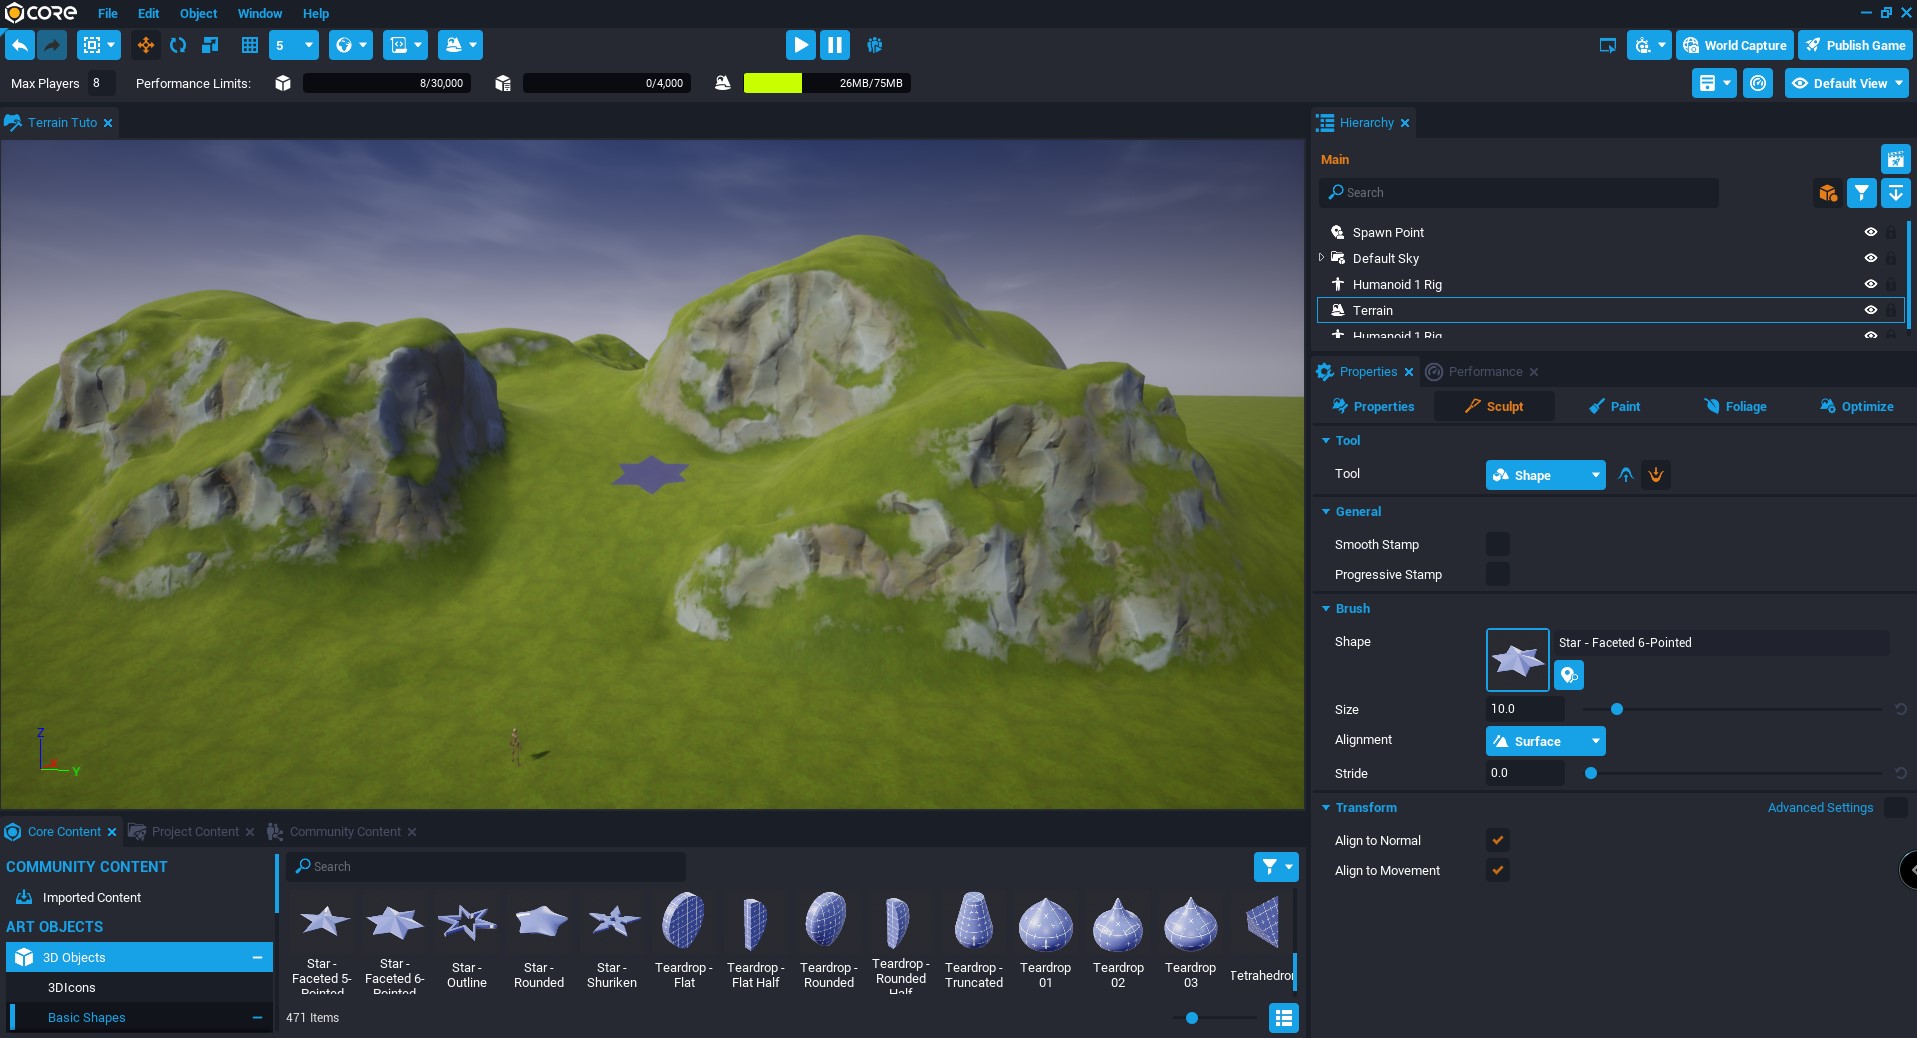
Now it looks more natural. That can be the base for the next, paint the terrain but first we go to look at materials.
MATERIALS
Materials in Core are composed by 4 materials with 2 layers on each of those 4 materials. That let us paint our terrain in many ways with amazing combinations. Since each material have 2 layers, 1 can be applied to paint i.e.: grass and the second can be used to pain i.e.: rocks. That way, when you paint using that material as soon as the landscape gets “X” inclination, the next layer starts to paint. Let’s modify the default material.
• Click on Material
NOTE: Since is a default terrain material, what we can see are blank or unknow material. We can change that by doble click on Material Base and a Material Picker pops up allowing us to assign a material.
• Double click on Material Base
• Select a material in the Material Picker window
• Double click on Material Side
• Select a material in the Material Picker window
• The next 3 options we leave as they comes
• Repeat those steps for the next 3 materials
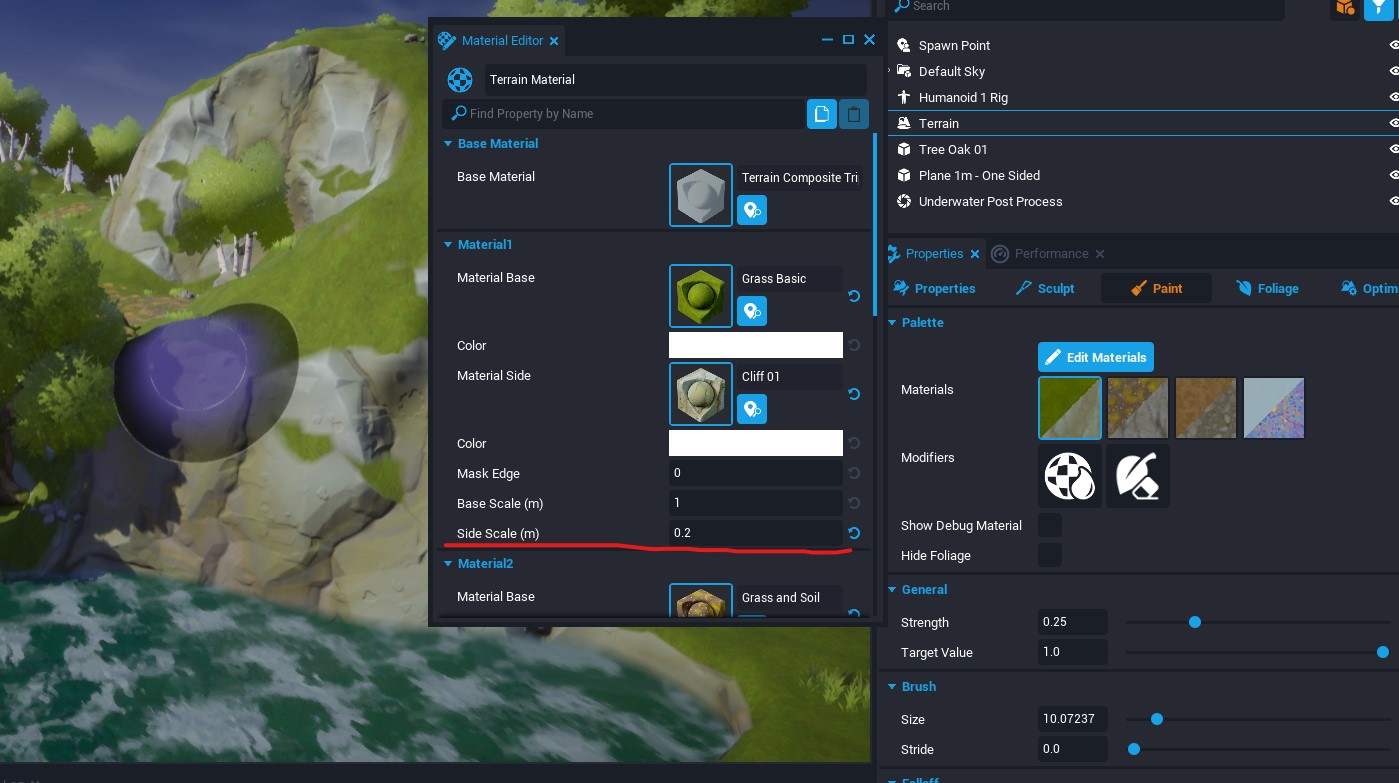
Once we have done that, we have other tools to tweak at our disposal. Let’s change the rock visual of the landscape walls to something more accurate. By default, should look similar to this:
Click on Edit Material and set the size of the Side to 0.2 as show in the pic:
PAINT TAB:
Let’s go to the paint tab. As you can see, the first time we assign a material to our terrain it says “The terrain material is not paintable!” and just down a button to Create new terrain material. Click on it and all settings of the actual material appears in this tab. We have our material ready so we can jump into paint.
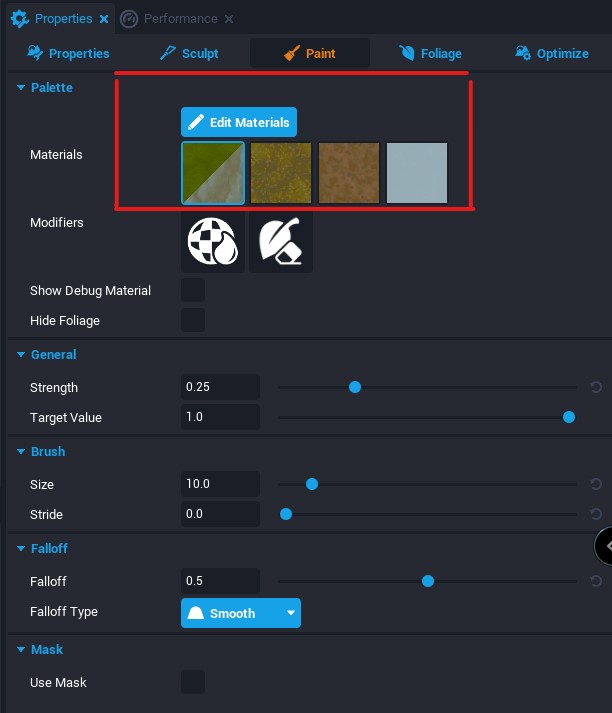
By now, select the next right to the one we are using. We go to paint a path. Set the Strength to 0.2 and the Target Value at 0.5. Size 10 with 0.0 Stride and a Falloff of 0.5. Falloff Type: Smooth and leave unticked the last setting: Mask. Paint a path in the way the arrow shows us and we sculpt. Should look that way:
Let’s explain those settings:
-Strength: As usual, a very low amount should work fine for most of the task.
-Target Value: That is how the editor mix the materials. Close to 0 the amount of paint is very small. 0.5 is the middle value and 1 is a full paint as soon as you draw with the pencil.
-Size: Self explanatory
-Stride: Normally, leave to 0 to get instant representation of what you paint. If you increase that value, the pencil starts to paint on intervals where 1 is to paint points on the landscape since once you start to draw, the pencil stops until you are out of the last paint till you can paint again.
-Falloff and falloff type are self-explanatory. We can play with different shapes if is needed.
-Mask: We can also use a mask and scale it for the paint. That’s useful to paint big areas and not fall on repetition or paths that looks like repeated on the terrain.
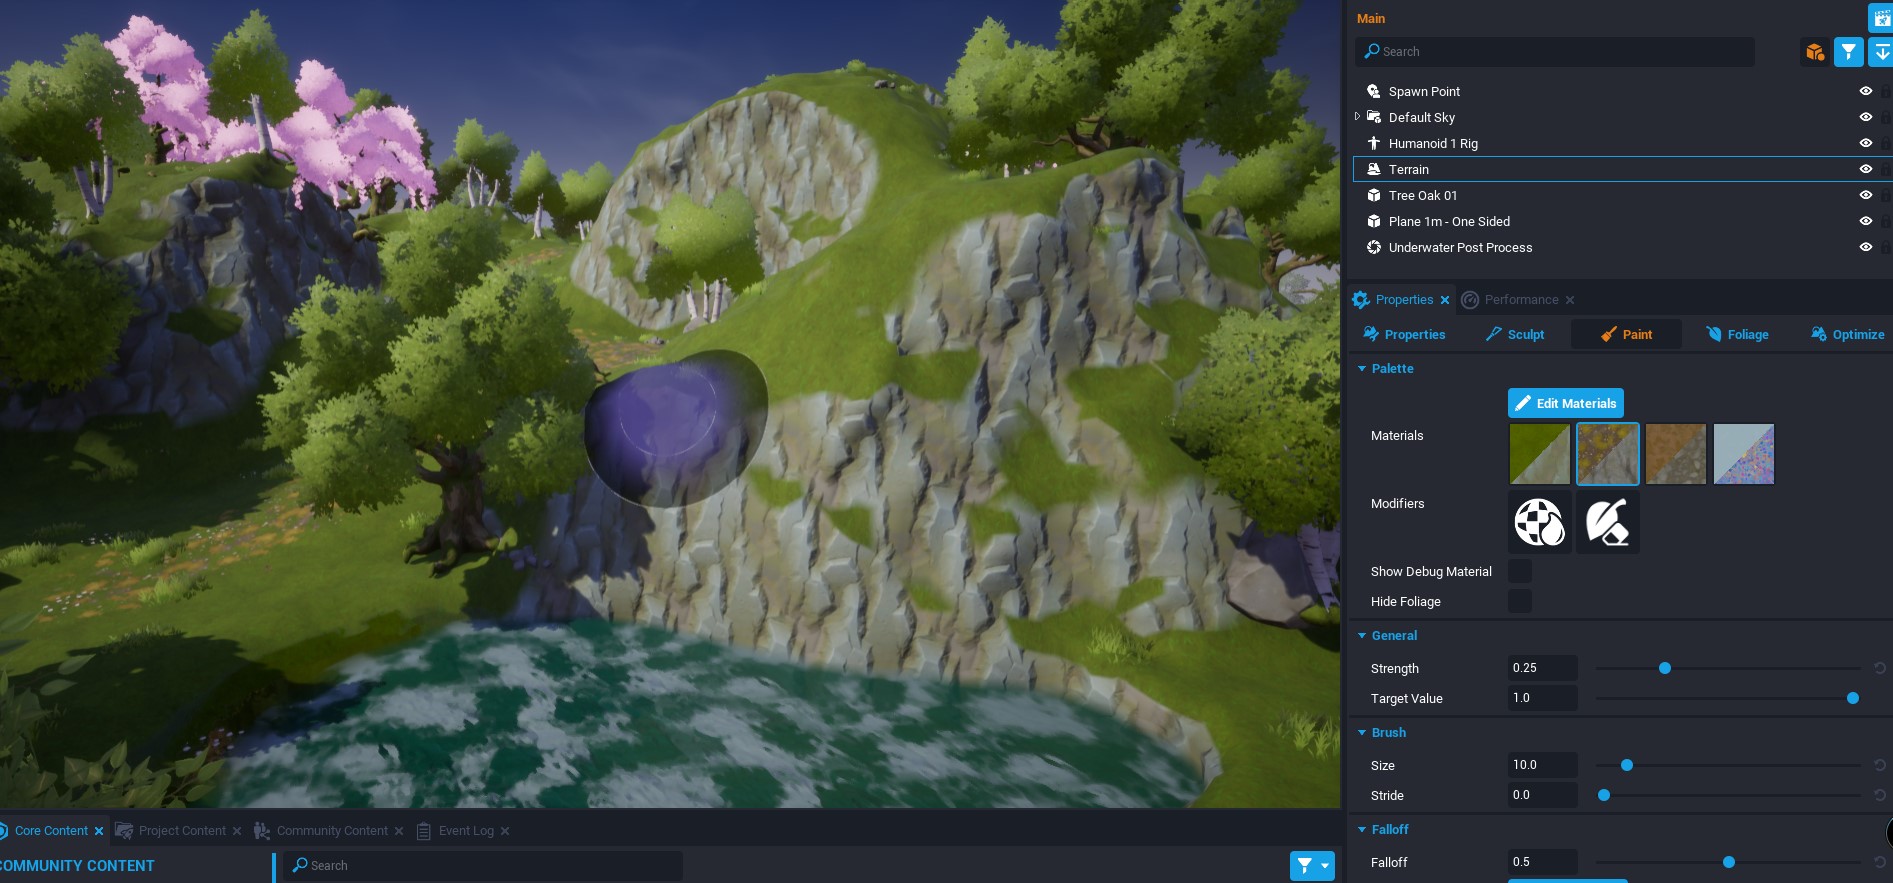
But there’s even more. Under Palette section we can see 2 modifiers and 2 options. The first modifier adds humidity to the paints. In case you need for a river or a beach on the areas that need it. The second modifier is to delete unneeded foliage. The last 2 options of that tab are Show Debug Material, to see where you painted and Hide Foliage for the occasions you have foliage but needs to paint the landscape.
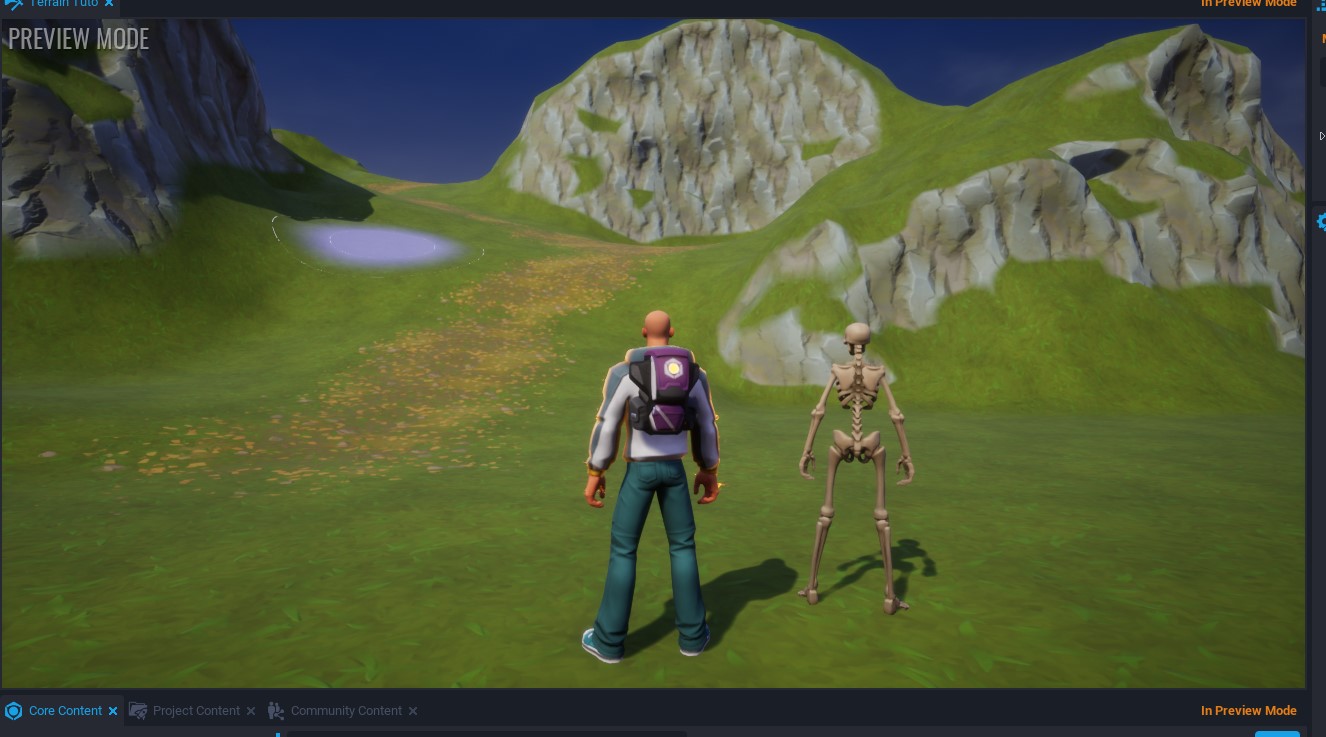
clicking on both we can see where we apply each paint:

Now why not test what we have done? Place the player start above ground if you not set up before and try it. Mine looks good! Yours should looks too!
FOLIAGE TAB:
Now that we know how to make and sculpt a Landscape/Terrain is time to add some foliage! Go to the Foliage tab. As we can see, the 4 materials are empty. That means no foliage is associated to any layer of the paints we have available. Let’s add some and see how they work.
NOTE: The foliage you add is placed on the material you have selected on the Paint tab.
Click on Add Foliage and the Static Mesh Picker pops up. Type Tree and scroll down to see the trees we have available.

As soon as you click on any tree, they are added to all the landscape. The more you add the more the editor needs resources. Your pc can be laggy until you tweak the next settings.
Under the General you can find the tools you need to tweak the amount, size and distance the trees you added should have.
- Material Channel: The material you are using for the foliage.
- Distance Between Instances: The distance between each tree (in that case) of the same type.
- Enable Collision: By default, is turned off.
- Spawn Distance: The distance the trees should spawn.
Down those settings the Material for the leaves, flowers and trunks are available in case you want to change it.
OBJECT GENERATOR
The object generator allows us to add trees, rocks, etc. to our landscape with many different settings to get a natural looking instead of a pre-made-in-some-way looking. Let's take a look how to generate and spawn in the map.
- Click on Window in the upper toolbar and search for Object Generator.
- At the window that pops up, tick or untick your settings.
- Click on Populate and close the window.
- Click on the mesh you selected and Shift+X to spawn with those settings. In that example, different sizes and colors for the kelp bush.

The Spawn Settings allows us to change many things like scale, slope, alignment, random yaw… just playing with these settings give us at the end a better natural look.
·Ground Slope Angle: That allows to spawn the trees (in that case) with a max angle of 90º.
·Scaling: There’s 3 types, usually Uniform works fine unless you specifically need it Free or Look X Y that are the other 2 options. They are self-explanatory.
·Scale: Let you scale each tree in random scales between the min and the max values.
·Rotation Alignment: The rotation the trees should follow when random placed. To Terrain Up should be common but we also have 2 more options: Align to Surface and Random align. Also, self-explanatory.
·Random Yaw: That rotate each tree in the Z axis. Should be ticked normally.
·Random Pitch Angle: A setting that allows to apply some variation in degrees from the Z axis.
·Height: The space the foliage will spawn relative to the Terrain.
·Height Falloff: How much density will be before go to 0.
·Local Z Offset: To adjust how much your foliage fits into the terrain.
·World Z Offset: To adjust how much your foliage goes up the terrain.
Last is the Instance Properties. Basically 2. Cull distance that is how far should the engine render the foliage and if the assets should Cast Shadows that usually no to avoid high demanding of resources of the pc.
Now we have some trees!
Now we can repeat the foliage steps to add flowers, grass, rocks, whatever you want to be in the world in that way. Also, you can add your own assets in the areas you need it like more trees of X type to an area where you can’t do due your settings for the landscape foliage.
Spawning Individual Objects
You can also spawn individual objects using the Object Generator's settings by placing your cursor in the scene and pressing Shift+X with an object selected in the Core Content tab. The object will spawn under your cursor. This allows you finer control over an object's placement without having to worry about randomizing its rotation, scale, or color.
LAKES RIVERS & OCEAN
Other things related to landscapes are the rivers, the lakes and the oceans. In any natural environment you can see that and in games are playable areas like any other. They can contain structures, animals, plants…
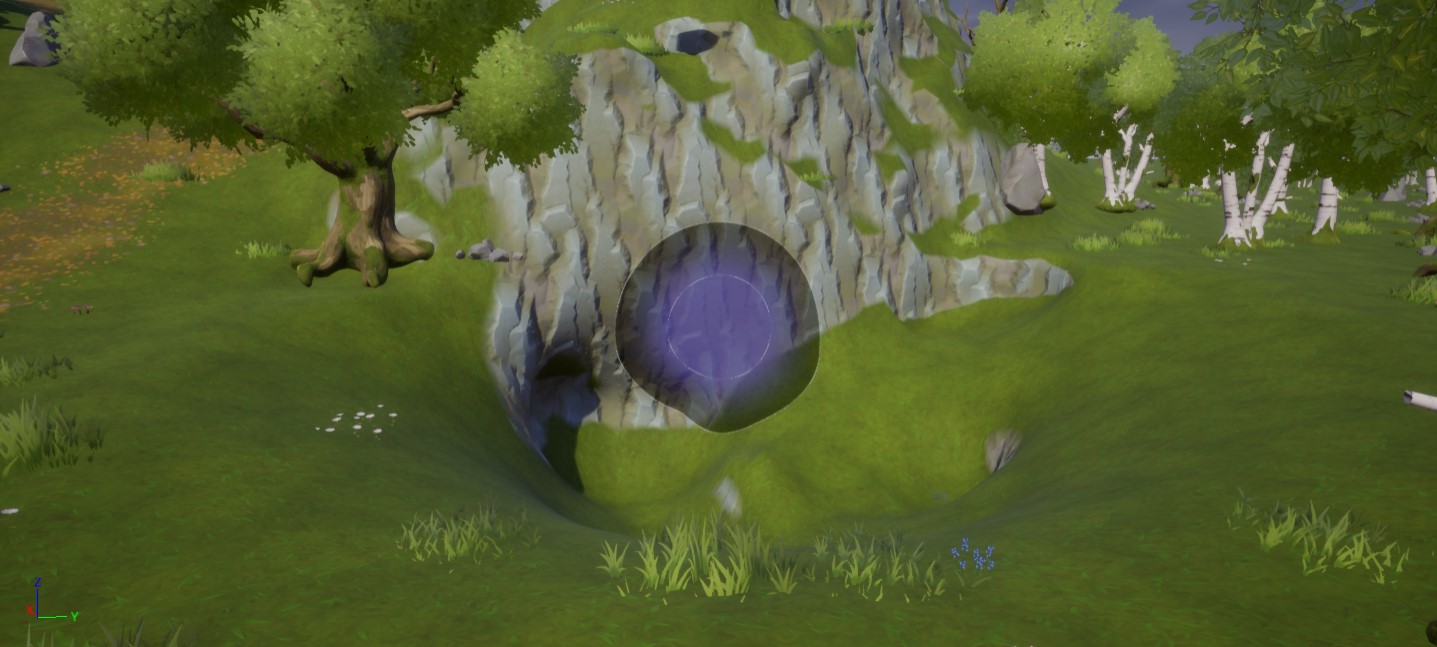
Let’s go make a small lake. To do this, we need to lower the terrain in an area to fit a volume that let us define our water space.
1 – Select the sculpting tool. Under Tools select Surface with the arrow down. A strength of 0.2. The rest of the values can be the default ones (10,0,0.5 and smooth)
2 – Paint on an area to lower a bit the landscape.
3 – Smooth the area.
4 – Delete unneeded foliage in the area you go to use as the lake with the modifier.
The result should look like a clean area with irregular ground. Perfect to fit a lake.
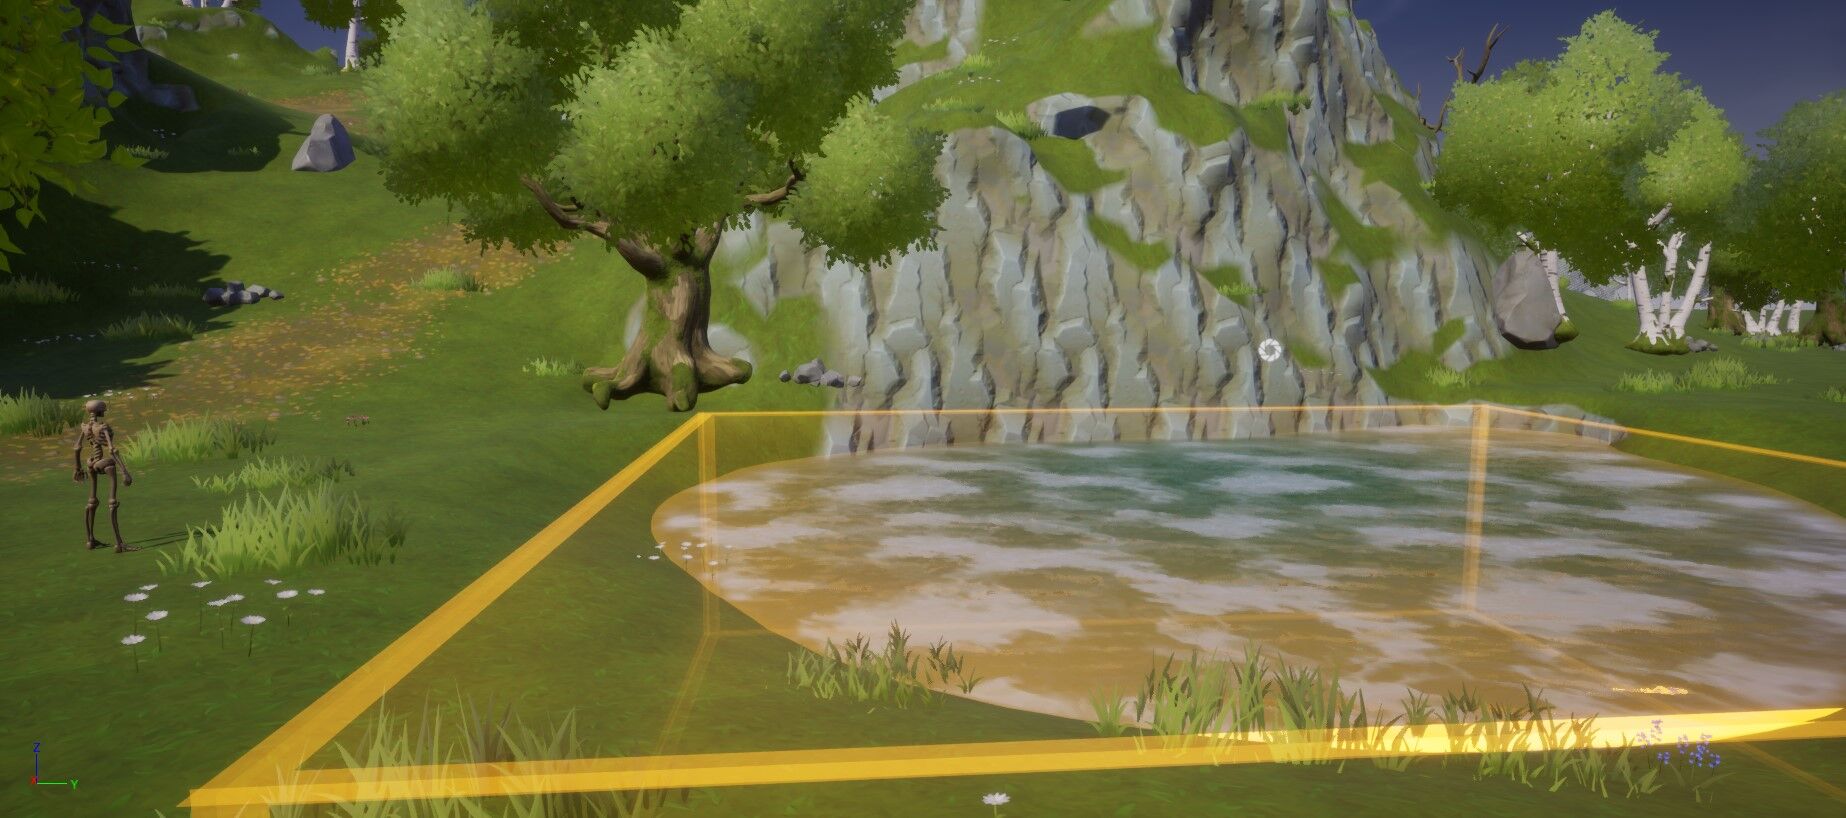
5 – Search for a plane – 1m 1 side in the Content Browser and drag it to your scene. Scale it and fit in the hole. That go to be our water plane. The surface we see in the game. Select to Force OFF the Game Collision and the Camera Collision.
6 – Select a water material and link it to the plane just drag it into the plane.
7 – Search for Underwater Post Process. That is our swimmable volume. Drag it to the scene and cover the area.
8 - At the Paint Tab select the first modifier to add wetness to the lake. Paint around the shore line and you get a more natural look. You can use the second modifier to delete the foliage in the lake or in any other area needed.
9 - Not related to landscape but worth to mention that lakes, rivers, woods... all can have their sounds and effects that we need to take into account.
Ready! Now we have a swimmable lake that we can connect to a river, waterfalls and ocean in the same way (Waterfalls are just visual but can be swimmable too)
OPTIMIZE TAB
Last, we have the Optimize tab with some tools to gain a bit of performance and maintain our game under correct values.
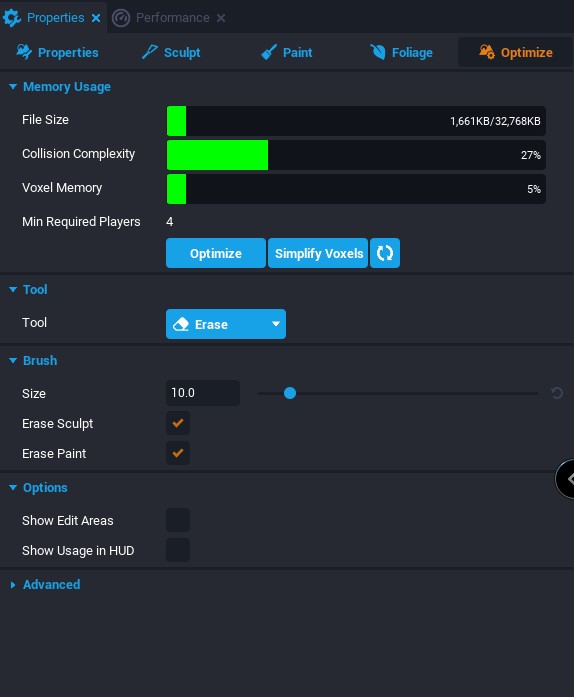
The first section of the Optimize tab are the Memory Usage. That shows us the amount of complexity and memory the landscape is using. Just down we have 3 buttons. The first is to optimize the collision complexity of the terrain. As we can see in this example, our File size and Collision Complexity are very low and the color is a light green. When that bar turns into yellow, orange or worst; red we urgently need to optimize it. To do so just click on the Optimize button and wait till the engine do the job. After done, your bar should recover a light green color that is valid for a fluid gameplay.
The second button is the same but for the Voxel plugin Memory. The more you sculpt your area, more memory is needed for the Voxel plugin. We can optimize that by clicking on the Simplify Voxels button.
The third button Is to update the data just in case you modify some minus things and you want to know if that affects your values.
There’s a Minimum Required Players section that tell us this is for a minimum of 4 players (and max of 8 setups in the editor up left). The more players and big the terrain, the more care we need to take about our primary landscape.
Down that section we have the Tool section. In that case is just to delete things so only Erase is available. That is in the case we end with a very high usage of the other parameters and our bars stills not looking good (dark yellow-orange). With that tool is recommended to delete any area of the map that is not used in both the terrain and the paint. The Next section, Brush, is related to the Tool.
NOTE: After we optimize with the tools provided, is recommended to check our playable areas. We can find that the landscape shape or the paint has been modified and we need to apply some smooth or fix some paints.
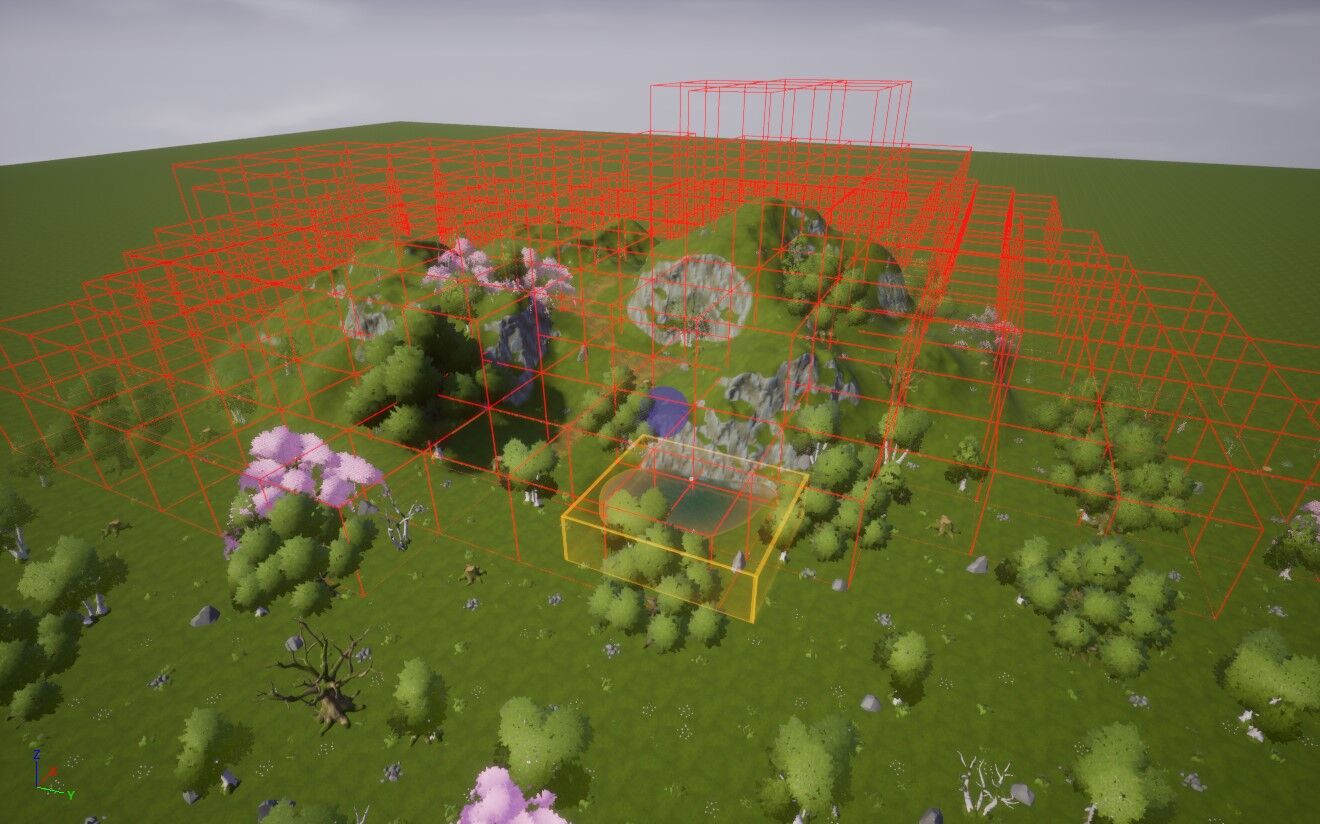
Down the Brush tool, the Options section comes. Clicking on Show Edit Areas we can see the areas we have worked.
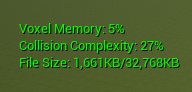
Clicking on Show Usage in HUD let us know at any moment the number of voxels and memory that are in use.
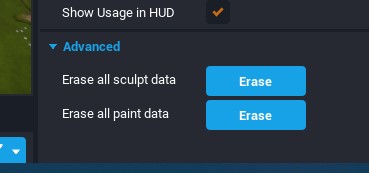
And last the Advanced section contains 2 options in case what you done is not close to what you want, let you erase any sculpt or paint in a click.
TIPS & TRICKS
Sculpt a landscape can be tricky at first like any other tool but once you spend some times is a relaxing exercise that let you get the exact shape you need.
- Start with small terrains and create different scenes. From a small lake to a canyon in mountains.
- Always use very low strength on the tools.
- Remember to optimize when your landscape is getting resources.
- Only the PRIMARY terrain can have collision.
- The foliage used in the terrain should not have collision enabled.
- The small foliage should not have shadows enabled.
DOWNLOAD
That tutorial can be downloaded to take a close view and play around with the tools in the next link: