Binding Sets - Everything you need to know
Welcome to this tutorial on Binding Sets!
In this tutorial, you will learn:
- What are Binding Sets and how to set them up
- How to define bindings
- What are the different types of bindings
- How to handle player input, with script examples
An editable Core project was published under the name “Binding Sets Tutorial”. You can find it in Core by browsing to the Community Projects tab in the Create section. It includes all the scripts and assets shown in this tutorial.
Let's begin!
Introduction to Binding Sets
What are Binding Sets?
Binding Sets are a way for creators to set and customize key bindings used in a game. For example, with the use of Binding Sets, you can specify what happens when a player presses the Spacebar key on their keyboard.
One of the main advantage of this system is that it allows players to customize those bindings, without altering the behavior of your game. If for any reason they want to change the key set to a binding, they can easily do it in the game options menu!
Access the Bindings Manager window
To edit binding sets, first step is to access the Bindings Manager window.
To do so, two solutions exist:
- In the top bar menu, navigate to Window > Binding Managers
- In your game hierarchy, find a Binding Set object. Click on it, and in its properties, you will find a button to edit the bindings. Click on it to open the Bindings Manager window.
Each newly created project will contain a Default Bindings object, found under the Gameplay Settings folder in the hierarchy.
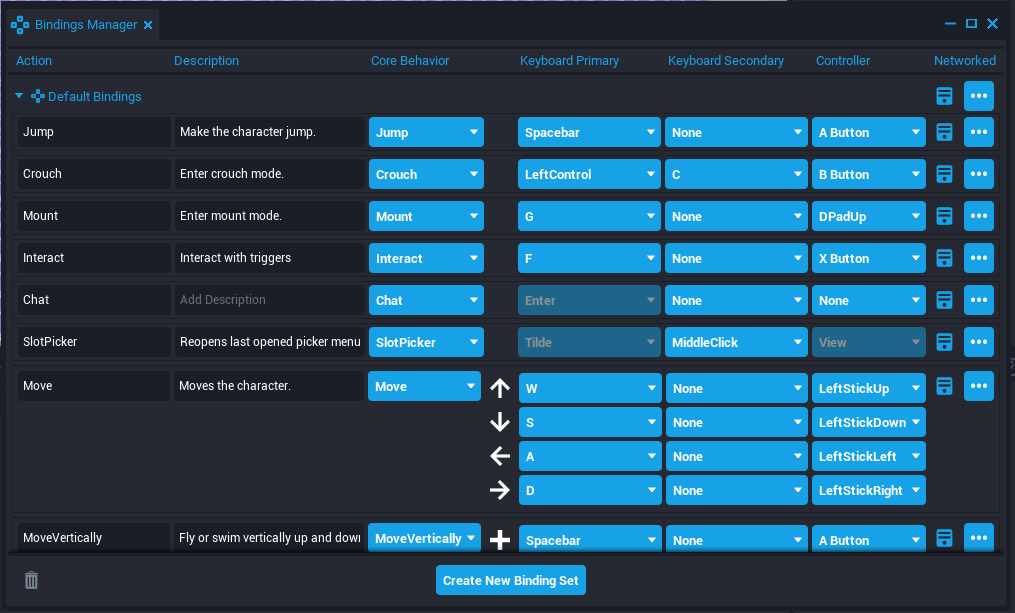
This is what the Bindings Manager window looks like. It may look a bit overwhelming to you for now, but don't worry, we'll cover everything it can do in this tutorial!
Create a Binding Set
Once you have access the Bindings Manager Window, click on "Create New Binding Set"' and choose a name for your new Binding Set. Press Create and you're done!
If you want your new Binding Set to have an effect on the game, don't forget to set it as a parameter of a Binding Set object in the hierarchy of your game. (See Use a Binding Set below)
Delete a Binding Set
To delete a Binding Set, click on the three dots button at the end of the line of the Binding Set you want to delete, and click on "Delete Binding Set"'. Click confirm.
Deleted Binding Sets go to the trash for the time of the current session.
If you deleted a binding set by mistake, you can still restore it. (See Restore a Binding Set below)
Restore a Binding Set
When you delete a Binding Set, the set is not totally deleted at first. The set will be placed in the trash and will stay here until you close the editor.
If you need to restore a Binding Set you deleted, click on the trash icon at the bottom left corner of the Bindings Manager window. The icon will turn orange and you should see your deleted Binding Set appear. Click on the "Restore" button next to it to undelete it.
Use a Binding Set
Once your new Binding Set is created, you need one last step for the game to take this set into account.
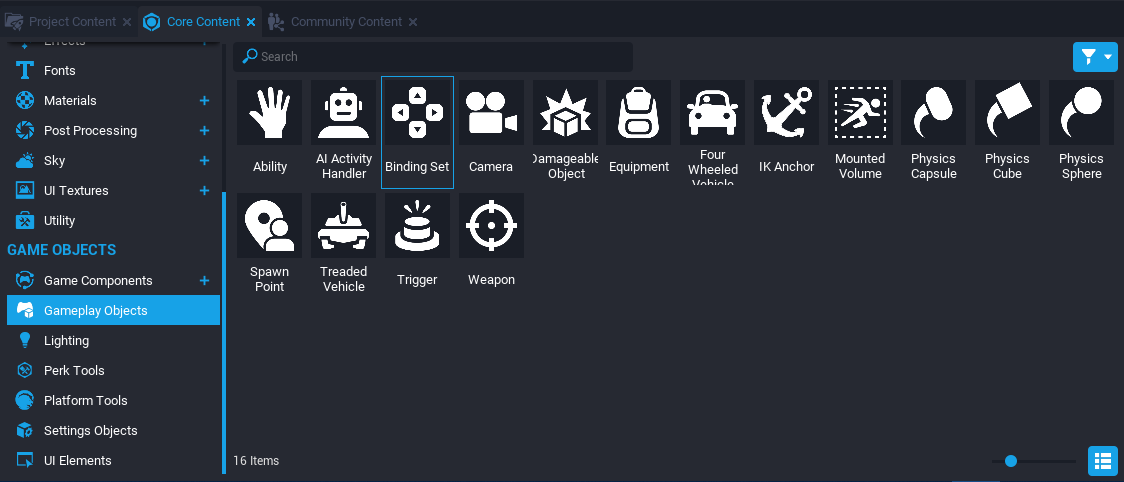
Add a Binding Set object to your scene. You will find it in Core Content > Game Objects > Binding Set.
By default, a newly created project contains a Binding Set object named "Default Bindings", linked to the "Default Bindings" Binding Set. Feel free to use it or delete this object and add another Binding Set object to your scene.
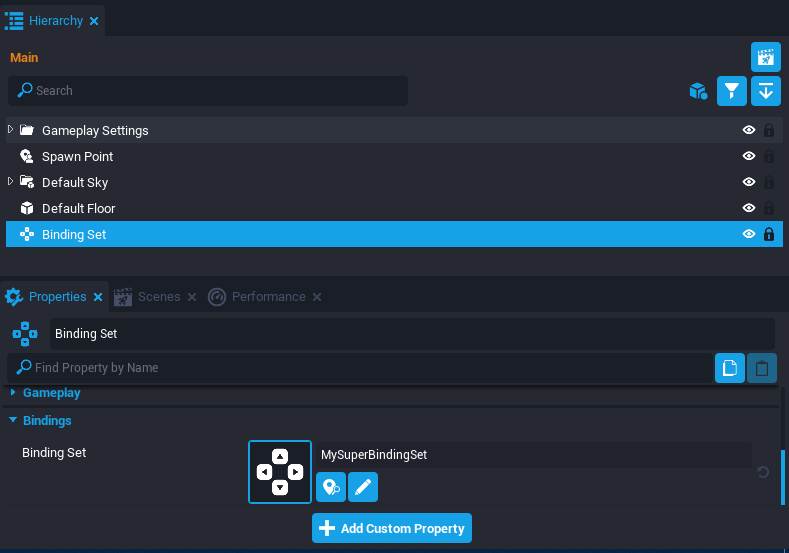
Next, click on the object in the Hierarchy panel and take a look at its properties. You'll find a property named "Binding Set". Click on the Binding Set icon to open the list of available Binding Sets to use.
Choose the one you want to use and click Confirm. Everything is ready now!
Setting bindings
Now that you have your Binding Set set up, next step is to add bindings to it. This way, you can specify what keys will do what in your game.
Add a binding
In the Bindings Manager window, click on "Add Binding". You will have three options, corresponding to the three different types of bindings that exist in Core:
- Basic binding
- Axis binding
- Directional binding

Type is an essential aspect of a binding and will depend on what behavior you want your binding to have.
Basic binding
A Basic binding can only take two values: 1 or 0. You can see it as a switch: when the binding is pressed, the value is equal to one. When it is not, the value is equal to zero.
Example use cases:
- Opening-menu bindings
- Simple actions bindings: interact, crouch, sprint...
Axis binding
An Axis binding can take an infinite number of number values (not just 0 or 1). With it, you can know how much a player is pressing their controller trigger or how fast they're scrolling their mouse wheel.
Example use cases:
- Make a vehicle go faster the more the player presses their controller trigger
- Create an inventory hotbar in which the player can navigate through the slots with their mouse scroll wheel
Directional binding
A Directional binding takes a Vector2 value, with x and y coordinates.
Example use cases:
- Move the player
- Move the camera
Each type of binding has its own number of linked binding keys.
- For example, the Axis type of binding will need two binding keys: one that goes positive (i.e. ScrollUp) and one that goes negative (i.e. ScrollDown)

Once you chose what binding type fits your use, there are several parameters to specify:
-
Action
Give an appropriate name to your binding. This will be the name you will refer to in your scripts when using Lua. This is also the name the player will see in the Options menu, if they want to change their bindings. -
Description
Give a description of what is the use of this binding. The player will be able to see it in the Options menu. -
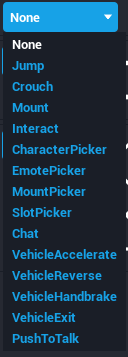
Core Behavior
Select a Core Behavior if you want to change the binding for one of Core Engine features (i.e. setting other keys than WASD for moving the player!)
Select "None" if you don't want your binding to interfer with a Core feature.
Since their names are pretty much self-explanatory, I won't really go into details for each of them. If you have a doubt, feel free to test them in Preview Mode!
-
Keyboard Primary
Choose what key should correspond to the binding. -
Keyboard Secondary
Here, you can specify another key that corresponds also to this binding. -
Controller
If you want to make your game controller-friendly (which is advised!), don't forget to choose what controller input should be linked to your binding! -
Networked
To make your binding networked, click on this icon. It will turn orange. By doing so, you allow your binding to be caught on a Server-side script. (See Networked bindings below)
Delete a binding
To delete a binding, click on the three dots icon next to it and choose "Delete Binding". Careful as it will be gone forever!
Networked bindings
Toggling networking for a binding will allow Server-side scripts to receive the information a player pressed this binding.
- It is not necessary to enable networking for a binding if it will only be useful in a Client Context
(i.e. a binding toggling the display of HUD should not be networked)
To enable networking, simply click on the network icon next to the binding. If you want to enable networking for all the bindings of a Binding Set, you can click on the icon next to the Binding Set instead.
- Orange color means networking is enabled. Blue color means it is disabled.
To learn more about Core Contexts, see Core Contexts - Everything you need to know
Handling Input
You learned how to create a Binding Set and add bindings to it. Last -but not least!- step is to learn how to detect, in a Lua script, a player pressed a binding in order to react to this.
- We will use the
Inputnamespace, which contains functions and hooks for responding to player input.
Detecting used input type
You can determine by scripting if a player is using a keyboard and a mouse or a controller. To do so, use:
Input.GetCurrentInputType()
- This function can return two different values:
InputType.KEYBOARD_AND_MOUSEorInputType.CONTROLLER. - Careful, it can only be called on the client!
To do something on the moment the player changes their input type, you can use the following event listener: Input.inputTypeChangedEvent.
- It will return the Player and the new InputType.
- This function can be called on the client and the server.
Example script:
local function onControllerChange(player, type)
    if type == InputType.KEYBOARD_AND_MOUSE then
        print(player.name.." now uses their keyboard and mouse!")
    else
        print(player.name.." now uses their controller!")
    end
end

-- Will call onControllerChange() and pass the following data: Player, InputType
Input.inputTypeChangedEvent:Connect(onControllerChange)
We connect the inputTypeChangedEvent listener to the onControllerChange function. When called, this function prints in the Console Log a message with the player name and the new controller they use.
Example use cases:
- Display appropriate binding hints in HUD related to what the player is playing with
- Why not try to show in player nameplates whether they're playing with a controller or the more classic mouse/keyboard?
Detecting player actions
To know when the player presses or releases a key bound to an action, there are two events you can listen to: Input.actionPressedEvent and Input.actionReleasedEvent.
- Both event will return the Player and a String ActionName.
Example script:
local HUD = script:GetCustomProperty("HUD"):WaitForObject() ---@type UIPanel

local function onActionPressed(player, action)
    if action == "Hide HUD" then
        HUD.visibility = Visibility.FORCE_OFF
    else
        print(player.name.." does action: "..action)
    end
end

-- Will call onActionPressed() and pass the following data:
-- Player, String (actionName)
Input.actionPressedEvent:Connect(onActionPressed)
We connect the actionPressedEvent listener to the onActionPressed function. When called, this function checks if the action made by the player correspond to what we set as "Hide HUD" when creating the binding. If so, the script hides the HUD. Else, it will print in the Console Log the name of the player and the name of the action they triggered.
Remember: to detect player actions on a script outside of a Client Context, you have to enable Networking for this binding. See Networked bindings above.
Escape Hook
When a player presses the ESC key, it opens Core default pause menu. With the Escape Hook, you can override this behavior and prevent this default pause menu from opening.
To intercept the player opening the pause menu, set the escape hook:
Input.escapeHook:Connect(onPause)
This hook will call our function onPause. It will pass two parameters: the Player and a parameters table. This table contains a boolean named "openPauseMenu". If we set it to false, then the default pause menu will not be opened.
local function onPause(player, parameters)

    -- Prevent Core default pause menu from opening
    parameters.openPauseMenu = false

end
Now, to show our own custom menu, simply add some lines to change the visibility of our referenced menu.
The final code will look like this:
local CUSTOM_PAUSE_MENU = script:GetCustomProperty("CustomPauseMenu"):WaitForObject() ---@type UIPanel

local function onPause(player, parameters)
    -- Prevent Core default pause menu from opening
    parameters.openPauseMenu = false

    -- If custom pause menu is visible...
    if CUSTOM_PAUSE_MENU.visibility == Visibility.INHERIT then
        -- ... turn it off ...
       CUSTOM_PAUSE_MENU.visibility = Visibility.FORCE_OFF
    else
        -- ... else, make it visible!
        CUSTOM_PAUSE_MENU.visibility = Visibility.INHERIT
    end
end

-- Will call onPause() and pass the following data:
-- Player, Table (parameters)
Input.escapeHook:Connect(onPause)
Please note that players will always be able to open the default pause menu by pressing "Shift-ESC". This will not trigger the hook.
Other useful functions
Other functions exist to handle player input:
Input.GetActionValue(Player, string actionName)
Use this function to get, at anytime, the current input value associated with the specified action.
See Add a binding above to know what type of value can be returned depending on the binding type!
Input.IsActionHeld(Player, string actionName)
Use this function to know, at anytime, if an action is currently being held by the player. This will return true or false.
Input.IsYAxisInverted(InputType)
Use this function to know if the player decided to invert the Y axis for the specified Input type. This will return true or false.
Input.GetActionDescription(string actionName)
Use this function to return the description corresponding to the specified action. This can be useful, for example, to show binding hints in the HUD.
Useful resources
- Core Documentation on Binding Sets
- Core Documentation on Input API
-
Default Bindings template by Ocylix in Community Content
This template contains Core Default Bindings and will be useful if you happen to have deleted them and can't retrieve them in your project.
Thank you for reading this tutorial. I hope it was useful and taught you something. 
If you have any question or suggestion, feel free to reach me on Discord or add a post below.