GUIDE TITLE: Shower Tutorial
ESTIMATED COMPLETION TIME: 20-30 Minutes recommended
CORE VERSION: 1.0.223-prod-s
SUGGESTED PREREQUISITES: I recommend that you complete Hello World Tutorial (Not required) [Scripting in Core (Beginner) - Core Documentation (coregames.com)] (Scripting in Core (Beginner) - Core Documentation)
TUTORIAL SUMMARY:
This tutorial is an alternative to the lightbulb tutorial, offering a different approach to help solidify your understanding of properties and functions. This tutorial is for learning beginning level scripting, please refer to the Core Tutorials in the Core Documentation for more information on the API and navigating the editor.
EXPECT TO LEARN HOW TO:
- Use Overlap and Interacted Events
- Use Play() and Stop() for both SFX and VFX
- Take advantage of in-editor tools such as the Script Generator
END PRODUCT VISUALS:
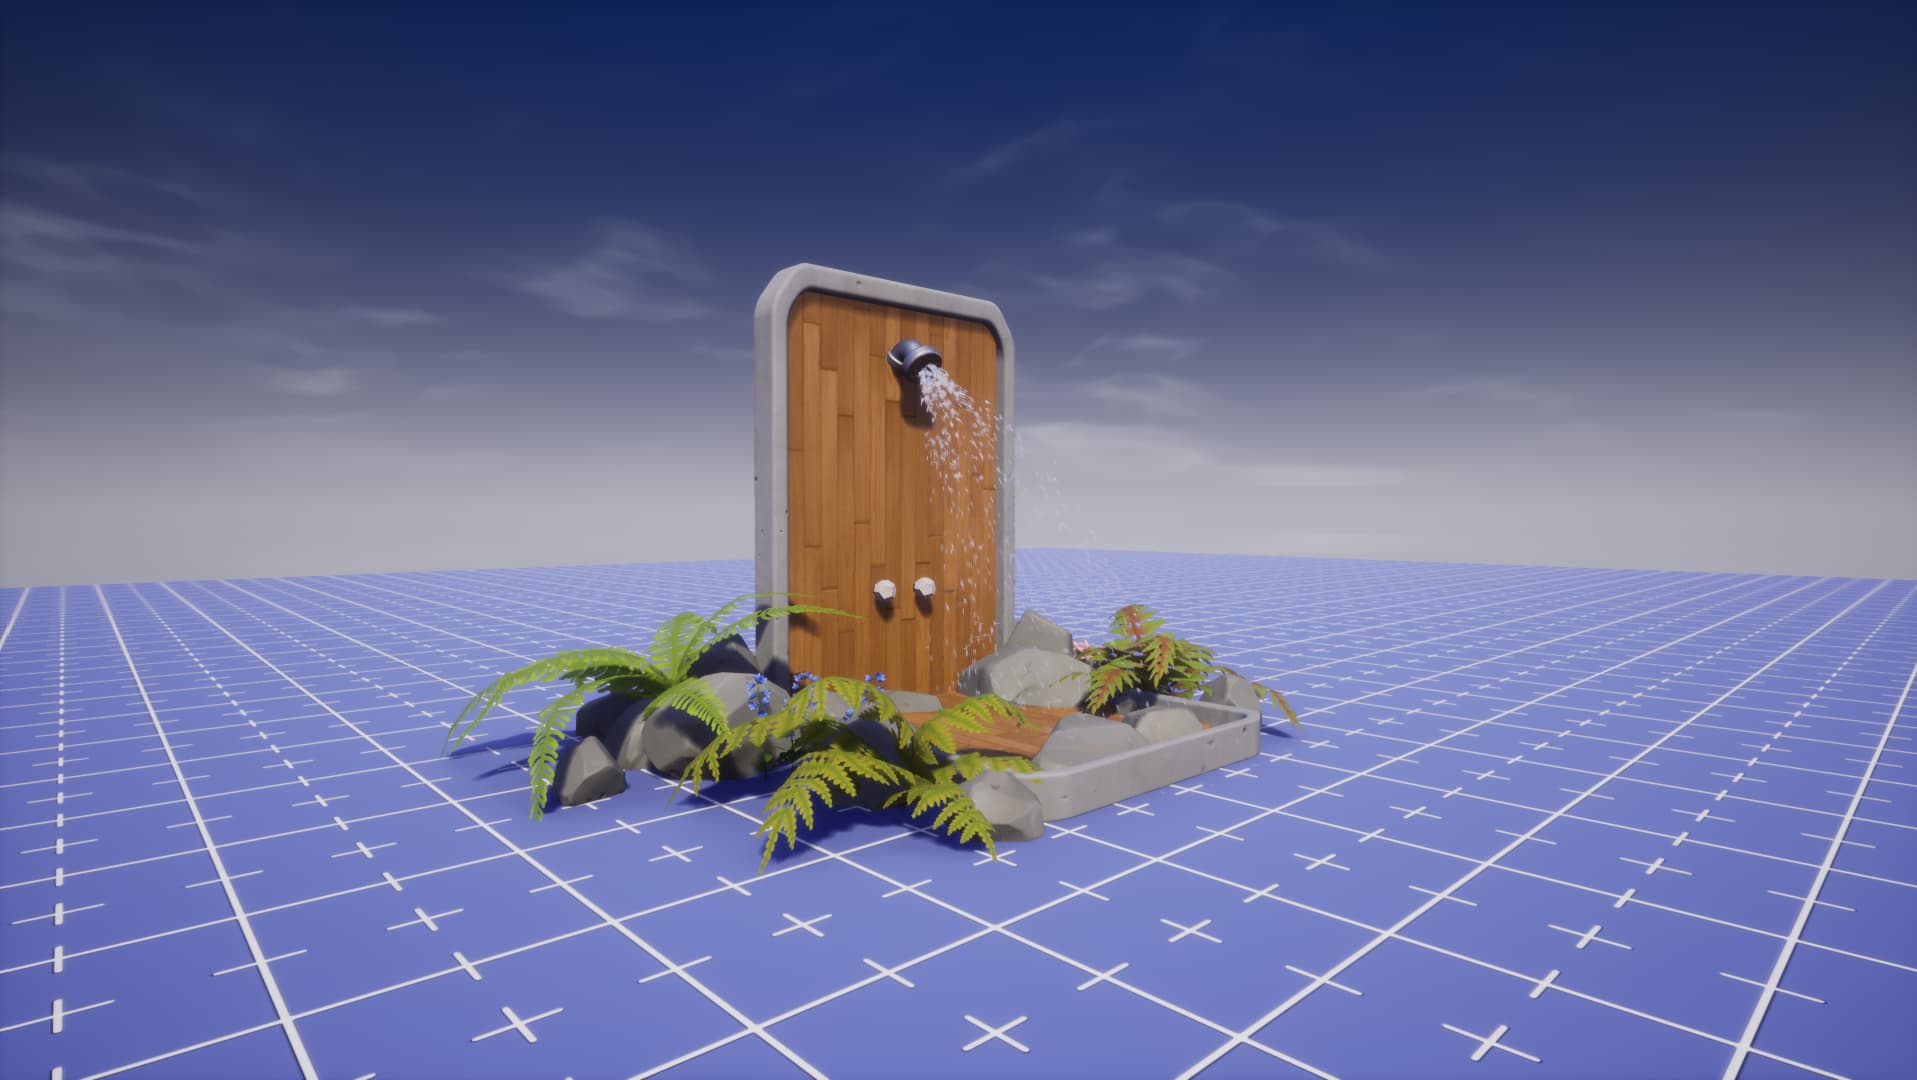
- Your visuals do not have to look like this to be functional
TUTORIAL:
There is a package of this tutorial with all of its components, as well as a finished product for you to compare with, available on CC! Labeled "Shower Tutorial CC"
| Step 1: Its dangerous to go alone (Dragging into Hierarchy) |
You are going to need:
- A Nozzle
- 2 Knobs
- A Script
- A Trigger
- Water Jet VFX
- Steam Volume VFX
- Metal Hinge Squeak 01 SFX
-
Aesthetics

The below Core Objects are what I used, you can use whatever you would like!
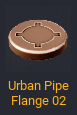
For the nozzle, I used a Urban Pipe Flange 02
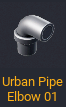
and a Urban Pipe Elbow 01 for the connection
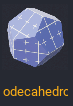
For the knobs, I used Cylinders for the shafts and Dodecahedrons for the handles.

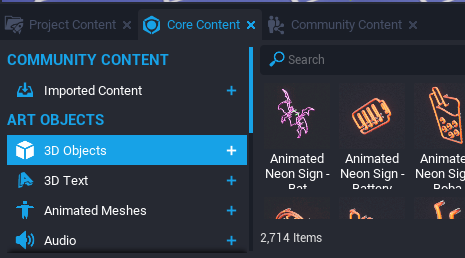
For our water we are going to use Water Jet VFX, Steam Volume VFX for steam, and for the sound effects we are going to use Ambience Water Hot Spring Bath Loop 01 SFX and Metal Hinge Squeak 01 SFX.
You can find all of these under the Core Content section on the bottom left hand of the screen
To create our script, go to the top left side of the screen and click the blue scroll button, and a drop down will appear.

For this tutorial, we are going to use the Script Generator. The Script Generator window in the Core Editor has a number of sample scripts that can be used for common patterns, including one that includes all three of the Trigger events. To get started, click Open Script Generator and a new window will appear.
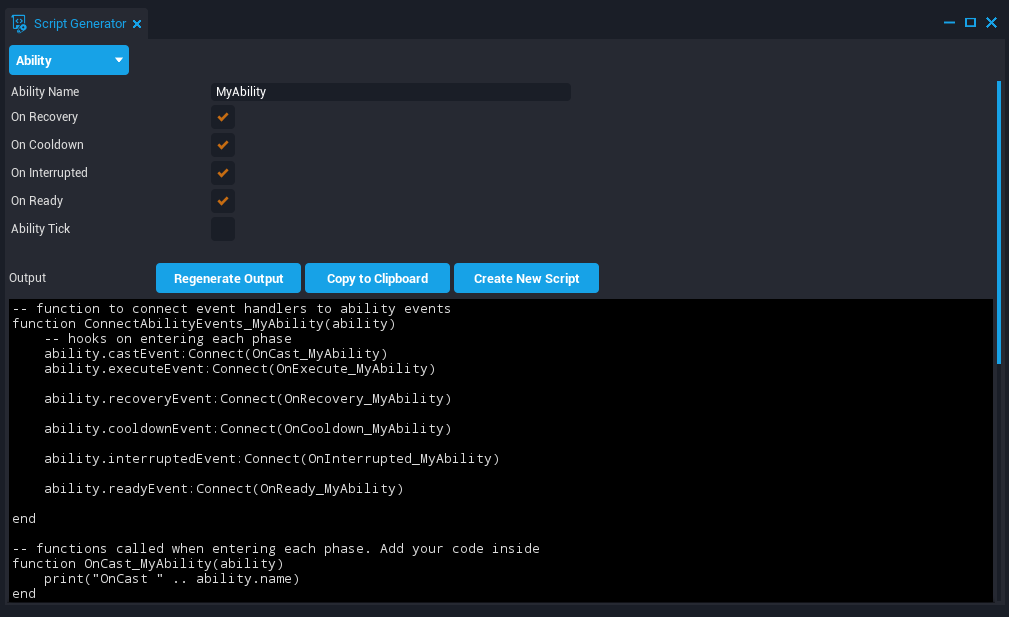
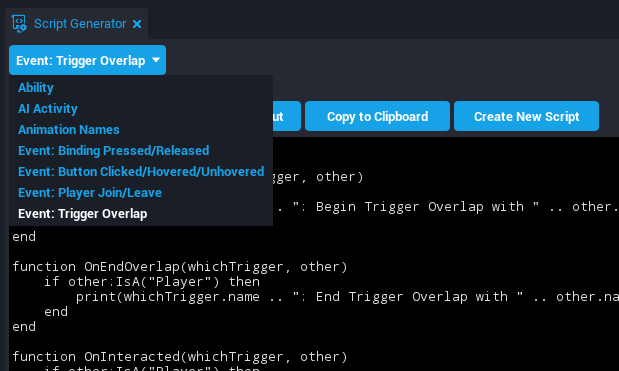
Click the Drop Down Menu labeled "Ability" on the top left side, and change it from "Ability" to "Event: Trigger Overlap".
Before we create the script, lets go over what you see in the preview.
At the very top you will see one local variable, labeled:
local trigger = script.parent
script.parent references the parent of the script. When you drag anything from the hierarchy onto another object, it becomes a child of that object. The object being the parent.
Later we will be making this script a child of a trigger.
Click Create New Script, name the script whatever you would like.
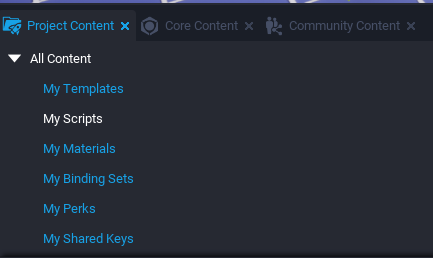
The editor will then automatically navigate to your script. If it doesn't, you can search for it under Project Content which can be found right next to Core Content on the bottom left side of the screen.
Now that you have your script, your going to need it to be a child of a trigger.
Grab a Trigger from the Core Content tab and drag it into your hierarchy or preview window, make sure your trigger is aligned and scaled to where you want the player to interact with your shower.

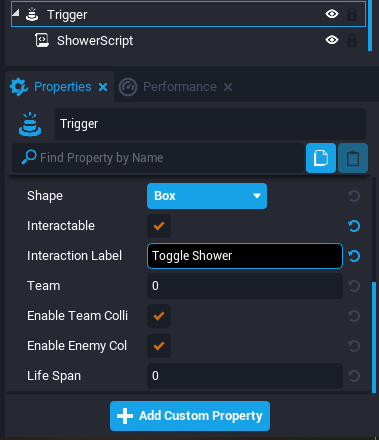
Triggers by default are set up to be non interactable. To change that, go into the properties and toggle
Interactable to True and label it whatever you would like, I labeled mine "Toggle Shower".
Some organization wont hurt us as well. You do not have to, however for this tutorial I recommend you put the Trigger/Script, the VFX/SFX, and the knobs all in a client context. If you do this, make sure your trigger's Collision is also set to FORCE_ON. For more information on contexts read here Contexts - Core Documentation (coregames.com)
Last but not least make sure that your VFX and SFX are positioned and rotated where you want them to be!
Now for the fun part.
| Step 2: Papers Please (Acquiring References) | 
On interaction we are going to rotate the knob, toggle the VFX, and play the SFX. To do this, we are going to need references to them.
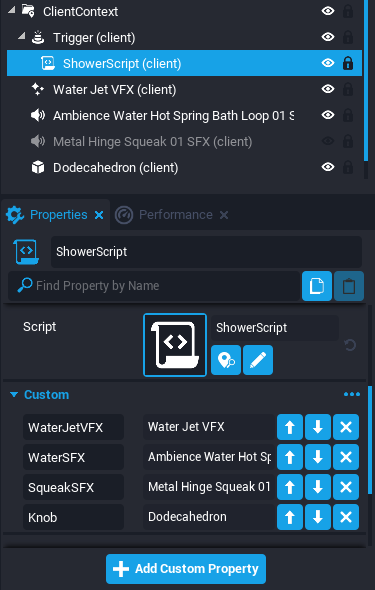
To add a reference, (with the script selected) click and drag whatever object you need into the blue "Add Custom Property" space seen on the bottom of the script's properties tab.
Get the references for VFX, SFX, and one of the knobs(Dodecahedrons).
So it is easier to read we are going to rename the properties.
- AmbienceWaterHotSpringBathLoop01SFX to WaterSFX
- MetalHingeSqueak01SFX to SqueakSFX
- Dodecahedron to Knob
- Steam Volume VFX to SteamVFX
Once finished, it should look like this:
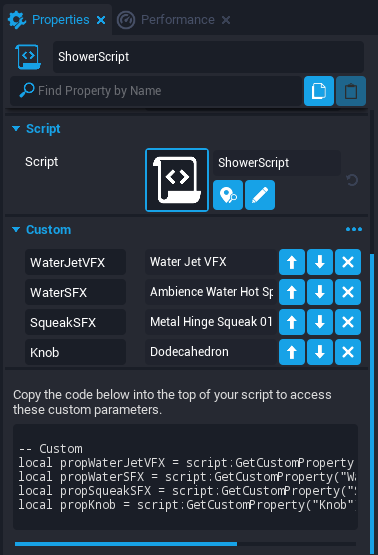
To get a reference you have added, you need to write it in the script as a local variable. You can write these in yourself, or you can use the hand snippet provided on the bottom of the scripts properties.
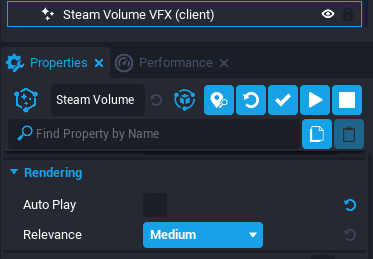
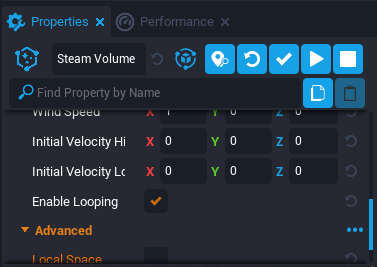
Last thing before we move on to scripting, make sure you toggle Autoplay to false for the Water Jet VFX and the Steam Volume VFX, make sure they are set to repeat or loop. Set Ambience Water Hot Spring Bath Loop 01 SFX to repeat/loop as well, preferably with attenuation and occlusion disabled.
Autoplay is most often found near the top of the properties of whatever you have selected, repeat or enable looping is usually found near the bottom of the properties.
| Step 3: Hello World (Writing the Script) | 
Open your script, and paste in the snippet from the bottom of its properties list on to the top of the script, right below the first line. Remove "Prop" from all of the variable names.
It should now look like this:
local trigger = script.parent
local WaterJetVFX = script:GetCustomProperty("WaterJetVFX"):WaitForObject()
local WaterSFX = script:GetCustomProperty("WaterSFX"):WaitForObject()
local SqueakSFX = script:GetCustomProperty("SqueakSFX"):WaitForObject()
local Knob = script:GetCustomProperty("Knob"):WaitForObject()
local SteamVFX = script:GetCustomProperty("SteamVFX"):WaitForObject()

function OnBeginOverlap(whichTrigger, other)
	if other:IsA("Player") then
		print(whichTrigger.name .. ": Begin Trigger Overlap with " .. other.name)
	end
end

function OnEndOverlap(whichTrigger, other)
	if other:IsA("Player") then
		print(whichTrigger.name .. ": End Trigger Overlap with " .. other.name)
	end
end

function OnInteracted(whichTrigger, other)
	if other:IsA("Player") then
		print(whichTrigger.name .. ": Trigger Interacted " .. other.name)
	end
end

trigger.beginOverlapEvent:Connect(OnBeginOverlap)
trigger.endOverlapEvent:Connect(OnEndOverlap)
trigger.interactedEvent:Connect(OnInteracted)
Nice job!
Now to clean this up a bit, lets remove the functions we arent going to use. We only need things to happen when we interact with this trigger, so the OnBeginOverlap and OnEndOverlap functions aren't needed.
Delete lines 8-18, and lines 26 and 27. You can tell what line you are reading by the count on the left side of the script preview window.
The script will now look like this.
local trigger = script.parent
local WaterJetVFX = script:GetCustomProperty("WaterJetVFX"):WaitForObject()
local WaterSFX = script:GetCustomProperty("WaterSFX"):WaitForObject()
local SqueakSFX = script:GetCustomProperty("SqueakSFX"):WaitForObject()
local Knob = script:GetCustomProperty("Knob"):WaitForObject()
local SteamVFX = script:GetCustomProperty("SteamVFX"):WaitForObject()

function OnInteracted(whichTrigger, other)
	if other:IsA("Player") then
		print(whichTrigger.name .. ": Trigger Interacted " .. other.name)
	end
end

trigger.interactedEvent:Connect(OnInteracted)
Awesome!
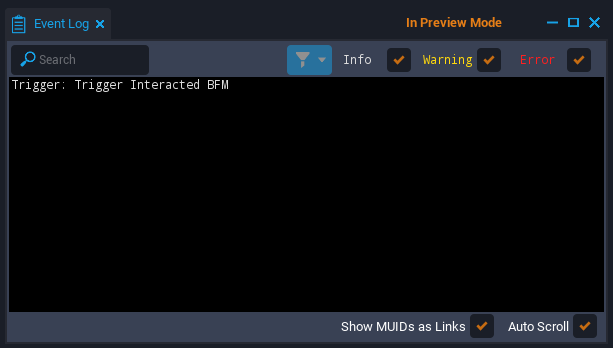
Already when interact with the trigger and open the Event log (located in the window dropdown in the top left of the editor)
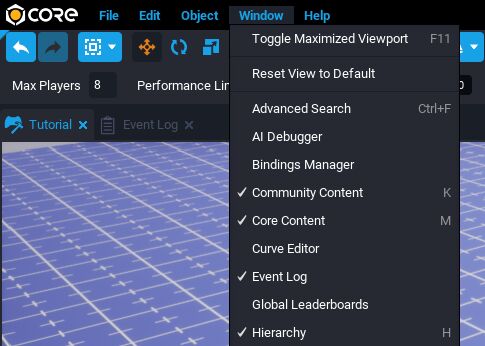
you will see a print signaling your interaction, success!
Next we are going breath some more life to this script by not only printing our interaction, we are going to play the FX and rotate the knob!
First we are going to need a Boolean(A binary variable, having two possible values called “true” and “false.”) to toggle this script on and off. To create a Boolean, simply write in your script below our existing variables "local", then the name of our Boolean, followed by an equals sign that then defines this Boolean as true or false. I named mine IsShowering. Written out it looks like this:
local IsShowering = false
When we interact with the trigger we need the script to check for this Boolean and toggle it.
Inside the OnInteracted function, we are going to write "if IsShowering = false then" followed on the next line we will right "end". This will create an if-then statement.
To check if two operators are equal, we use ==. So to check if our variable is false, we would write
IsShowering == false
That check will return true.
So in order to complete our if-then statement, we need to check if its false, if false then we set to true, else we set it back to false. Written out it looks like this:
if IsShowering == false then
    IsShowering = true
    else
    IsShowering = false
end
For both SFX and VFX, the Play()and Stop() functions can be used to play the FX from the script. For our use case we are to going to play them on interaction.
The if-then statement we wrote should can fit right into our OnInteracted function inside our check for the player that already exists. Inside our if-then statement, we can then insert our Play() functions and rotations.
if its false, we are going to play the WaterJetVFX, WaterSFX, and SqueakSFX. Then, we will rotate the Knob using RotateTo().
RotateTo(), MoveTo(), etc, are very commonly used and extremely helpful functions built into the Core API. I highly recommend you go over some of it when you have the time, as it is essential for overcoming problems. Core API - Core Documentation (coregames.com)
Getting started with RotateTo(), rotate your knob however much you want it rotated in the preview, and copy its new rotation. We are going to use this for our RotateTo(). If you can, undo your rotation. If not, try your best to rotate it back to its original position.
RotateTo() is written like: Knob:RotateTo(Rotation, transitionTime)
So for the rotation we are going to insert the rotation we copied from our knob.
then for rotating back, we will use our original rotation.
Your full script will now look like this:
----------------------------------------These are our variables/references-----------------------
local trigger = script.parent
local WaterJetVFX = script:GetCustomProperty("WaterJetVFX"):WaitForObject()
local WaterSFX = script:GetCustomProperty("WaterSFX"):WaitForObject()
local SqueakSFX = script:GetCustomProperty("SqueakSFX"):WaitForObject()
local Knob = script:GetCustomProperty("Knob"):WaitForObject()
local SteamVFX = script:GetCustomProperty("SteamVFX"):WaitForObject()

local IsShowering = false

----------------------------------------This is our function---------------------------
------What it does------
--[[ On interacted, it checks if its a player,
if its a player we check if the player is showering,
if they arent showering they are now showering.
Else(if the player is showering), they are now not showering, stop the FX. ]]
-------------------------

function OnInteracted(whichTrigger, other)
	if other:IsA("Player") then
		if IsShowering == false then
			IsShowering = true
			WaterJetVFX:Play()
			WaterSFX:Play()
            SteamVFX:Play()
			SqueakSFX:Play()
			Knob:RotateTo(Rotation.New(90,0,90),1)
			else
			IsShowering = false
			WaterJetVFX:Stop()
			WaterSFX:Stop()
            SteamVFX:Play()
			SqueakSFX:Play()
			Knob:RotateTo(Rotation.New(0,90,0),1)
		end
		print(whichTrigger.name .. ": Trigger Interacted " .. other.name)
	end
end

--------------------This is where Events go--------------------
--[[This registers our function to the event that is called when we interact with a trigger.
trigger is the name of our reference,
trigger.interactedEvent is the event called when we interact with that reference.
The listener in our case is our function called OnInteracted.
All together, this connects our listener(the function) to that event.
Whenever we interact, the event is called, our trigger listens. Its a good boi
|  |
v  v   ]]
trigger.interactedEvent:Connect(OnInteracted)
Stupendous!
Congratulations!
Now when you interact with your trigger, your shower should turn on and off!
Thank you for reading this tutorial, I hope you learned something!
 I especially liked the fact there is not too much reading and a lot of useful screenshot ! Thank you