Producers, Buffs and Areas Tutorial
Prerequisites:
You must know your way around the Core editor. No coding knowledge is required.
Introduction
Welcome to this tutorial in which I will try to show you around the "Producers, Buffs and Areas" example project (we will call it PBA from now on). This project contains many different systems and mechanics and the scope of it all is so large that each mechanic would require a tutorial of its own. There are two big systems which both contain different mechanics: Areas and Player Lots on one side, and Producers and Buffs on the other. In the present tutorial, we will focus on the Areas and Player Lots systems.
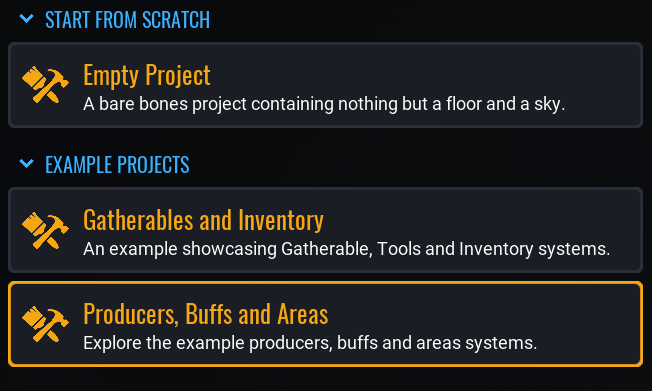
To open the PBA example project, create a new project, and instead of selecting an empty template, select "Producers, Buffs and Areas" example project as starting template:
The PBA example project contains many different read-me files that cover many of the mechanics present in this project. Don't hesitate to take a look at those to familiarize yourself with the general logic of the systems.
Let's start!
Areas and player lots
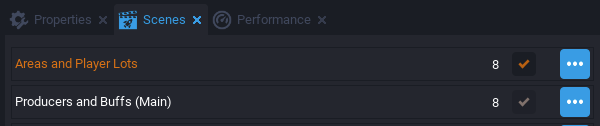
Load the "Areas and Player Lots" scene if it is not already the loaded scene:
Here is the description from the read-me file that can be found in the PBA project:
The Areas system is meant to be used to chunk your environment into discrete pieces that can be loaded on demand. This provides a much more performant experience for Players and lets creators include much more content in their games. As Players move through Areas they can be moved to specific spawn points, be placed into pools of Areas, have templates loaded into client, server or static contexts and more.
In fact, this component is divided into 2 parts: one part that loads or unloads objects in a given area depending if there are players or not in that zone, and a second part which lets a player acquire a lot which is then assigned to that specific player. You can use both components independently or combine them.
In the PBA project, various examples of what can be achieved are being given:
-
a simple example where one portal leads to a single shared zone. This zone is not assigned to any particular player and if there are no players in that particular zone, everything is unloaded so that objects count is optimized and resources can be used elsewhere.
-
an example with "assignable areas". A set of assignable areas is a group of areas to which players will be randomly teleported once they interact with the portal. You can specify how many players can be at once inside an area before the area is locked. Like the previous example, objects are only loaded once a player enters the area and objects are unloaded once the last player leaves the area. For example, you can use this to create 1v1 arenas in your game by specifying a limit of 2 players for that set of assignable areas.
Regarding player lots, here is the description given in the read-me file:
Player Lots offer a way for creators to define sections in their game that belong to individual Players. Lots can be mixed with several other systems and the main benefits they provide are ownership, permissions and persistence. A Player can "own" any number of Player Lots, and Lots can exist only while the owner is online, or stay even after they leave the game. Lots can even be combined with Areas to let you create pools of Area/Lots that dynamically load and unload as Players enter and exit them. This is used to create things like the interior of a Players house that only loads when a Player enters it.
Two examples of player lots are given:
-
one example called "Basic Player Lots" without the Areas component, which means that the objects in the player lots are always loaded regardless of the presence of players.
-
a second example called "Area Based Player Lots" which as the name suggests, shows how to use the player lots system combined with the areas system, so that all the objects in a player lot are loaded only when a player enters the lot, and unloaded when all players have left the area.
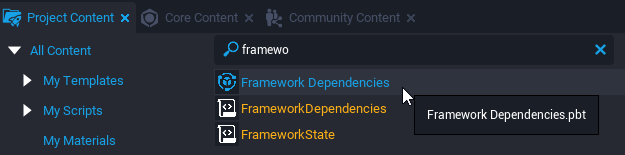
If you look at the hierarchy, under the "Managers" folder, you will see a group named "Framework Dependencies":

This is a template that contains things that all the mechanics in the PBA project require. So this is the first thing you have to import into your game in order for anything to work. It can be found in Project Content.
That said, let's now first see how to implement the basic areas mechanic.
Basic Areas
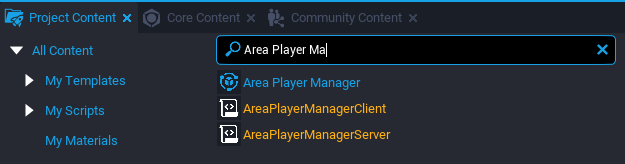
What you first need to bring into your hierarchy is the "Area Player Manager" template:

It can also be found in Project Content:
If you look at the custom properties of that template, there are some things that need to be setup:
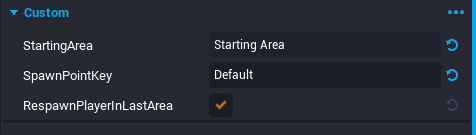
- StartingArea is the area that contains the starting spawn point. After you have built your starting area, you will have to drag and drop it in this custom property.
- SpawnPointKey is an optional key that will filter which area spawn point to use. It should match a key set on an "Area Spawn Point" template in the starting area.
- RespawnPlayerInLastArea is a boolean that if set to true, will respawn the player in the area they died in. It is recommended to use this to avoid situations where the player is in one area physically but being tracked in another Area.
Note that the PBA project doesn't use Core Spawn Points, but it uses its own dummy objects system, like this example:

What you then first need is a starting area in which players will spawn when they join the game. This starting area could serve as a hub to which players will be able to teleport back later. It is part of the area system itself so that its geometry will be unloaded when there are no players in it.
Thus a starting area is not really different from any other basic area. The only difference is that it will be considered as the starting area by the Area Player Manager. Here is what it looks like in the hierarchy of the PBA example project:
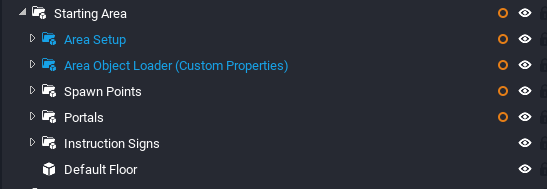
Let's look at it in more detail:
-
"Area Setup" is actually the template that will register the Starting Area into the areas system. By default, it will register its parent as an area, but you can also fill its single core object reference custom property. Every area that you will create later will require this template in order to be considered as an Area by the system.
-
"Area Object Loader (Custom Properties)" is the template that will load the geometry of the area when a player enters it. It has 3 asset reference custom properties for the 3 main contexts : server, client and static:

All 3 assets will be loaded at once when a player enters the area if there was no player in it, and all of them will be destroyed when the last player leaves the area. Note that you can have many "Area Object Loader" inside an area if you want to divide your assets into multiple assets. -
An area requires at least one spawn point, otherwise the area would be impossible to reach. As said earlier, the PBA project doesn't use Core Spawn Points but its own system based on dummy objects. The spawn point template can be found in Project Content:
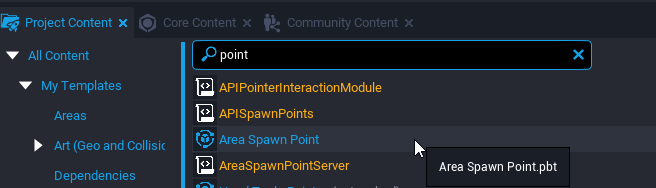
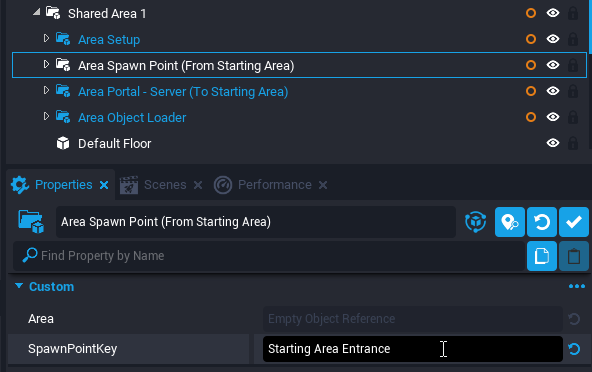
Bring one into your starting area and take a look at its custom properties:

The "Area" custom property should link to the area this spawn point resides in, or you can leave it blank and it will reference its parent as the area. SpawnPointKey, in this case - since this is a starting area, should match what you have set in the SpawnPointKey custom property of the "Area Player Manager" template. In the PBA example project they are both set to "Default", but you can change that name to something else as long as they match. -
Next up, you need at least one portal that will lead to another area, otherwise your starting area will be nothing more than a prison with no possibility of escape! There are two kinds of area portals: a server side one and a client side one. The difference between the two is that the client side portal will have to make a networked broadcast in order to tell the server to teleport the player. It is useful in case you want to spawn a portal only for a specific player or a specific group of players. In the PBA scene, the portals are all server side. Portals can be found in Project Content:
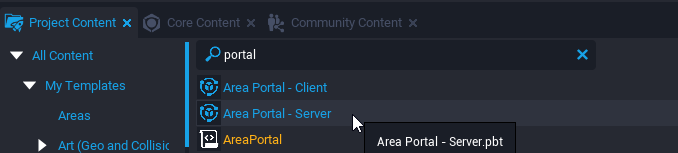
Bring one into your starting area and look at its custom properties:
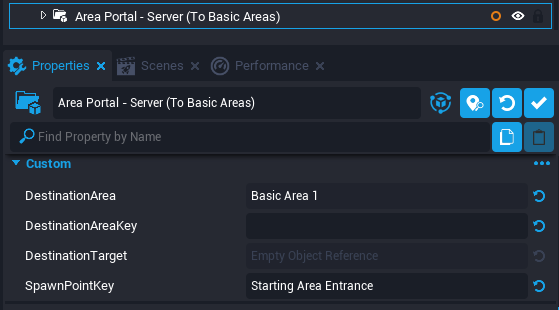
-
DestinationArea is the area which the player will be teleported to.
-
DestinationAreaKey is useful for the Assignable Areas system which we will be talking about later.
-
DestinationTarget is useful if you want to send the player to the position of any core object in the game world.
-
SpawnPointKey will look for a spawn point with the specified key inside the area specified in DestinationArea.
Our starting area is almost finished, it just needs a floor. You might be asking "why couldn't we just spawn a floor in the static context with the help of the Area Object Loader template"? The answer could be that the first player who enters the area might fall through the floor if said floor is spawned just a bit too late! And so placing a floor will make sure the first player who enters the area will always find a ground on which to stand on. Another solution would be to place a floor of a limited size just around the spawn point and then spawn the rest of the area floor with the Area Object Loader.
So now that we have a starting area, what we need is a second area to which players will be able to travel by going through the portal that we have created earlier. As was said before, creating an area is the same process as creating a starting area, the only difference is that you won't need to reference it with the Area Player Manager.
So first you create an empty group and you give it the name of your area, for example "Game Area 1". Then you add an "Area Setup" template inside that group. Then you add an "Area Object Loader" which will load the assets that need to be loaded for that particular area. Then you need a spawn point for that area. And finally, you need a portal that leads back to the starting area. And let's not forget a floor!
A word on "Area Change Components" :
One last important thing which we haven't talked about yet is the "Area Change Component". It is made of 3 client scripts that you can use independently:
- ToggleEffectsOnAreaChangeClient enables you to stop, play or toggle sfx and vfx when a player enters or exits a specific area. This is used in the PBA project to play the sound effects when you go through a portal and display the rain and snow effects.
- ToggleVisibilityOnAreaChangeClient enables you to show, hide or toggle the visibility on objects when a player enters or exits a specific area.
- ToggleEnabledOnAreaChangeClient which you can use to enable, disable or toggle objects when a player enters or exits a specific area.
Each of these scripts has a dozen custom properties to let you customize how the effects should take place:

The most important property is the "Area" one. It lets you specify which area is being concerned with the script. But if you leave it blank, the effect will happen for every area. In this case, because the "Area" field is empty, the sfx will play every time the player enters any area. The other custom properties are self explanatory, except AreaGroupKey which concerns the Assignable Areas system.
Now here is a simplified hierarchy which contains everything we have created so far. Your hierarchy should look similar to that:
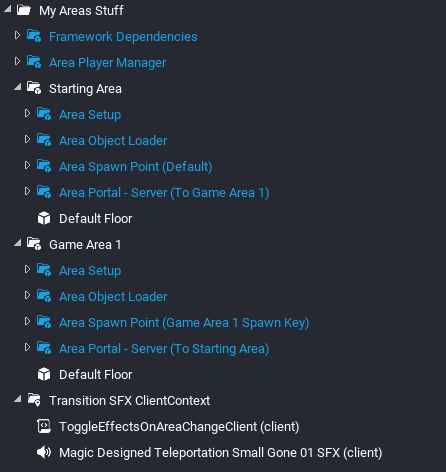
This screenshot is to show you everything in one shot, but in your own game, you can organize things the way you want. Take a look at the PBA project to see how it is organized. Notice that I have only brought the transition sfx from the "Area Change Components" folder in the PBA example project.
You might have noticed that in the PBA example project, there is a UI folder which contains everything related to the user interface, like the names of the areas, the fade to black transition effect and other things. Everything in there is optional, and you can pick and choose which templates you want to keep and which ones you don't need, or delete the whole folder altogether (not recommended but the areas system will still work).
This is the end of the Basic Areas section of this tutorial. Now all that's left for you to do is to add more areas and create all the assets that will be loaded/unloaded by the Area Object Loader template.
Now, let's take a look at the Assignable Areas system!
Assignables Areas
As has been said already, Assignable Areas is a system which will enable you to dispatch players to areas and to specify a max number of players per set of areas after which the area is locked and cannot receive any more players until one or more players have left the area. Depending on your game design, you might want to limit the number of players in a specific area. You can for example design identical areas with a maximum of 4 players per area, then if a 5th player joins the game, that player will be sent to a new identical empty area. Since areas aren't loaded until there is a player inside it, this is perfectly viable.
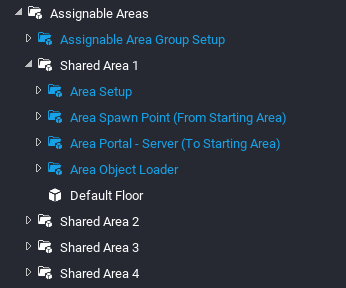
Building areas for the Assignable Areas system is no different than building areas for the Basic Areas system. Here is how the Assignable Areas hierarchy looks like in the PBA example project:
The procedure to create a set of Assignable Areas is fairly simple:
-
Create an empty group and give it any name you want.
-
Create all your areas then put them all in that empty group. Don't forget the spawn point and at least one portal leading back to the starting area!
-
Add an "Assignable Area Group Setup" template to the empty group. It can be found in Project Content:
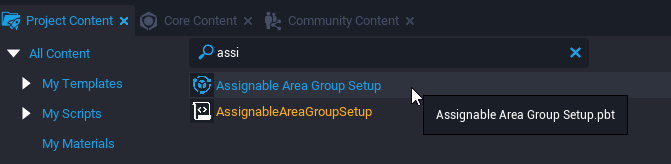
-
Add a portal somewhere in your game which players will have to go through in order to reach the assignable areas. For convenience, place it inside your starting area because that's where players start when they join the game.
Now all that's left to do is a bit of custom property configuration. Select the "Assignable Area Group Setup" and look at its custom properties:
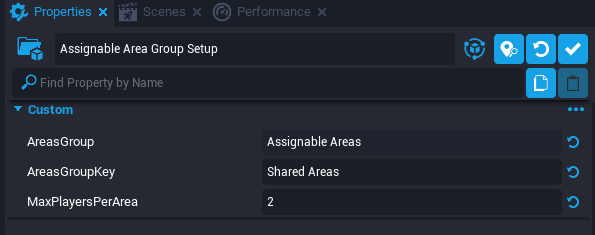
- AreasGroup is a reference to the parent group you created at step 1 above. If you leave it blank, it will look for the direct parent in the hierarchy.
- AreasGroupKey is the very important property which will be used by the portal in your starting area to transport players to the right set of assignable areas. Choose a unique name for this key.
- MaxPlayersPerArea as the name suggests will limit the number of players per area. If set to 0, there will be no limit to the number of players an area can accept.
Now, select the portal that you have added to the starting area and look at its custom properties:
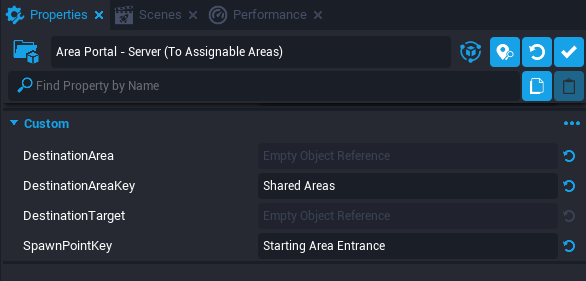
- Leave DestinationArea blank because we don't want to send the player to any particular area but we want to let the Assignable Areas system decide for us.
- DestinationAreaKey should be the same exact key that you have put in the AreasGroupKey custom property of the "Assignable Area Group Setup" template.
- DestinationTarget should be left blank.
- SpawnPointKey should correspond to the SpawnPointKey property of every spawn point of every area of the set, like so:
If the keys don't correspond, the system won't know where - inside each area of the set, players should appear when they go through the portal in the starting area.
This is all you need to make Assignable Areas work. You can have as many sets of assignable areas as you want as long as you have attributed them a unique AreasGroupKey. Don't forget to setup portals in each area of the set in order to give players the possibility to go back to the starting zone. And alternatively to these portals, you can just press T on your keyboard to go back to the starting zone. This UI feature resides inside the UI folder in the hierarchy:
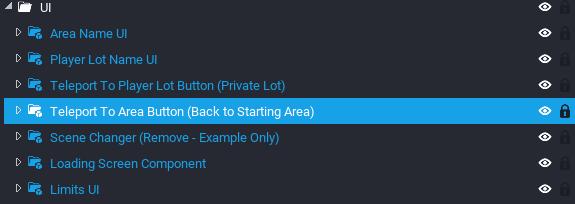
You can duplicate this template and change its custom properties so that the player would be sent to the area of your choice or to a set of assignable areas. You can also choose another binding and other options related to how the icon looks like on the UI.
This is all for Assignable Areas. Now let's take a look at Player Lots!
Player Lots
Here is a reminder of what Player Lots are about, taken from the read-me file:
Player Lots offer a way for creators to define sections in their game that belong to individual Players. Lots can be mixed with several other systems and the main benefits they provide are ownership, permissions and persistence. A Player can "own" any number of Player Lots, and Lots can exist only while the owner is online, or stay even after they leave the game. Lots can even be combined with Areas to let you create pools of Area/Lots that dynamically load and unload as Players enter and exit them. This is used to create things like the interior of a Players house that only loads when a Player enters it.
Let's first how to setup a basic Player Lots system and then after we will see how to integrate the Areas system to it.
Basic Player Lots
What we first need is a "Player Lot Manager" template that can be found in Project Content:
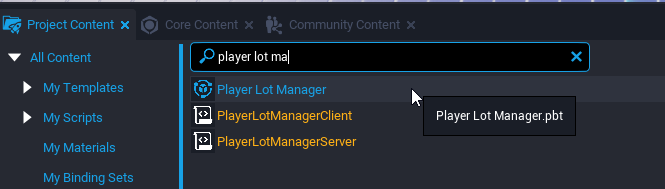
Bring one into your hierarchy then take a look at its custom properties:

- LotType is the unique name you need to give to this set of player lots.
- MaxOwnedPerPlayer is the maximum number of lots a player can own at the same time from this set of player lots.
- AssignWhenPlayerJoins is a boolean that if true, will automatically assign a lot to every player that joins the game.
- ResetLotsWhenPlayerLeaves is a boolean that if true, will reset all lots of this set that a player owns when they leave the game.
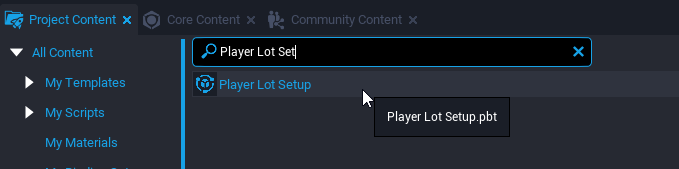
Next, you need to actually build your first player lot that you will then duplicate as many times as you need. Create an empty group in your hierarchy and name it "Lot 1", then inside it, drop a "Player Lot Setup" template that can be found in Project Content:
Take a look at its custom properties:
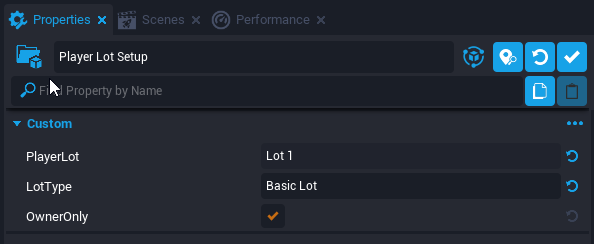
- PlayerLot should reference the empty group that you have created. If left blank, it will reference the direct parent of the template.
- LotType must correspond to the same LotType property that you have set on the "Player Lot Manager" template.
- OwnerOnly is a boolean that if true, will make any dynamic objects on the lot, such as Gatherables and Producers, only accessible to the owner of the lot.
Next up, you need a way for a player to reach the lot. If your player can reach their assigned lot by walking to it, then you have nothing to do, otherwise you need a "Player Lot Spawn Point" that can be found in Project Content:
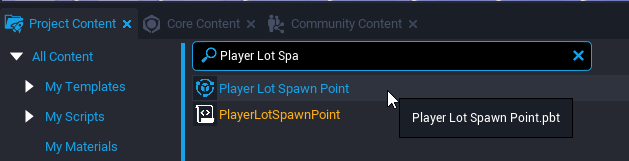
Bring one into your lot group and look at its custom properties:
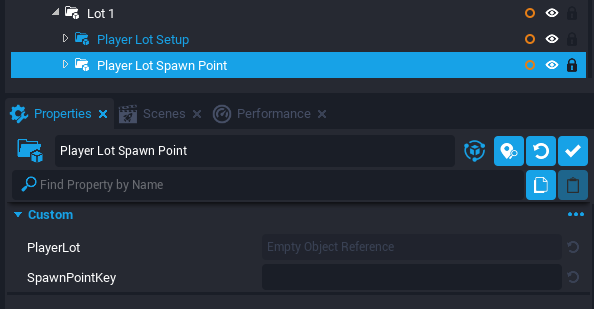
- PlayerLot should reference the lot group, but if left blank will find its parent automatically.
- SpawnPointKey can be used if you want to have many spawn points inside a lot and thus multiple portals leading to these spawn points. For now it can be left blank.
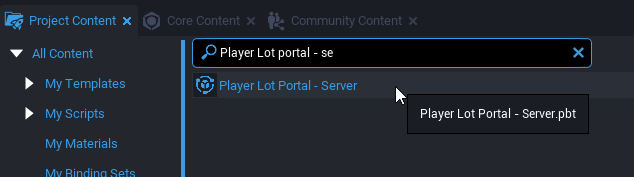
If you have added a spawn point, then you need a portal that leads to that spawn point. Add a "Player Lot Portal - Server" template somewhere in your game (if you have followed this tutorial until this point and have built a starting area, you could place it there), it can be found in Project Content:
Take a look at its custom properties:
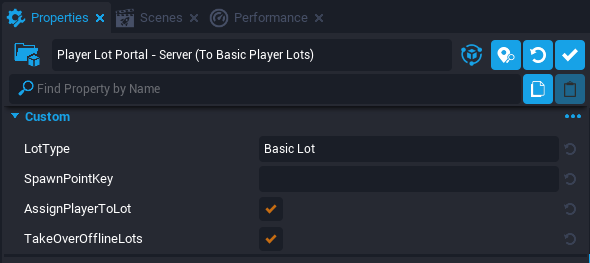
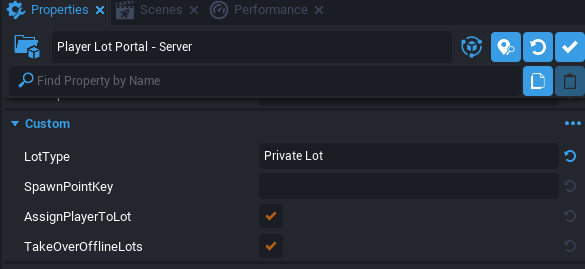
- LotType must correspond to the same value you have put in the LotType property of "Player Lot Manager" and "Player Lot Setup" templates.
- SpawnPointKey is optional and can be used if for example the lot is huge and you want to have many portals leading to many different spawn points inside the lot.
- AssignPlayerToLot is a boolean that if set to true, will automatically assign an empty lot to the player who is using this portal if they don't already own one. Otherwise, if the player already owns a lot of this set, it will teleport them to the lot they own.
- TakeOverOfflineLots is a boolean that if set to true and if there is no available free lot to assign, a lot owned by an offline player will be used. Meaning that if the ResetLotsWhenPlayerLeaves property of the "Player Lot Manager" is not set to true, then lots won't be reset when the owner of the lot leaves the game, but they will be only reset when a new player needs to be assigned a lot through this portal.
Next, you need a way to spawn assets when a lot has been assigned to a player. Imagine a game where each player is given an empty castle inside their lot: every time a player joins the game, a castle will pop inside the lot the player owns. We can say that the castle is the starting assets every player starts with. Remember, since we are not integrating the Areas system yet, these castles will be loaded as soon as the lot is owned by a player, regardless if there is a player walking around inside that lot or not.
In order to load starting assets, we need a "Player Lot Object Loader" that can be found in Project Content:
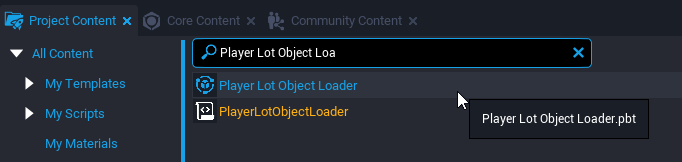
Bring one into your lot and look at its custom properties:
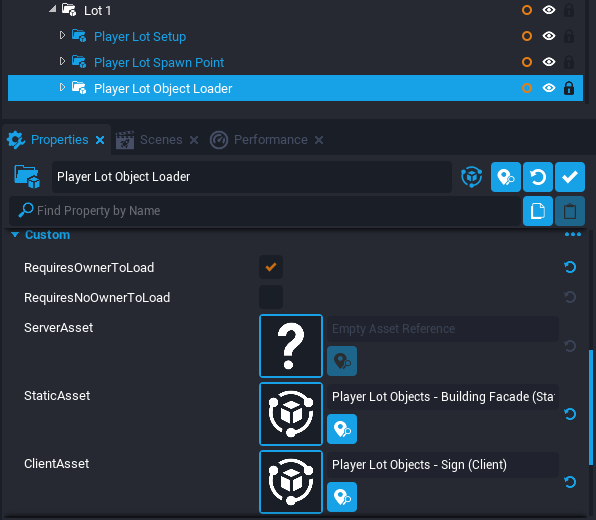
- RequiresOwnerToLoad is a boolean that if set to true, will only load the objects if the lot has an owner. Which means that the lot could look totally empty until a player owns the lot. Objects will be unloaded when the owner is cleared.
- RequiresNoOwnerToLoad is a boolean that if set to true, will only load the objects if the lot does not have an owner. This could be used for example to display an untouched pristine forest or a castle in ruins until the lot is owned by a player. Objects will be unloaded when the owner is set.
- ServerAsset, StaticAsset and ClientAsset correspond to the templates that will be spawned in the 3 main network contexts.
You can have many different "Player Lot Object Loader" templates inside one lot and use different spawning logic for each of them.
Your lot is now complete but now it's up to you to make it look the way you want. First, you should add a floor to make sure players don't fall into the void. Then prepare all the assets that will be loaded once the lot is owned by a player.
Now let's see how we can integrate the Player Lots system into the Areas system!
Area based Player Lots
Integrating player lots inside areas means that all assets inside the player lot will only load when there is a player in that area and unload when the last player has left the area.
-
So first, we need a "Player Lot Manager" template to manage our lots. Fill its LotType custom property with a unique name.
-
Then we need an areas system using the "Assignable Area Group Setup" template. Use an "Area Setup" template to make each area. Refer to previous sections of this tutorial where we see these procedures in detail.
-
Inside each area, we create a lot with the help of the "Player Lot Setup" template. Don't forget to set its LotType custom property to the same value you used to setup the "Player Lot Manager" template.
-
Inside each lot we will place an "Area Player Lot Loader" template which will take care of the loading/unloading of assets depending on if there is a player present or not.
-
Add an "Area Portal - Server" template inside each lot so that players can leave their lot and reach another area like a starting area for example.
Look at the following picture, it shows a basic setup:
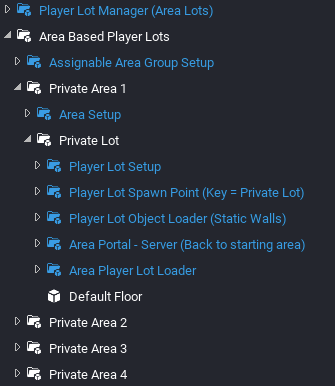
There are 4 areas (named Private Area x) and each of those contains 1 lot (named Private Lot), so in this game the max number of players should be set to 4 because there are only 4 lots to acquire, unless you add more. Each lot contains the very important "Area Player Lot Loader" template which enables the Player Lots system to communicate with the Areas system. You can find it in Project Content:
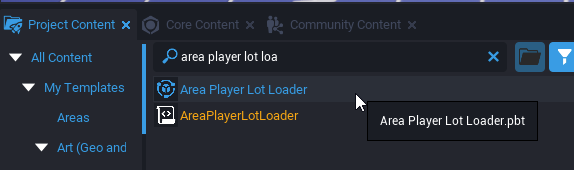
What you now need is a portal that will lead players to the lots. You could do it in two different ways: by using an area portal or a player lot portal, since the two systems are combined. In this tutorial we will use a player lot portal, so that as soon as a player uses the portal, they will be assigned a lot and be sent there. Bring a "Player Lot Portal - Server" template from Project Content and place it somewhere in your game. Then set its LotType custom property to the same value you have set the "Player Lot Setup" and "Player Lot Manager" templates. In this example, all LotType custom properties are set to "Private Lot":
Alternatively to a portal, you can use the "Teleport To Player Lot Button" template from Project Content and set its LotType custom property accordingly ("Private Lot" in this example), so that players can just press a keyboard key to teleport inside their lot. This template is already present in the PBA example project in the UI folder.
That is all for area based player lots. You can always take a look at how it has been done in the PBA example project to have a feel of possible combinations. Notice how they have made it so a set of player lots leads to another set of player lots in the areas based player lots example. An unnecessary complication in my opinion.
Conclusion
As you may have noticed, the Areas and Player Lots are already huge and complex systems by themselves. If you add to that the Producers, Buffs, and Placeables systems, you obtain a complex web of intertwined systems that can all work together. It should be kept in mind that the PBA example project is a work in progress and as such it will evolve and maybe become even more complex. Some parts of this tutorial may or may not become obsolete in the future.
That said, I hope this tutorial will help you understand how to create areas and player lots in your game and set everything up to your liking.
If you have comments, suggestions or have spotted an error, post here and I will make sure to give you an answer.