Make Sounds
The Right Way
ESTIMATED COMPLETION TIME: 1 Hour recommended
CORE VERSION: V1.0.226-prod-s 1/10/2022
SUGGESTED PREREQUISITES: None previous knowledge required, all the information contained within this tutorial is aimed to all kind of levels.
TUTORIAL SUMMARY:
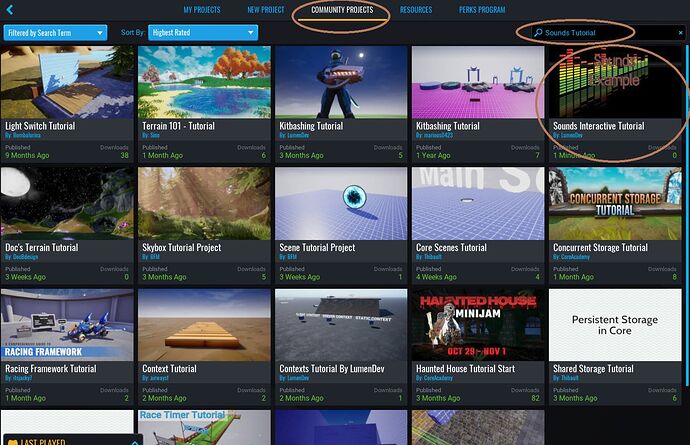
Interactive Tutorial. Download the sample project to begin. Or Play it! Sounds Interactive Tutorial by LumenDev - Core Games Before reading the tutorial.
You will learn with this tutorial how to create good sounds for your games through kitbashing, meanwhile you are listening to the examples provided in the sample project.
EXPECT TO LEARN:
- Kitbash your own sounds. (In case what core provides is not enough for you)
- Usage of code to work alongside sounds and implement additional functionality to improve the players experience.
- The different kinds of sounds and how to use them properly.
- Select the right sounds for the right purpose.
- How to obtain the right sounds, FAST.
END PRODUCT VISUALS:
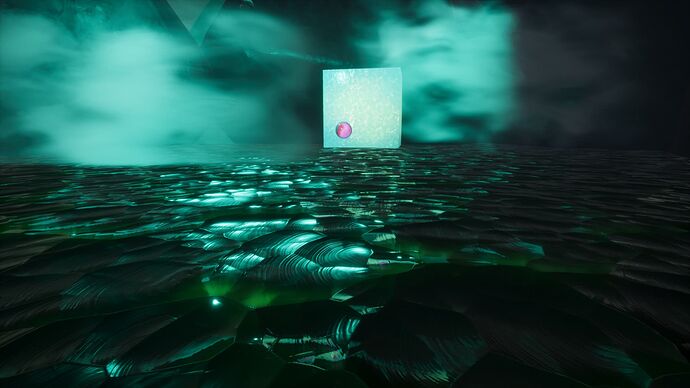
- You will be capable of creating really similar scenes as shown in the short video above, after finishing the tutorial.
PRELUDE
You have created a really great looking weapon, or a great vehicle, or a great scene with an amazing floating wizard island. But when you shoot the weapon it sounds unnatural, the vehicle does not even sound like one, and the wizard floating structure is just there, hanging in the middle of the sky without emanating that wispy sound of magic.
TUTORIAL:
Table of Contents.
0: Download The Sample Project.
1: Philosophy of sounds.
2: General Knowledge About Sounds in Core.
3: Environment sounds.
4: Suggestive sounds.
5: Emphasized sounds.
6: Natural sounds.
7: Kitbashing new sounds.
8: Music kits.
[1]
0: Before going any further i am assuming at this point that you have downloaded the sample project, i mean it. This tutorial was designed to be interactive, i will be explaining each one of the above mentioned points while you are visiting each section inside the project. So you will be able to HEAR the sounds, meanwhile you read & learn.
1: The Philosophy
The philosophy is simple, use the right sounds based on YOUR NEEDS. its your game after all, you are the creator of it, so when we talk about sounds we are talking about a really relative matter, but one thing is for sure, it does not matter if you chose to make a soundless game or a game saturated with sounds, your game must contain the right sounds in the right spot i often say "they must feel fine" if you open a chest with a BOOM you are going to be like what? What exploded? Did that sound come from this chest? and that could be bad. A bad and confusing experience for your playerbase. So it is crucially important to create the right sounds. One thing ill like to add: back in my days of gaming when the industry of video games was born, games didn't have great 4k textures, neither physics, but what has always been there is the great sounds, so developers focused a lot and put a lot of effort on creating great sounds a proof to this can be seen in Pacman, who does not know yet the "wacka-wacka-wacka-wacka" sound that Pac-Man does when playing it? It is a geniusly designed sound, unique, simple and will be forever remembered by anyone.
[2]
2: General Knowledge About Sounds In Core.
-
Variety: Core provides a wide variety of sounds, they are so greatly designed that i would recommend that if you find a sound and, literally sounds right, don't touch it, leave it as is. Why modifying it when its perfect?
-
How to search the sounds and fast: Type what you need in the search bar. "Boom" will pop-up all the sounds related to explosions, "sci-fi" will show technological-like sounds, "crack" will display cracking related sounds, from bones cracking and bullets impact to cracking glass. So, just do it, if you are thinking about a sound, type it in the search bar and there is a chance of 90% that the sound you are looking for will be displayed as a search result.
-
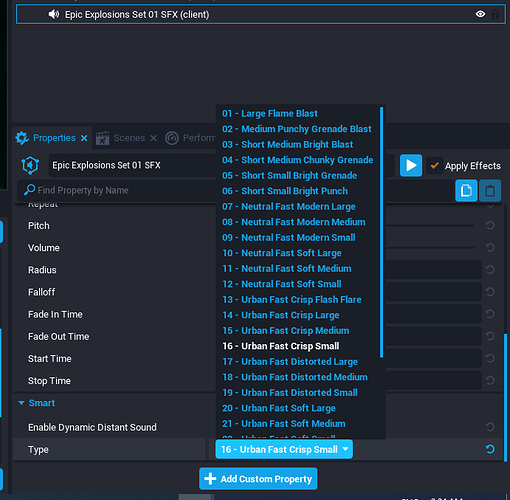
Sound Sets: Check for a big blue button at the bottom of each sound, why? because some sounds are cataloged as "sets" and they do contain more variants for the sound category you are looking for a good example of this is "Explosions set", get at the bottom of the details and you will see something like this.
-
Audio Propertys.
-
Enable Spatialization : Turning this off means the sound will be global. (Perfect for a music map, but beware, you will have to use code if you want to place multiple songs in the same game)
-
Enable Attenuation: Works alongside the one above, turning this off is a must, if you want a global music to be heard. or if you want to get rid of the Falloff, meaning the sound will be heard the same regardless of the distance.
-
Enable Occlusion: Occludes, suffocates the sound based on the geometry around it, good for bullets, good for impacts. But I do recommend disabling it most of the times, because it does reduce the volume some times in a weird way.
-
Auto Play: Self explanatory, but just in case, sounds with this option activated will be played as soon as the game gets loaded.
-
Transient: Sound will self-destruct after being played
-
Repeat: It will repeat after finishing playing.
-
Pitch: Move this bar to the right in case you want acute and fast sounds, move to the left in case you want to slow down the track and boost the bass.
-
Volume: Amount of power of the sound, sounds with more volume than others will likely be more heared.
-
Radius: The radial distance of the sound, the more the radius is, the further away you can be and still hear it.
-
Falloff: Additional radius to the normal/natural radius that helps to create a vanishing effect while you walk away from the sound.
-
Fade In Time: fading effect when the audio starts
-
Fade Out Time: fading effect when the audio stops
-
Start Time : the track will start in the precise amount of seconds given in this option.
-
Stop Time : the track will stop in the precise amount of seconds given in this option.
-
Code: Remember that you can introduce code to improve the overall functionality of the sounds, ill cover this part in detail in the section of suggestive sounds.
-
About Contexts : Always use client context for the sounds, the reason is pretty simple, you want your players to hear them, not the server. Also you could leave them on default context but putting them inside a client context folder serves as a small optimization as well, by doing so the sounds will be loaded on the PCs of your players and the server will have less weight to handle.
[3]
3: Environment Sounds
Brief reminder: This is the last time i'll write this reminder in the tutorial, at this point i am assuming that you have the downloadable project opened on your editor, and that you are inside the portal area (first portal) of Environment Sounds.
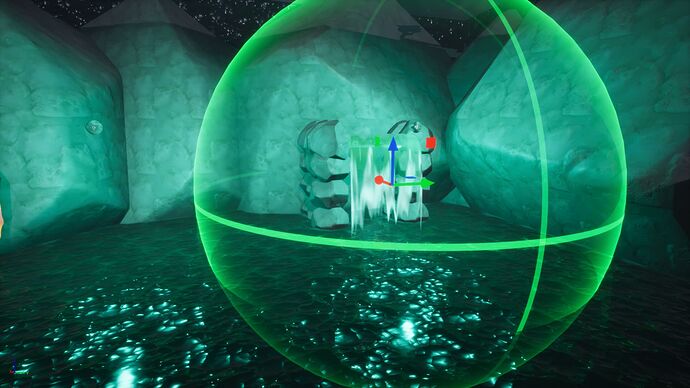
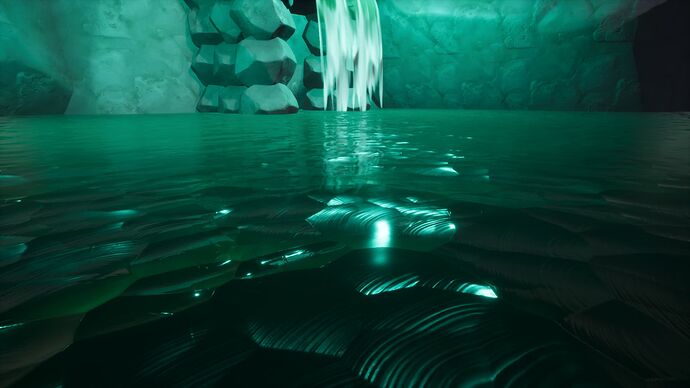
About Environment Sounds: As mentioned in the general knowledge section, Core provides a lot of sounds, one of these are environmental looping sounds (loop means something that repeats continuously) in this case, what we seeing is a waterfall sound.
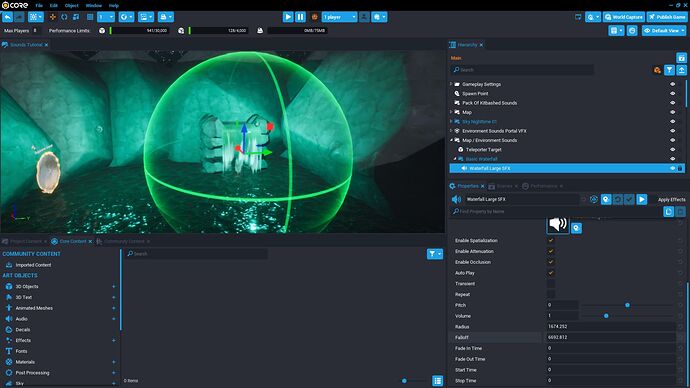
Settings of the Waterfall Sound
- Spatialization ON
- Attenuation ON
- Occlusion ON
- Auto Play ON
- Radius: 1674.252
- Falloff: 6692.812
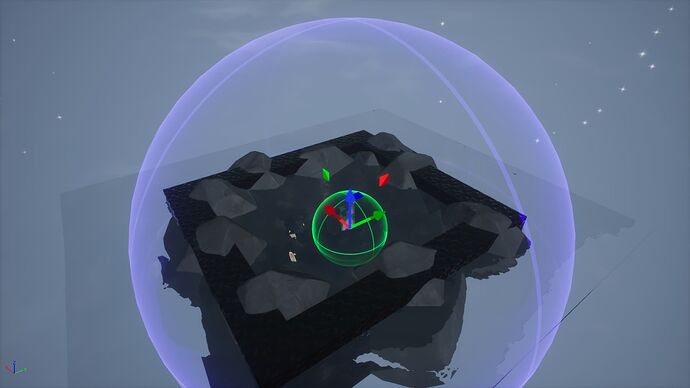
About Radius Settings for Environment Sounds: Why does the blue sphere have to be so big?
The answer to that is simple: it has to be that big, so you hear the waterfall from afar, like you usually would when you are approaching a waterfall, waterfalls in real life make a tremendous amount of sound, and they can be heard from a considerable distance. But the epicenter of the sound (green circle) is small, because we want our players to hear a maximum volume when they are really close to the waterfall, that means adjusting the green circle to the size of the actual waterfall.
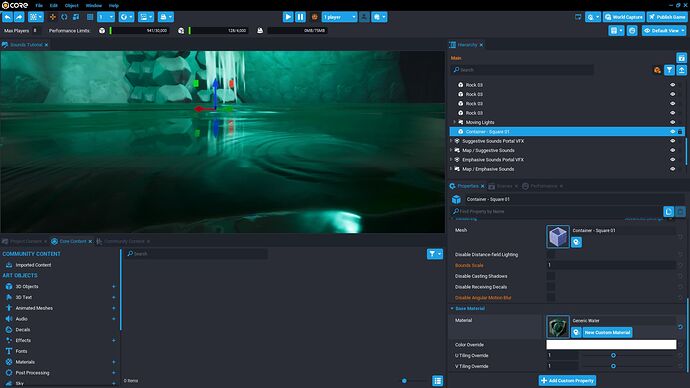
About the Water: Is just a container square. I mean it.
About the Water part 2: Placed properly above the obsidian "floor" because by doing so we enable the footsteps of our players to be heard as splashing water footsteps and this also enables a little bit more of realism to the scene.
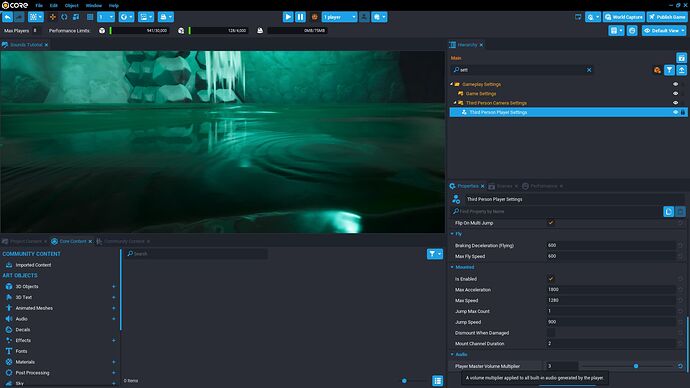
Dymamic Sounds: Most sounds are dynamically produced. So Core does provide built-in sounds. Sounds that can be heard when you jump, when you walk. (this does include the splashing water footsteps we are hearing) How to adjust the volume of those? See the image below.
Adjusting Dynamic Sounds: If you feel like dynamic sounds are useless for your project, which is perfectly fine, in case you want to develop a 100% unique project/game. just drag that bar to 0. And you will no longer hear built-in sounds. On the other hand if you want to hear them a little bit louder, as I did for this sample project, an amount of 3 or 2 is fine. Why? The built in sounds have low volume, so boosting them a little as an adjustment is fine.
Before Going to the next portal/section: Notice how we have created a simple, yet environmentally realistic feeling of a waterfall without even touching scripts. That is what you have to look for when working on sounds. use the right ones, and adjust its settings properly.
[4]
4: Suggestive Sounds
About Suggestive Sounds: These are the kind of sounds that only by hearing them you know what's happening, sounds that suggest what's next to come, or what is happening or what will happen. An additional example to the one provided in the sample project could be: a placed sound that only plays when you are choosing the right exit, in a maze-like game or a puzzle game, picture this: 2 doors, when you get close to the right one, a sound starts playing, when you get closer to the wrong one, nothing happens.
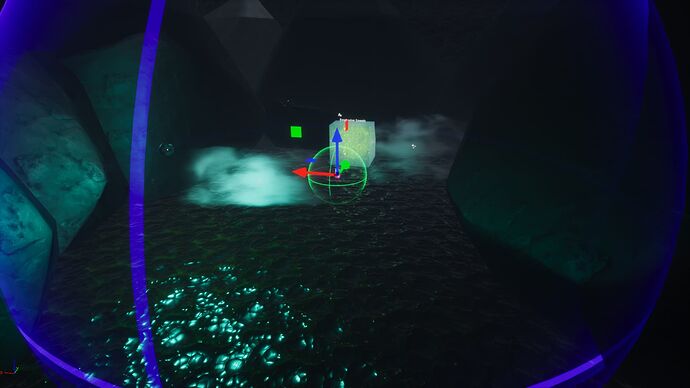
Components used for the Suggestive Sounds Scene: The interactive scene is composed of a cube, a sphere, a trigger, 2 scripts. and a lot of sounds and vfx.
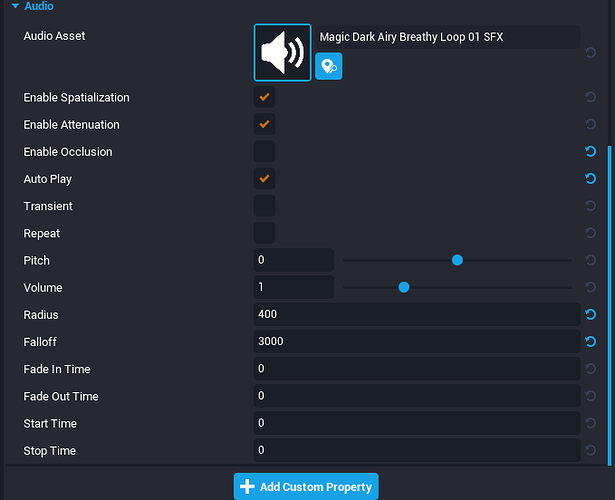
Sounds of the suggestive scene: All of the sounds and the complete scene was designed to grant an engaging experience as you may have noticed, when you enter the area you start hearing a dark whispering, well, that dark whispering voice is the sound that can be appreciated on the image above.
It is a Loop sound that is always playing, pretty similar to the waterfall sound. is there with autoplay on.
These are the settings of it, nothing complicated, as i already mentioned it's pretty similar to the waterfall.
How the suggestive sound scene was made:
Step 1: Imagine the scene you want made. I wanted to make something a little bit dark, so that's why I adapted the environment like I did.
Step 2: Added the wispy fog vfx, to add extra darkness feeling, not only the sound. After I had the main idea done, now the next step was to add a little puzzle on it. So why not blocking players in the area until they destroy the source of evil?
Step 3: Here is where we will get our hands dirty. Added extra sounds and vfx to suggest what was going to happen after destroying the source of evil. But first, we have to add the code to the sphere, so time to make it destructible! and this leads us to explain what is the meaning of kitbashing sounds and using code to make them work even better!
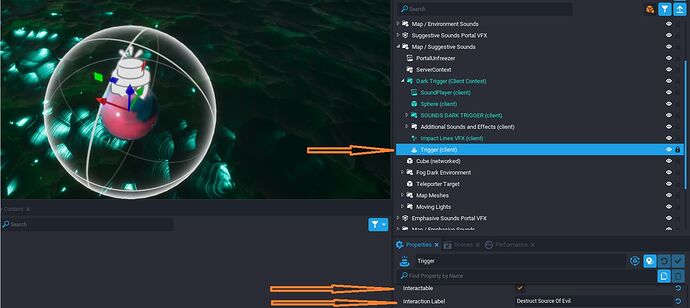
Kitbashing Sounds With Code: Is the art of creating new sounds, by making 2 or more sounds play nearly at the same time, to create 1 new sound. In this case I used a trigger, and kitbashed a lot of sounds to grant life to the scene. First off, look at the trigger on the image below.
The Trigger Is being used as a method of destructing the sphere, it works alongside the script named SoundPlayer , notice how it was set-up to be Interactable and the Label to be named " Destruct Source Of Evil"
So, now that we have our trigger placed, and well positioned as shown in the image (it must match the sphere, or be a little bit bigger than the sphere) we have to create the sounds that will be played after interacting with the trigger, ask yourself this question what sound will suggest that you are destructing something?
After you have finally figured out which sounds will be played after pressing "F" place them (you don't have to, since i already provided everything in the sample project, but i have to explain it so you will remember what to do or the process to do for your future projects.)
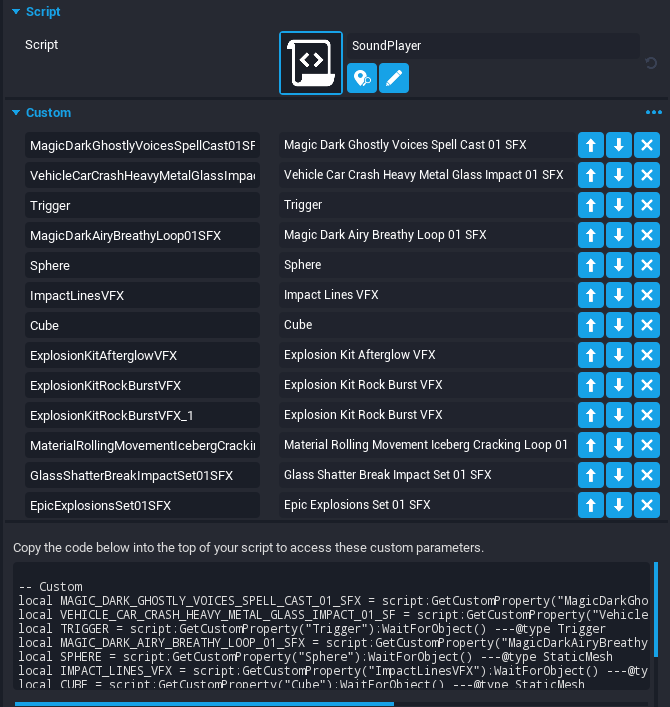
And reference everything you will use inside of the script, in case you still don't know how to reference CoreObjects to a script check this out. Custom Properties - Core Documentation
After you are done, the script might look something like this.
Looks scary right?
But it is not that scary after all, if you read and analyze the Core Objects referenced, they are all only VFX (Visual effects) And SFX (Sound effects) after all.
Why do we have to reference them? because that way, the script knows of the sounds existence and can communicate with them.
So after all is set up, and we have the trigger, the sounds and the visual effects referenced its time to open that script and you will see something like this.
--[Source Of Evil Sphere, Sounds Sample]--
--[By LumenDev]--
--We load the sounds, the trigger and the visual effects as local variables.
local Sound1 = script:GetCustomProperty("MagicDarkGhostlyVoicesSpellCast01SFX"):WaitForObject()     ---@type Audio
local Sound2 = script:GetCustomProperty("VehicleCarCrashHeavyMetalGlassImpact01SF"):WaitForObject() ---@type Audio
local Sound3 = script:GetCustomProperty("MagicDarkAiryBreathyLoop01SFX"):WaitForObject() ---@type Audio
local trigger = script:GetCustomProperty("Trigger"):WaitForObject() ---@type Trigger
local SPHERE = script:GetCustomProperty("Sphere"):WaitForObject() ---@type StaticMesh
local VFX1 = script:GetCustomProperty("ImpactLinesVFX"):WaitForObject() ---@type Vfx
local CUBE = script:GetCustomProperty("Cube"):WaitForObject() ---@type StaticMesh

function OnInteracted(whichTrigger, other)
	if other:IsA("Player") and Object.IsValid(trigger) then
		print(whichTrigger.name .. ": Trigger Interacted " .. other.name)

	    --Time to pause the looping sound!
		Sound3:Stop()

		--Sounds To Play Are placed Here
		Sound1:Play()
		Sound2:Play()

		--Time to simulate the destruction of the sphere with a simple but cool looking VFX
		VFX1:Play()

	    --We have to destroy the sphere! since its the source of evil!
		SPHERE:Destroy()

		--We Wait 2.5 Seconds Before Destroying the sounds otherwise we stop hearing them instantly.
		Task.Wait(2.5)

		--Now We Destroy Them

		Sound1:Destroy()
		Sound2:Destroy()
		Sound3:Destroy()

		--And the trigger & VFX as well...
		trigger:Destroy()
		VFX1:Destroy()
	   -- We could simply destroy everything by doing [ script.parent:Destroy() ] but you have to enable networking on the parent
	   -- And i wanted you to learn how you can test/destroy 1 by 1 each one of the objects we are using for this example.
	   -- Before Actually Destroying the whole thing.

	  --We add extra variables (To load the Additional CoreObjects we will use)
      local VFX1 = script:GetCustomProperty("ExplosionKitAfterglowVFX"):WaitForObject() ---@type Vfx
      local VFX2 = script:GetCustomProperty("ExplosionKitRockBurstVFX"):WaitForObject() ---@type Vfx
      local VFX3 = script:GetCustomProperty("ExplosionKitRockBurstVFX_1"):WaitForObject() ---@type Vfx
      local LoopSound1 = script:GetCustomProperty("MaterialRollingMovementIcebergCrackingLo"):WaitForObject() ---@type Audio
      local Sound1Glass = script:GetCustomProperty("GlassShatterBreakImpactSet01SFX"):WaitForObject() ---@type SmartAudio
      local Sound2EpicExplosion = script:GetCustomProperty("EpicExplosionsSet01SFX"):WaitForObject() ---@type SmartAudio

       LoopSound1:Play()
       Task.Wait(5)
       --Now we stop the loop.
       LoopSound1:Stop()
       --Client Sending a message to the server
	   Events.BroadcastToServer("UnfreezeTheCube", CUBE_1)
       --Play the right sounds at the right moment.
       Sound1Glass:Play()
       Sound2EpicExplosion:Play()
       --And add Cool VFX to it!
       VFX1:Play()
       VFX2:Play()
       VFX3:Play()


	end
end

trigger.interactedEvent:Connect(OnInteracted)
Ok as you might see, all the provided code is commented before going into the next line, if you are really new to coding i'll suggest that you read really carefully each of the comments. The code provided is self explained. and i believe it is perfectly explained so anyone might understand it. if after re-reading it more than 10 times and still you don't understand it, check the basic scripting tutorials, since this script is big, but not complex at all. Basically it just loads the sounds, and plays them at the right moment.
Also the Client side script sends a message to the server side script, so the server script is capable of destructing the cube. And this is why the ice cube has to be networked.
Server Side Script
Task.Wait(2)
local myEvent

myEvent = Events.Connect("UnfreezeTheCube", function(CUBE_1)
    --We make it work
   local OBJECT_TO_DESTROY = script:GetCustomProperty("ObjectToDestroy"):WaitForObject() ---@type StaticMesh
   OBJECT_TO_DESTROY:Destroy()

    -- Check if myEvent is connected, if so, disconnect.
    if myEvent.isConnected then
        myEvent:Disconnect()
        myEvent = nil
    end
end)
Step 4: After we are done with our scripts and sounds, we have to arrange them inside the client context, properly. and put order into them, you can check the hierarchy order i am using inside the sample project for further trigger-like sound components.
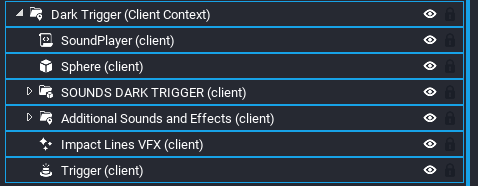
Kitbashed Sounds Used To Make the Scene Possible
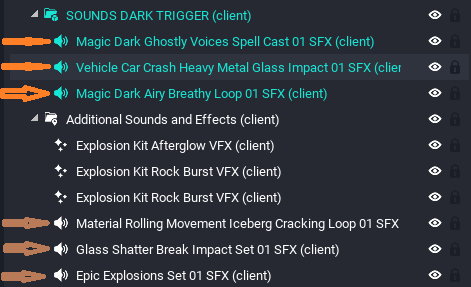
Orange Arrows Displaying the kitbashed sounds being used by the sphere and its destruction.
Brown Arrows Displaying the kitbashed sounds used by the cube, and when it does finally melt in a epic way.
I'm pointing them out, because when you are playing it, it feels so suggestively natural, that it might be passed unnoticed by the fact of having so many sounds playing together to grant a final user experience. And that, is kitbashing your own sounds to grant your players the desired experience.
[5]
5: Emphasized sounds
Explanation of Emphasis
So what is emphasis , we have broken the big ice cube and now i'm trapped in a new scene. What does this mean? and why is it important?
Well, emphasis means: "special importance, value, or prominence given to something."
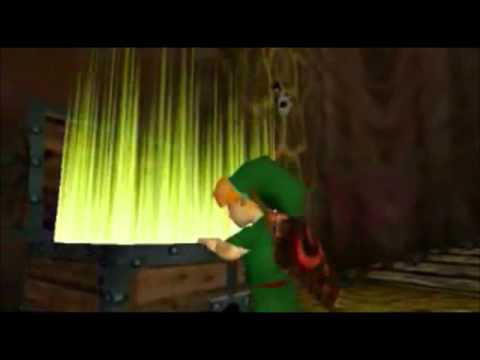
Video games are full of emphasized sounds, the moment you open a chest on the Legend of Zelda Ocarina of time, by example.
As you might notice, all of that is utterly "unnecessary" but it is engaging, it looks cool, looks professional as well, and it was perfectly well done by the devs team of Zelda.
So i highly recommend that you use as much as possible emphasized sounds, it doesn't matter if it is about opening a chest, or clicking a UI Button, emphasized sounds done properly leads to a better and more enjoyable playing experience. Just mute the provided Zelda video and watch the difference.
How the emphasized sounds scene was made
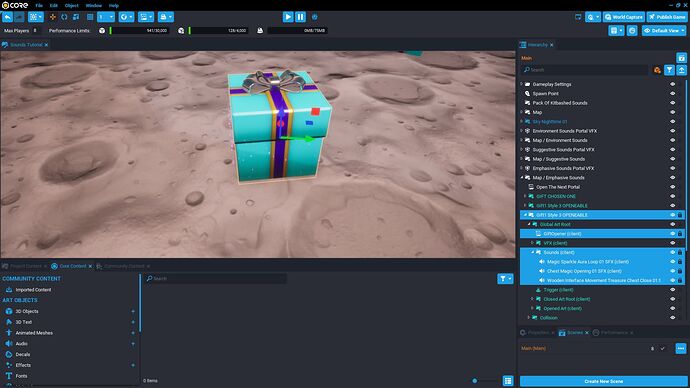
- 3 Kitbashed Sounds
- 1 Script
- Inside Client Context
Why a gift? and not a chest like zelda? Because why the same? so many other things can have emphasis, for example, after killing a player in a deathmatch an emphasized UI message could pop-up saying "Rampage" and the voice of the announcer, saying so. Or, simply opening a gift can be emphasized as well with kitbashed sounds and vfx!
About the Gifts Script: It is pretty similar to the one used by the suggestive sounds scene. It loads sounds as variables, and plays it at the right moment based on whether the gift is being opened or closed.
--[[  Basic Gift Opener By LumenDev
                 V1.0               ]]--

local CLOSED_ART = script:GetCustomProperty("ClosedArt"):WaitForObject()                                       ---@type NetworkContext
local OPENED_ART = script:GetCustomProperty("OpenedArt"):WaitForObject()                                       ---@type NetworkContext
local trigger = script:GetCustomProperty("Trigger"):WaitForObject()                                            ---@type Trigger
local SOUND_WHEN_OPENING = script:GetCustomProperty("SoundWhenOpening"):WaitForObject()                        ---@type Audio
local SOUND_WHEN_CLOSING = script:GetCustomProperty("SoundWhenClosing"):WaitForObject()                        ---@type Audio
local SOUND_PLAYING_BEFORE_OPENING = script:GetCustomProperty("SoundPlayingBeforeOpening"):WaitForObject()     ---@type Audio
local TREASURE_RAY_BURST_RED = script:GetCustomProperty("TreasureRayBurstRED"):WaitForObject()                 ---@type Vfx
local TREASURE_RAY_BURST_GREEN = script:GetCustomProperty("TreasureRayBurstGREEN"):WaitForObject()             ---@type Vfx
local TREASURE_RAY_BURST_WHITE = script:GetCustomProperty("TreasureRayBurstWHITE"):WaitForObject()             ---@type Vfx


function OnInteracted(whichTrigger, other)

if other:IsA("Player") then
	--print(whichTrigger.name .. ": Trigger Interacted " .. other.name)
--Current Status of the Folders
if OPENED_ART.visibility==Visibility.FORCE_OFF
and CLOSED_ART.visibility==Visibility.INHERIT
----------------------------------------------------------------------------------------------------------------------
then
--Stuff That happens when we open the gift
OPENED_ART.visibility = Visibility.FORCE_ON
CLOSED_ART.visibility = Visibility.FORCE_OFF
SOUND_WHEN_OPENING:Play()
SOUND_PLAYING_BEFORE_OPENING:Stop()
--VFX
TREASURE_RAY_BURST_RED:Play()
Task.Wait(0.2)
TREASURE_RAY_BURST_GREEN:Play()
Task.Wait(0.2)
TREASURE_RAY_BURST_WHITE:Play()
----------------------------------------------------------------------------------------------------------------------
elseif --Checking the status of the gift, must match the opened status.
OPENED_ART.visibility == Visibility.FORCE_ON
and CLOSED_ART.visibility == Visibility.FORCE_OFF


then
--Stuff That happens when the gift gets closed
OPENED_ART.visibility = Visibility.FORCE_OFF
CLOSED_ART.visibility = Visibility.INHERIT
SOUND_WHEN_CLOSING:Play()
SOUND_PLAYING_BEFORE_OPENING:Play()

  end
 end
end

trigger.interactedEvent:Connect(OnInteracted)
About the Gifts Script Part 2: Everything in use by the script is placed under Client Context, it makes use of IF statements to know when the gift is opened or not. Might look scary but it is not that scary, read the lines of code carefully and with patience.
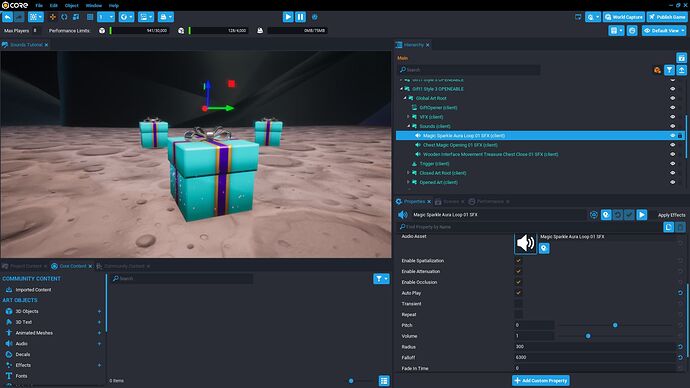
Special Mention of one of the sounds in use: That particular sound is a great example of what I have previously written in this tutorial. Notice how "Magic Sparkle Aura '' didn't require at all a modification on the Pitch, or an Apply Effect box being active. Why? because its perfect. its perfectly doing the emphasis of something magical. In this case, the magic of a gift is about to be opened.
After opening all the gifts, the next section will be unlocked
[6]
6: Natural sounds
Natural Sounds Meaning: They are the sounds that literally sound natural. A footstep sounds natural, a jumping grunt, sounds somehow natural as well, the sound of moving an object, and so on... natural sounds are those that you expect to hear because in real life you hear them when interacting with the real world. The wind, trees moving, and so on. (But it is not tied precisely to the sounds of the nature) the sound of a car engine could be cataloged as natural as well. i mean if the car is moving you expect to hear the engine, right?
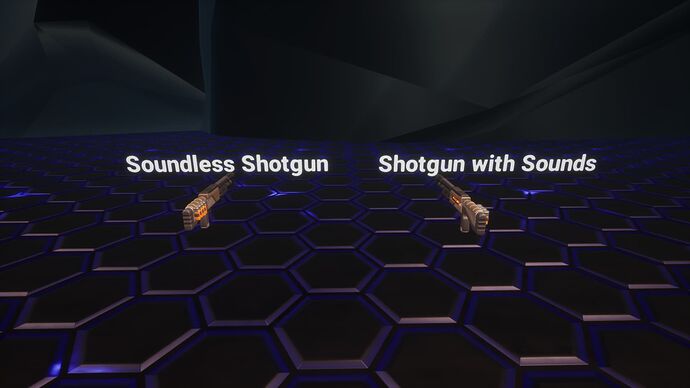
For this particular matter I have placed 2 shotguns in the scene, shoot the soundless shotgun first.
Then the other one, and feel the difference.
Surprisingly it is exactly the same shotgun, the only difference is literally the sounds. they do the same amount of damage, spread, speed, everything its the same except the sounds.
The importance of Natural Sounds: I know that sometimes it is something boring trying to figure out which sounds are missing in a game, and that working this part could be somehow boring for some developers. but it is important, because when you are playing a game full of natural sounds it feels better, more engaging overall. Just give a check to all the AAA Games out there, some are really careful with this part, some have created sounds for every footstep, gun, when colliding with each different surface, voices, when throwing objects, and so on... They do bring realism and realism brings a most engaging experience for the players.
[7]
7: Kitbashing new sounds.
Why Kitbashing New Sounds? It might be the case (this happens often to me) that you want to create a really amazingly sounding plasma gun shot. but is not there! i have typed in the sounds search bar " amazing plasma gun sound" and nothing is showing up, why? Because we have to make it.
But worry no more! I will guide you through this process.
Method to Kitbash and Create New Sounds
Note: The steps are referring to hypothetical sounds just to teach out the creative method of
creating kitbashed sounds. (However if you want real examples, check the ones i have previously explained in this tutorial, inside the suggestive sounds section)
Step 1: First off we will need 1 sci-fi sound (they do exist, plenty of them) with a great bass.
Step 2: Now grab another gunshot-like sound, it could be from the pistol gunshot sounds as well.
Step 3: Merge them inside a client-context folder with Autoplay Enabled.
Step4: Test them!
Step5: Ask yourself, does that merging of 2 Sounds sound well? or it sounds worse when playing at the same time? If the answer to this question is Yes, they sound well and better when being played together leave it as is. Otherwise modify the settings and read the next Step.
Step6: What is missing? Does the sci-fi bass sound too loud? Reduce the volume then. from 1 (default) to 0.5 does the gunshot sound cannot be heard at all? boost the volume from 1 to 1.5.
Test Again
Step7: Still sounding bad? Because I'm hearing the acutes of the sci-fi and i only want the bass of it. Well it's Time to adjust the "Start Time" property to match exactly where the bass part is being played to 0.7
Test Again
And we got it! Our kitbashed Plasma gunshot is sounding original, its unique and was handcrafted from scratch.
That is the method of kitbashing new sounds and can be applied to anything. The idea is to get sounds that are similar to what you want to create or re-create and by adjusting the right settings, you can even create new completely functional sounds. My Main game is full of them. and the method written above is the way i made them.
Every Single Weapon Inside Lumen Arena Has Kitbashed Sounds
[8]
8: Music kits
Music... who hates music?
No one as far as i know.
And if it does exist anyone that hates music... well... that's rare.
Core provided a lot of music tracks, don't worry about copyright since I have just mentioned they are provided by the platform. Feel free to use all of them! But beware... meaning you have free music does not mean that you cannot end up failing and hard by placing a lot of music objects in the world.
So you might need to know how to use them since some of the music files are actually modifiable. And I'm here to help.
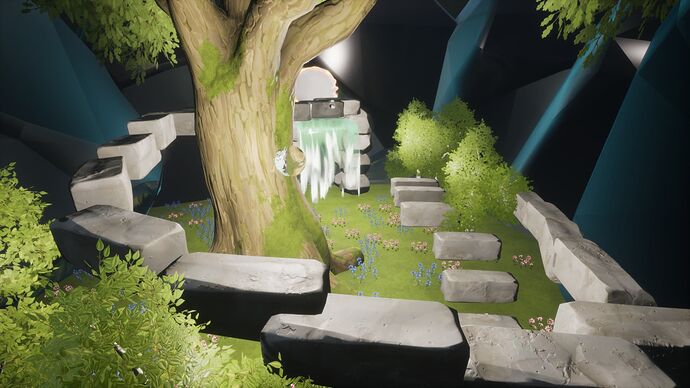
That area looks like a forest, a really basic one. but it does get really engaging when you are there hearing the music being played. it just feels more natural and enjoyable than well... not having music playing on the background.
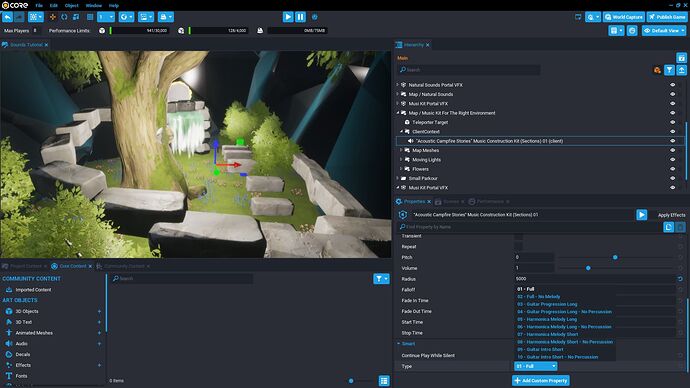
Notice How the track has a big blue button at the bottom of it, allowing us to change the way the track plays.
Notice as well how I selected the track for that environment. Imagine being there, with metal music playing in the background, would be weird don't you think?
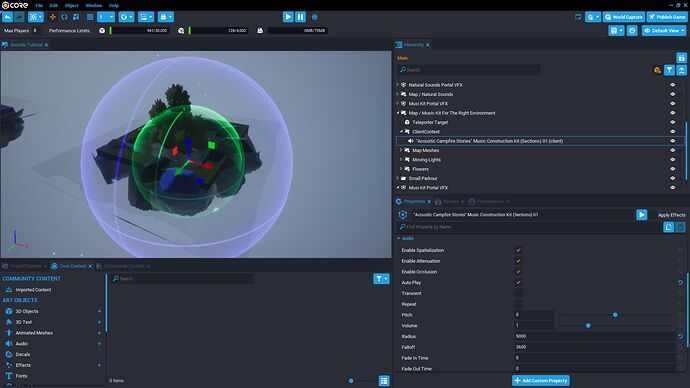
This image does provide a better look of the settings and how i adjusted them.
How to make a song/music set global or local
Global songs: If your goal is to make a song global, so it can be heard all the time, regardless of the player position, just uncheck all the Audio properties and leave "checked" the Auto Play one.
Local Songs: Use similar settings to the ones I just provided in the image above.
Note: you have to be really cautious with this, because if 2 files overlap the radius of the music, players will be able to hear 2 songs being played at the same time and it does sound really bad.
Recommended practice: Use 1 song per map/scene. And adjust the volume of the song, not all the songs / music sets on core will be loud enough when playing at 1 of volume.
Finally, we have come to the end of the Tutorial. Now you should be able to kitbash your new sounds, be more wise in which sounds to create and why. How to use sounds to provide your player base with a better gameplay experience. And the most important of all is how to use code to add that extra functionality to sounds!
Remember, sounds are a relative matter, use what you consider that will be good for your projects.
