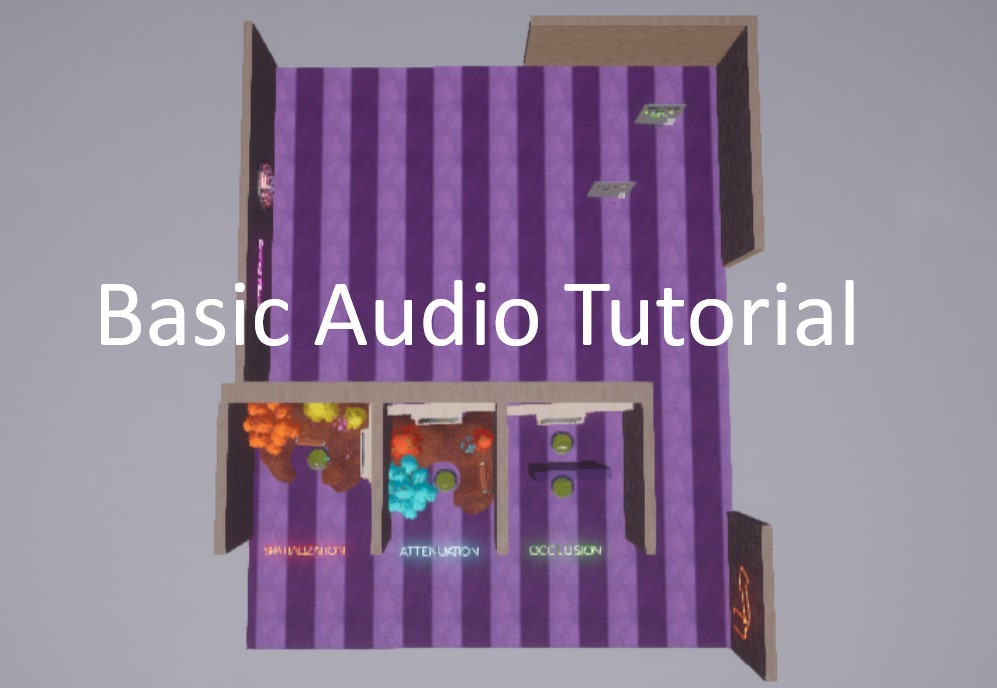
GUIDE TITLE: Basic Audio Tutorial
ESTIMATED COMPLETION TIME: 30 Minutes
CORE VERSION: 1.0.226-prod-s
SUGGESTED PREREQUISITES: Introduction to the Core Editor
TUTORIAL SUMMARY:
In this tutorial you go to learn the basics and kitbashing of audio in Core.
EXPECT TO LEARN:
· Audio in Core
· Audio properties
· Audio types
· Adding audio
· Kitbashing audio
· Important Notes
Overview
This tutorial is designed for beginners. Other ways to use audio in Core are not covered by this tutorial such as using audio through triggers or scripts. With this tutorial you will learn the basics and how to modify or create new audio files that fit your project.
Audio in Core
Audio side of Core editor is an important part for developers. Core offers us a bunch of tools and all types of audio files to make any game sound as it deserves. At first, due the amount of audio files in the editor can be tricky start with, but in this tutorial, we cover the basics to understand in 1 read all related to audio in the Core editor and how to implement and kitbash to fit your scenes.
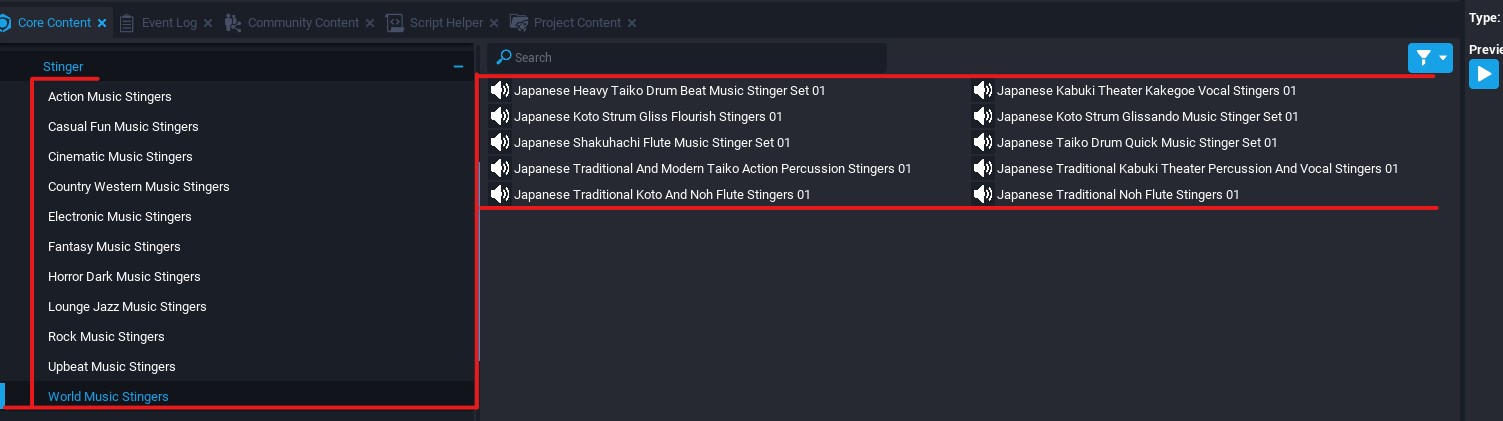
Let’s start looking at the Audio section under Core Content tab. As we can see, there are a lot of audio files that can be confusing looking this way.
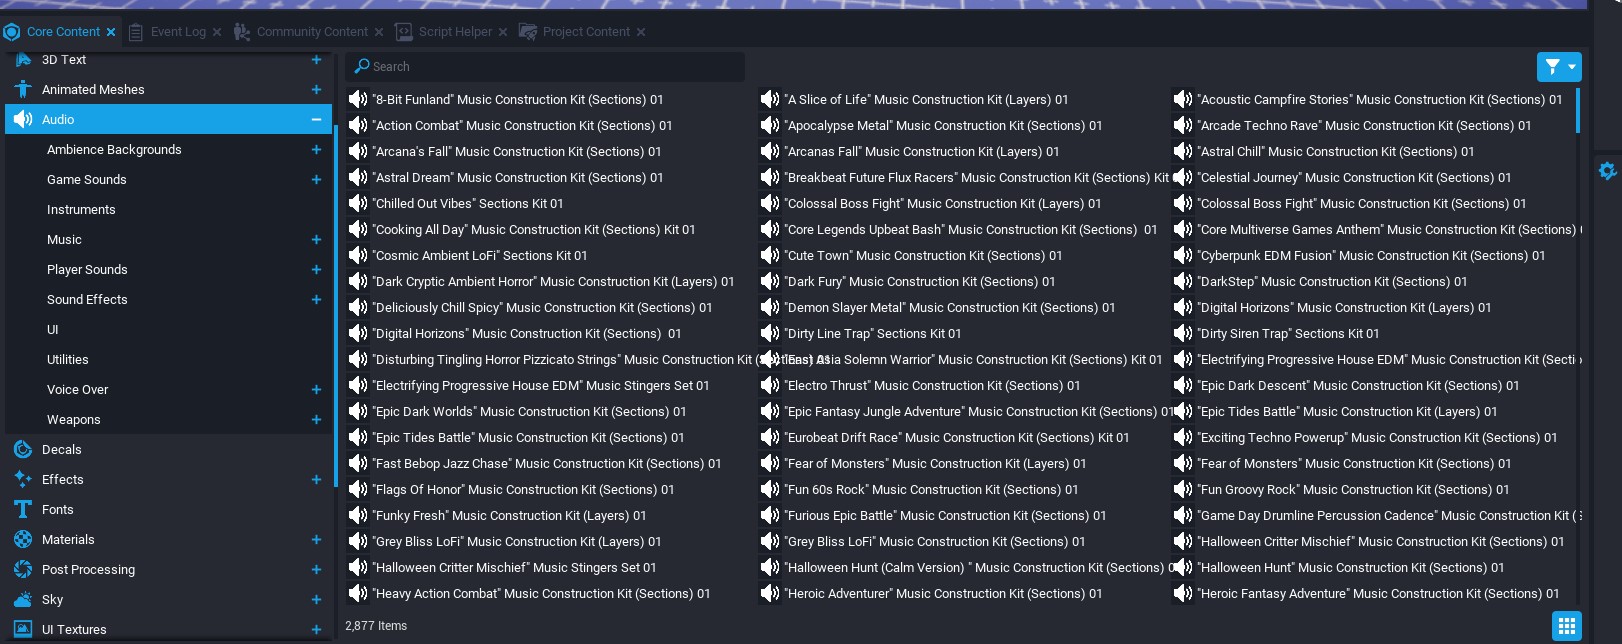
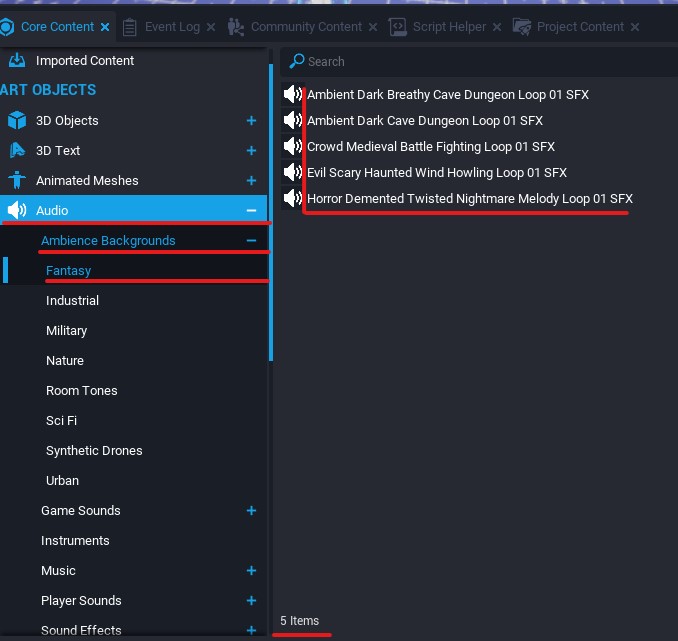
All those files have different options or are different from each other. Some are songs, others are sounds, others are instruments, kits, etc. We have all that organized by type down the Audio section of the Core Content. Let’s go open the first, called: Ambience Backgrounds. Once again, those sections are organized by type and under those types we can select the audio file that most fits our needs. For example, we go to open the Fantasy section and we can see that there are 5 audio effects that are Fantasy Ambient Backgrounds for our games.
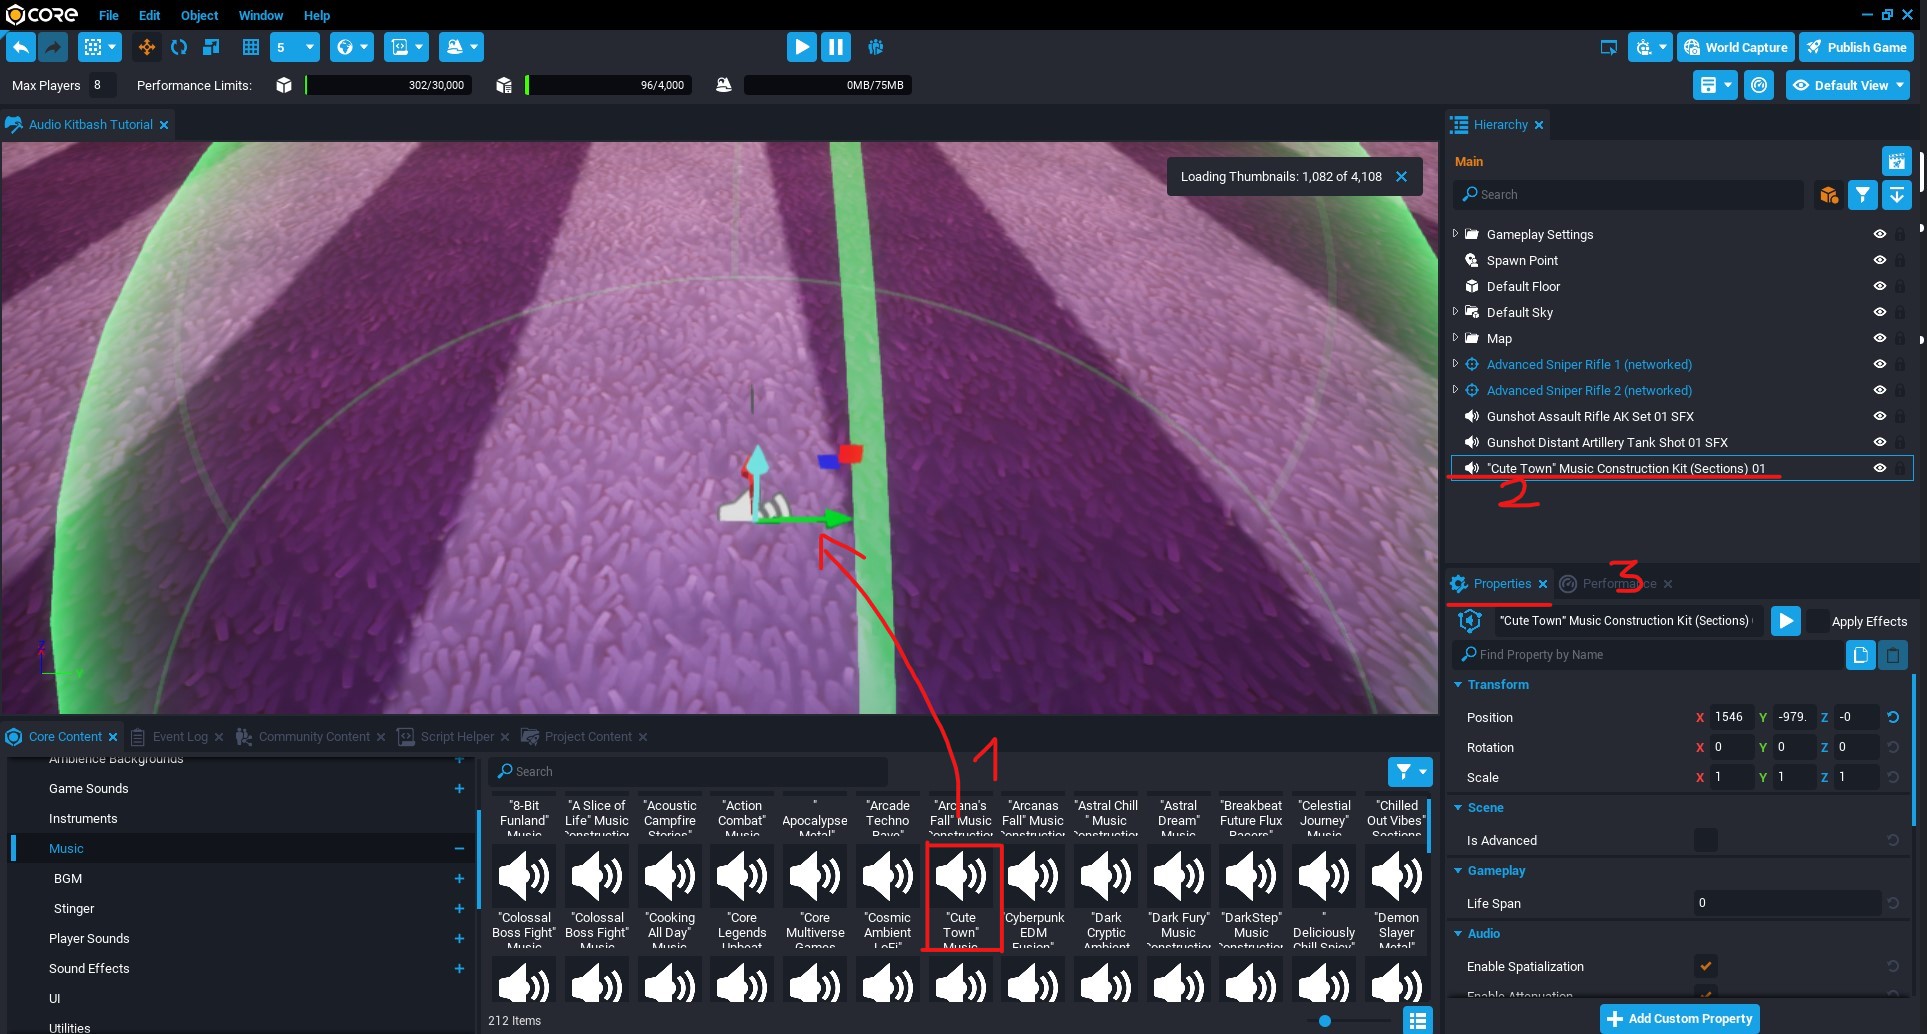
For this example, I go to use “Crowd Medieval Battle Fighting Loop 01 SFX” but you can test with any other of your likes. Click on the audio file, drag it to the Hierarchy and the properties tabs appear.
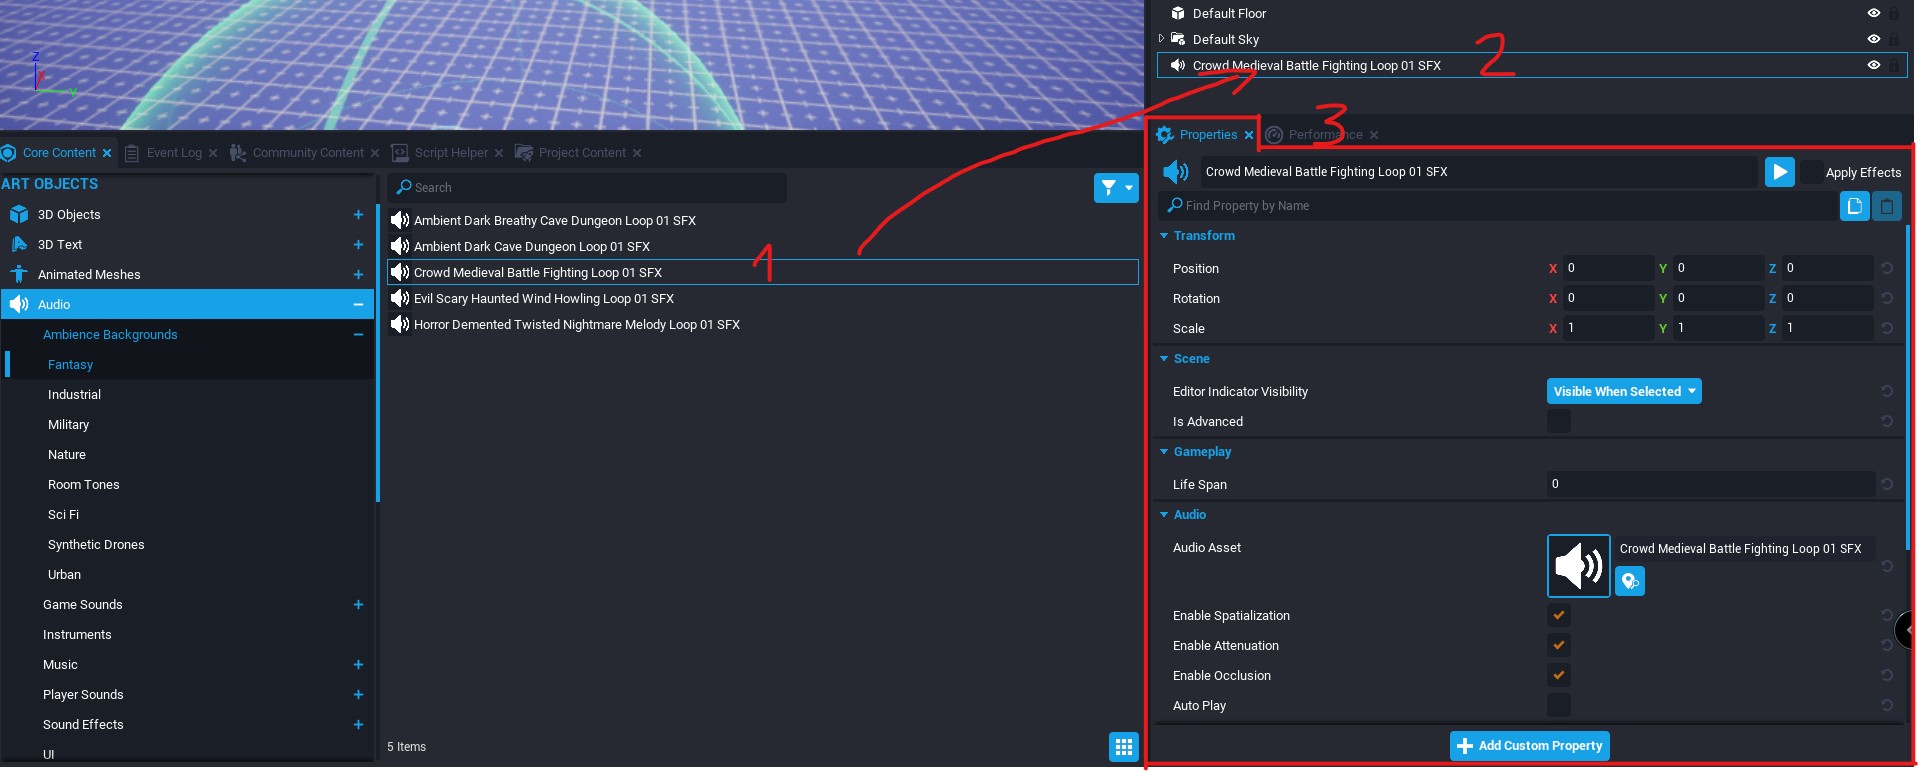
In the properties of any audio file, we have all tools we can use to modify the sound of the audio file. We go 1 by 1 clarifying what each option does.
For the tutorial purpose, we can hide the 3 first sections and center on the audio file as show below:
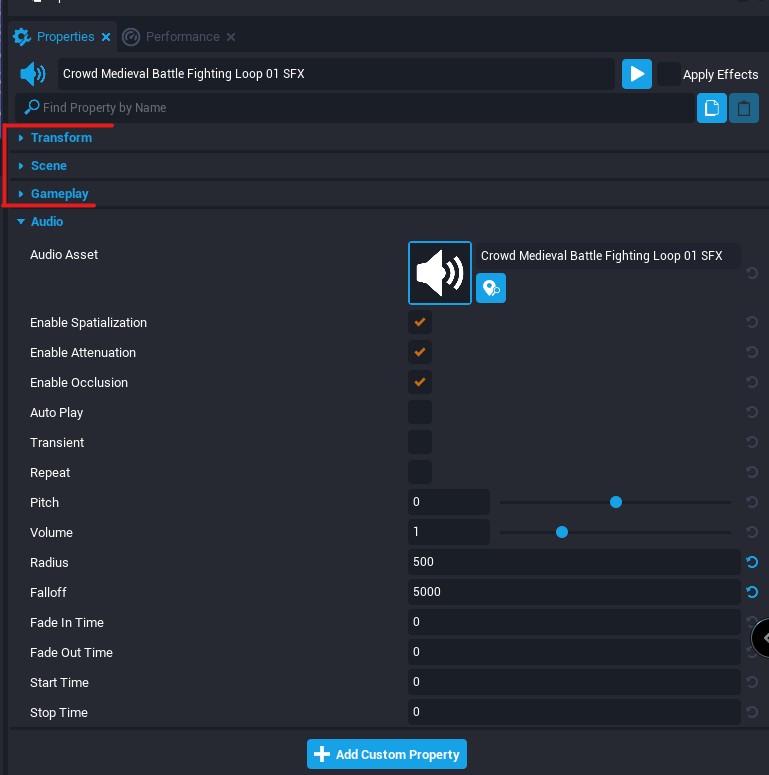
Audio Properties
At the Properties tab, we have 2 options up the right side of the tab. The first is Play, to play the audio file and the second is a box to tick: Apply Effects. That box should be ticked if you go to modify the file. If not, the audio file plays its raw format in the preview. Hover over it to get more information.
Down the Audio Asset we can see:
· Spatialization * : How the player hears the sound determined by the player's position.
· Attenuation * : How the player hears the sound determined by the player's distance.
· Occlusion * : How the player hears the sound determined by any obstacle between player and the sound source.
· Autoplay: If the sound should be audible at start.
· Transient: If the sound should be destroyed once played.
· Repeat: If the sound should loop.
· Pitch: How fast or slow the player hears the sound.
· Volume: Default = 1. Adjustable audio volume.
· Radius: How far the player hears the sound at max volume.
· Falloff: How far the player should be to start decreasing the sound till it stops.
· Fade In Time: (In seconds) How long the fade in effect applies until reaching the max volume.
· Fade Out time: Vice versa. From where the sound starts to decrease till it stops.
· Start Time: Time to skip in the audio file till it starts in seconds.
· Stop Time: Time where the audio file stops in seconds.
NOTE: Start Time and Stop Time only works in Preview mode.
*Examples are in the template:

Audio Types
There are some types of audio files to take into account before we get lost into hundreds of files. That are:
Normal Audio File: Can be from a note of an instrument to a stinger. That means is a raw audio file, no effects, is not a part of a kit, just an audio file with no extra properties.
Smart Audio File: That type of audio file has extra properties called Smart and is visible down the Properties of the file.
Construction Kit: Can be anything too, from an effect to a song. These kits are composed by Layers or Sections.
· Layers : Normally instruments but also effects that are in a song.
· Sections : Sections of complete songs to use independently or mix with other audio files.
Other audio files are in the Core Content but that is the most we need to take into account. Let’s go a bit deep into kits, layers and sections.
Smart audio files
Smart audio files have other section down the Properties tab called Smart. Some of those smart archives are sections that are composed by other segments and you can select which one you prefer instead of the premade. To see all the segments under that audio file, drag a file into the editor and automatically is added to your Hierarchy. Go to the Properties tab and click on the arrow as seen below:
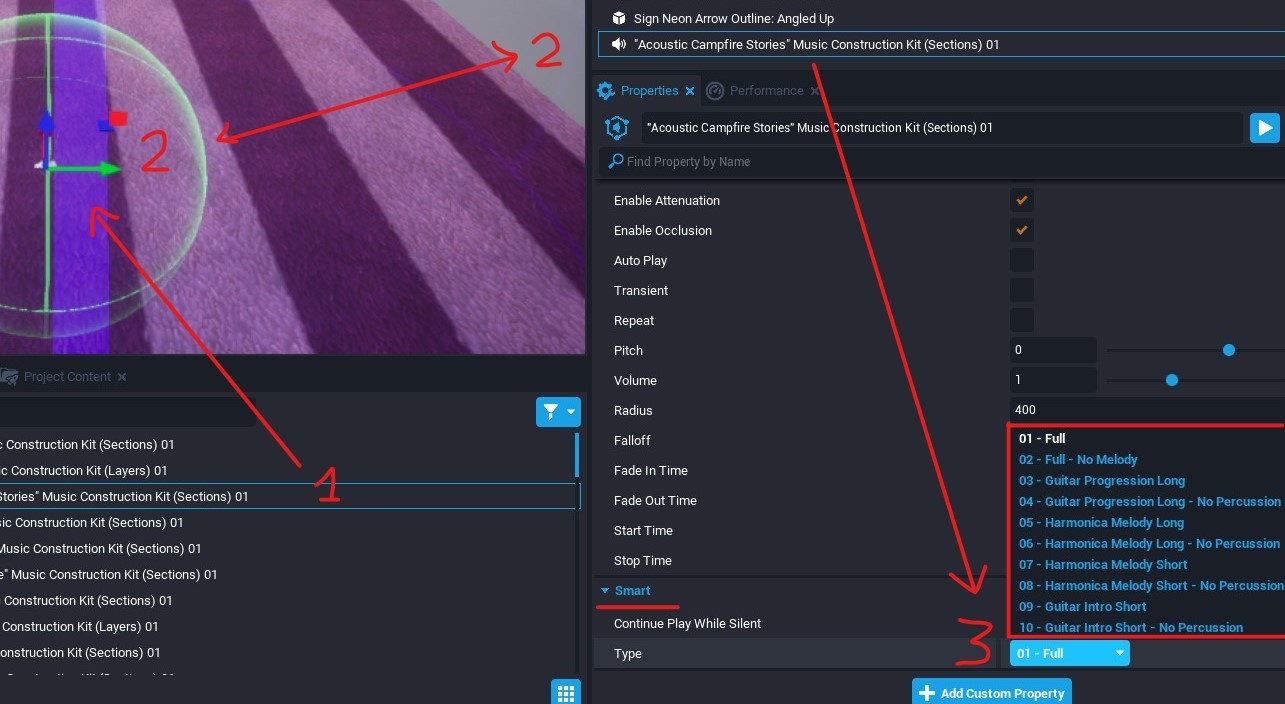
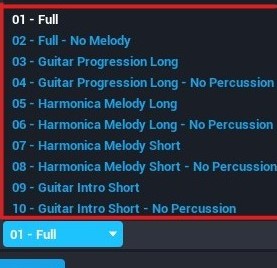
The file I selected “Acoustic Campfire Stories” is a Construction Kit. That means we have available all the things needed to build it as we saw in the past pic. We can tweak each of the 10 premade sections in the kit. Remember to tick Apply Changes.
Layers
Other files are composed by Layers and each layer usually is an instrument or a simple sound. You can think in Layers in the same way you see a multi-track mixer in a music studio. Each layer is a channel. Mixing the channels in the proper way until you get a song, a background ambient sound, a specific scene sound, etc.
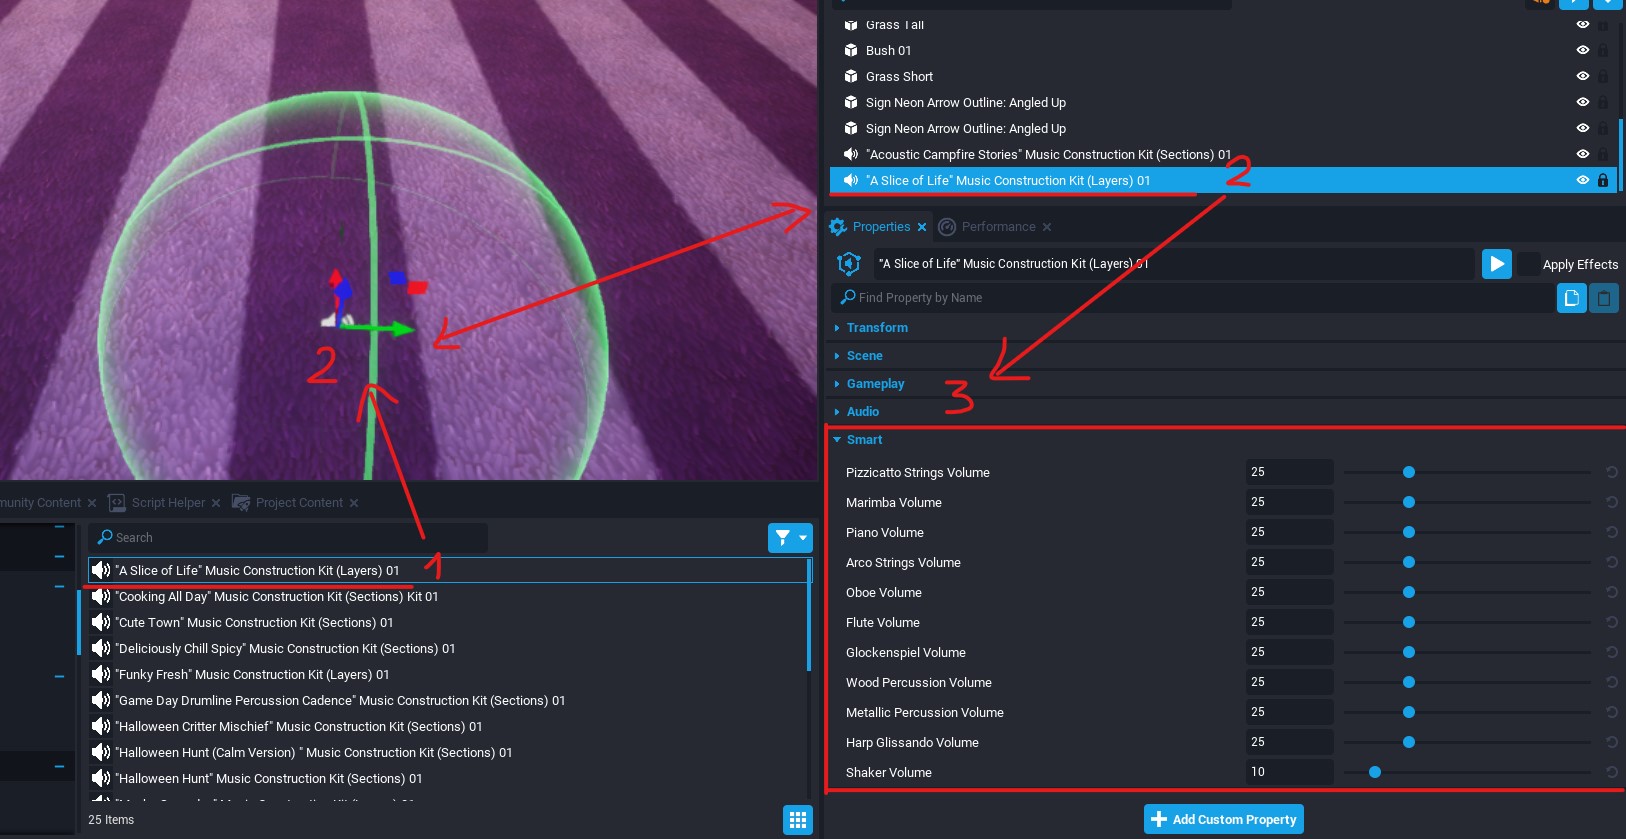
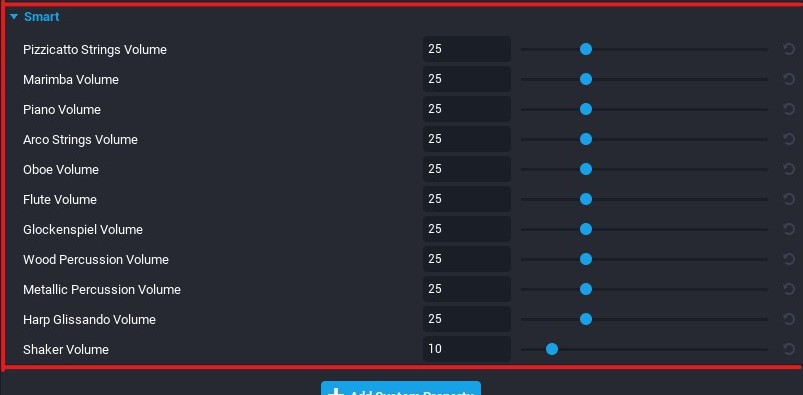
Go to the Core Content and type “A Slice of Life” Music Construction Kit (Layers) 01. Drag it to the editor and go to the Smart section of the Properties tab. Now are visible each instrument that is in the file.
Sections
Other kits come in Sections and mixing sections is another way to get a song, background music, effects, etc.
Stingers
Stingers are small pieces of audio specifically designed to add to other kit, song, etc. They are** thematic . That way it is easy to find the ones better fit in your project BUT that does not mean they need to be used in a scene that fit the audio file name. You can use any sound for any situation.
Instruments
We have 30 instruments to make our compositions. The way they are modified are shown below:
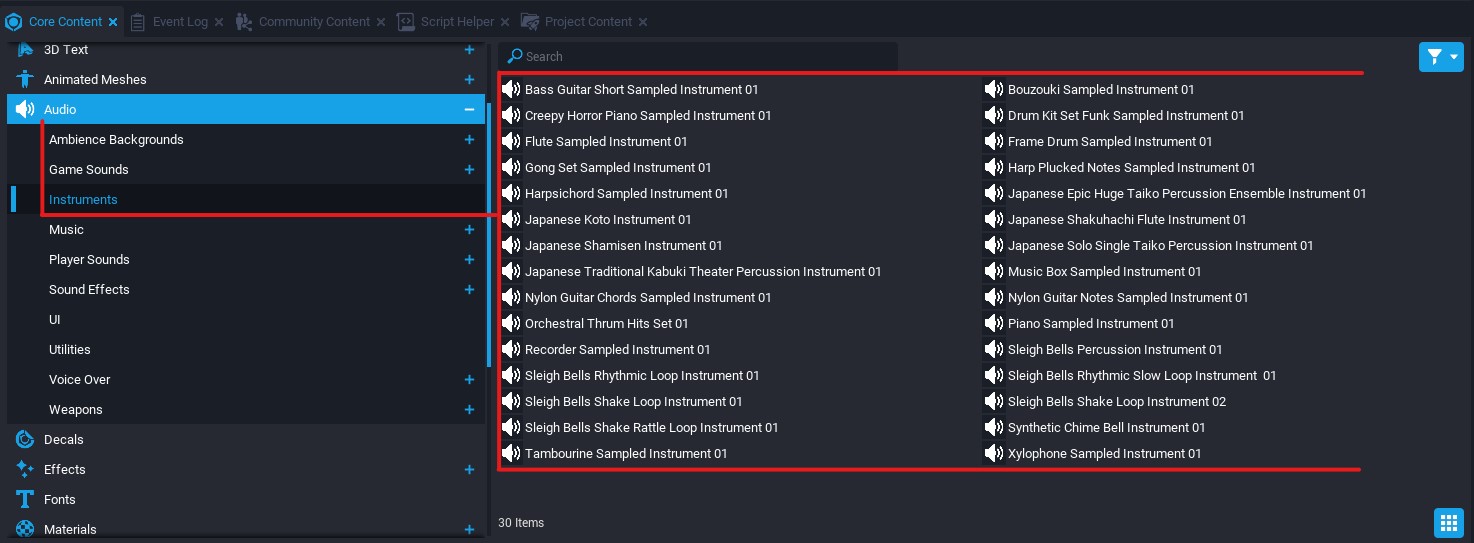
Each instrument is divided by octaves. You can play around till they fit your project.
Other types are Player Sounds, UI, Weapons, etc. But they are most effects to kitbash with it.
Effects
In Core there’s a bunch of simple effects to apply directly to the scene but even more that are a combo of various effects and that is the previous step before we are going to do something cool at editor.
We all know what a sound effect is but at the moment of building a scene, many things can get you out of immersion and the most noticeable is sound effects. You expect a visual effect and a sound effect when shooting for example. That’s the minimum cause can be applied more and more sound and visual effects to a simple shot.
At the Core Content go to Audio>Weapons>Firing and drag to the scene the audio file “Gunshot Sniper Rifle Set 01 SFX”. At the Properties tab you can see how that effect was build and tweak at your desires as seen below:
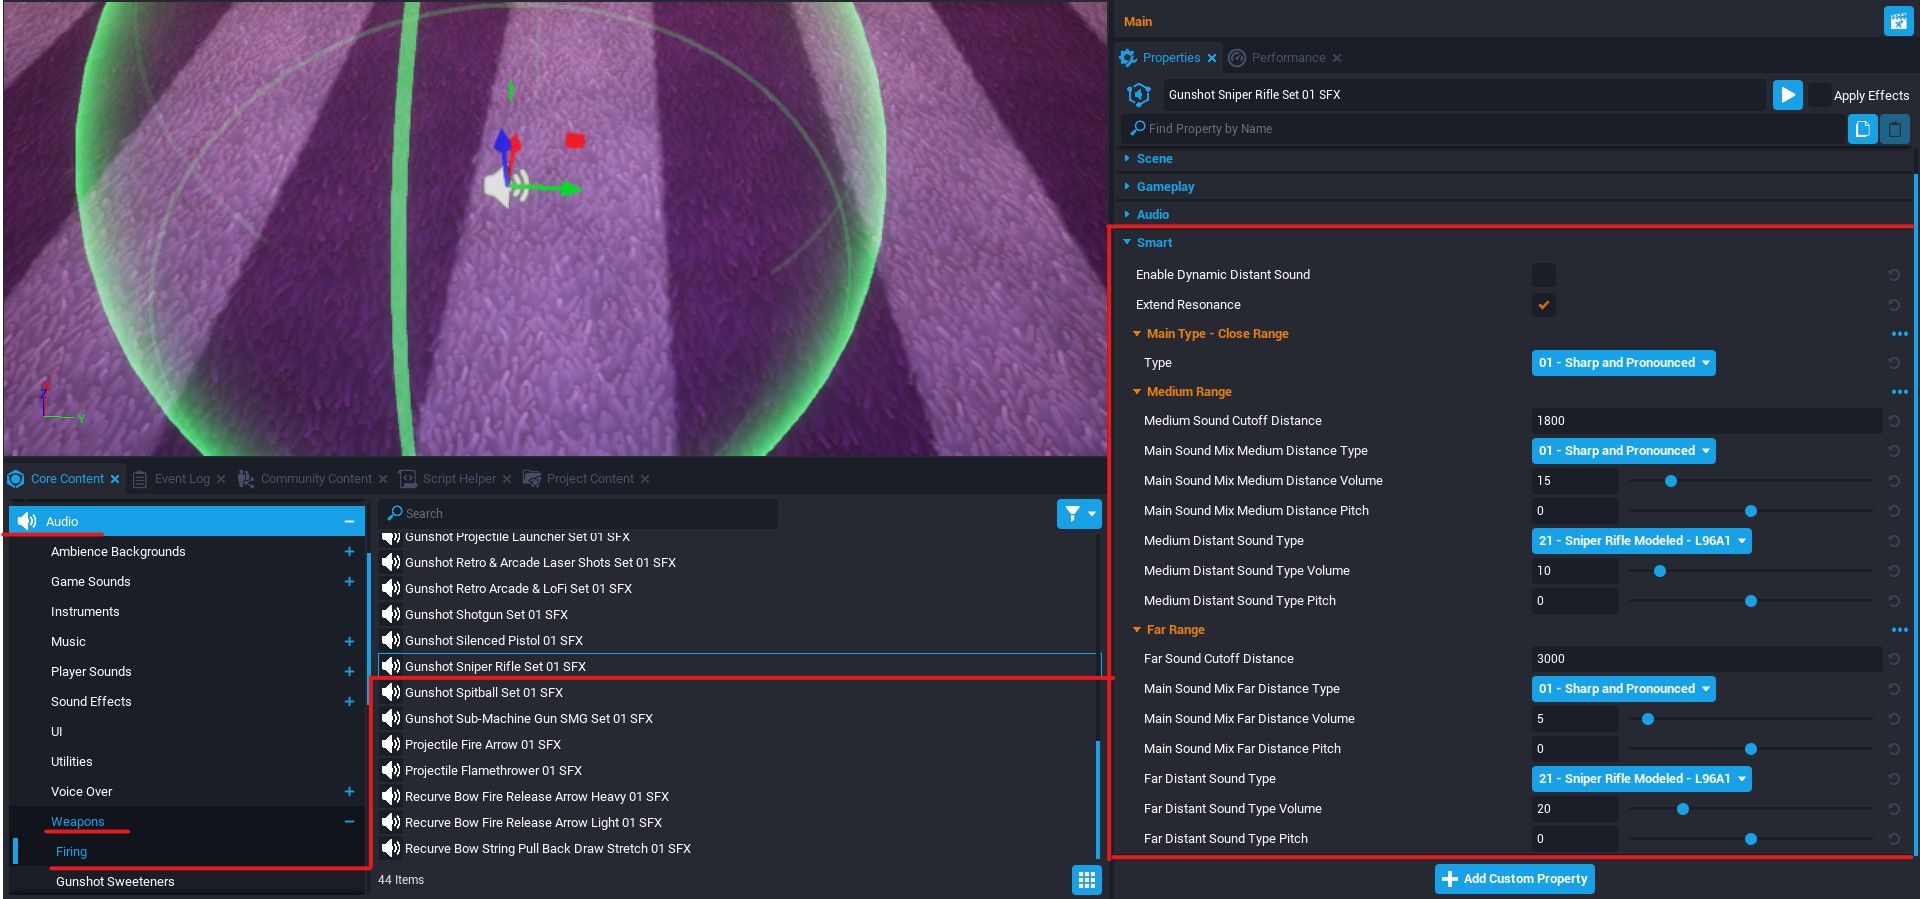
If you deploy each list, you can see a lot of effects to modify to your liking that audio file effect and make it fit perfectly in your scene. This brings us to the next step. How to do it?
With the Gunshot Sniper Rifle Set 01 SFX in the scene, we start by checking each audio that is in the separated sounds under that audio file. We can test 1 change per sound, apply effects and see how it sounds.
Adding Audio
To add any audio file to your project, drag it to the scene where you need it or to your Hierarchy. Click in the audio file on the Hierarchy and go to the Properties tab to have access to all tools for the audio file. Tweak as your needs, remember to tick Autoplay and tick Apply Effects. Done!
Kitbashing
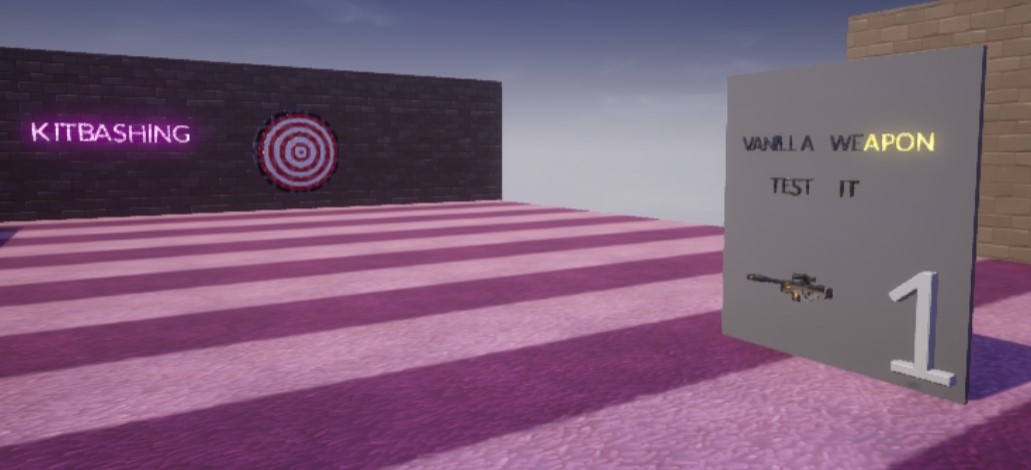
With the number of files at our disposal normally we can find what we need at the Core Content but sometimes we need something particular or we do not like some aspects of a sound. We can modify or make our own. That’s called kitbash. Kitbashing audio files are similar to kitbash 3D models; modify it till we get what we need. For the next steps you can download the project provided and open it in your editor if you want a more accurate vision of what we are going to do.
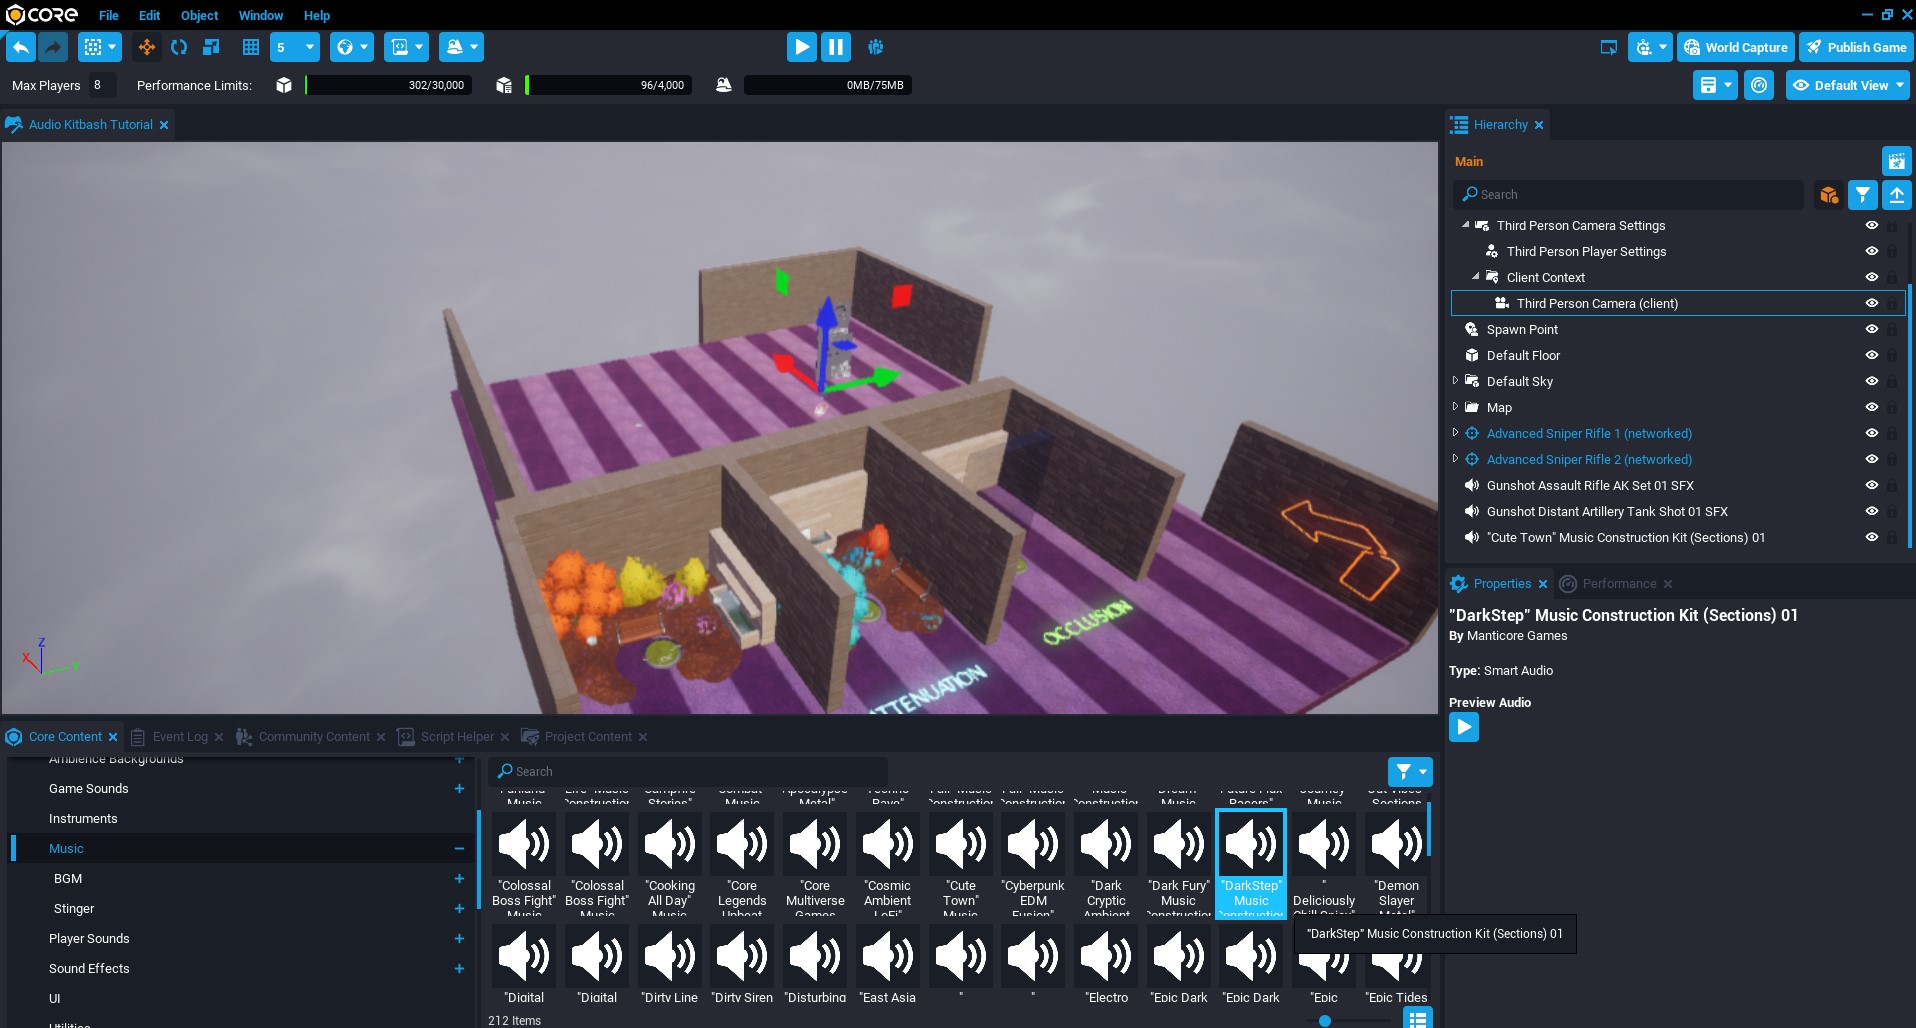
In the template provided, go to the Kitbashing area. At the number 1 you have the vanilla Advanced Sniper Rifle. Equip it, test it and take attention to the shooting sounds that are the ones we go to kitbash.
After that, go to the number 2. That is the one we go to kitbash.
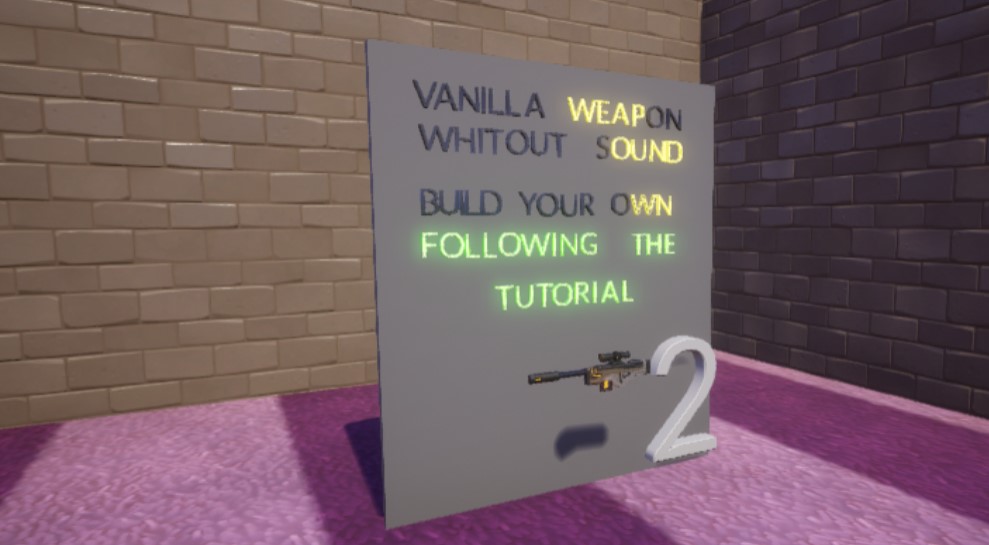
Assuming you have downloaded the template and is open in your editor, the steps are the next:
- Click on the Advanced Sniper Rifle 2 and scroll down on the Properties tab till you find the Ability section.

- In the Attack Sound Template , click on the “Find in Asset Catalog ” button.
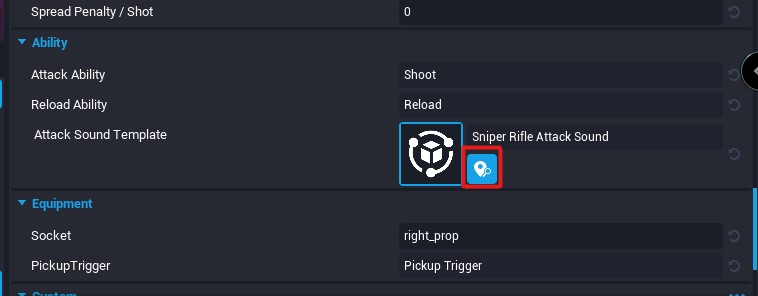
- Drag “Sniper Rifle Attack Sound ” to your Hierarchy .
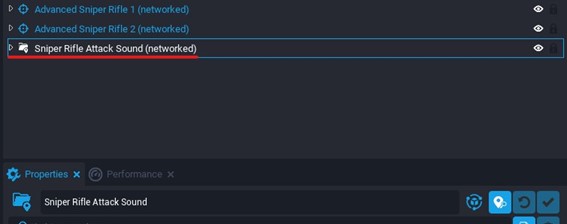
- Delete the 2 sounds that come with it.
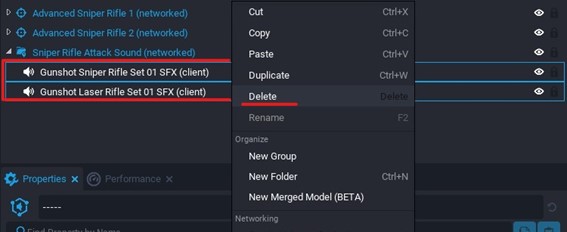
- Use the 2 sounds provided and drag it as a child of the Sniper Rifle Attack Sound .
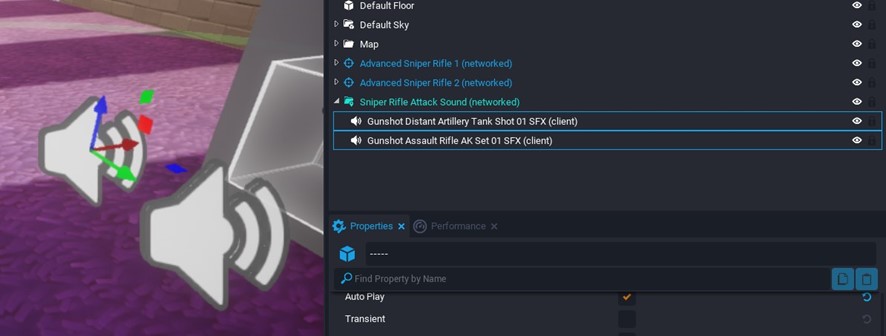
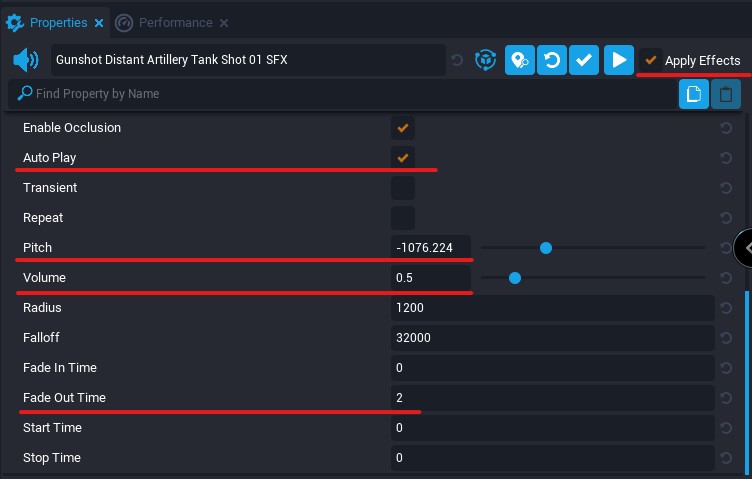
- Modify “Gunshot Distant Artillery Tank Shot 01 SFX ” in Pitch -1076.224 , Sound : 0.5 and Fade Out Time : 2 .
- Modify “Gunshot Assault Rifle AK Set 01 SFX ” in Main Type – Close Range select: 18 – Silenced Rifle 01 – Muffled and Metallic .

- Right click on Sniper Rifle Attack Sound and Create New Template From This . Name it Sniper Rifle Attack Sound Tutorial .

- Click on Advanced Sniper Rifle 2 and scroll down till Ability . Drag your new template and click on the up-right button “Update Template From This Object ”

- Delete “Sniper Rifle Attack Sound Tutorial ” from your Hierarchy.

- Test your new kitbashed shoot sound.
You can follow the same steps to modify any sound attached to a weapon or any other Core object.
Important notes
All audio files you place on a scene should be in client context to avoid increasing the number of networked objects. That does not means can’t be networked (as the files used in this tutorial).
Remember to tick the box Apply Effects or your settings will not go to be audible.
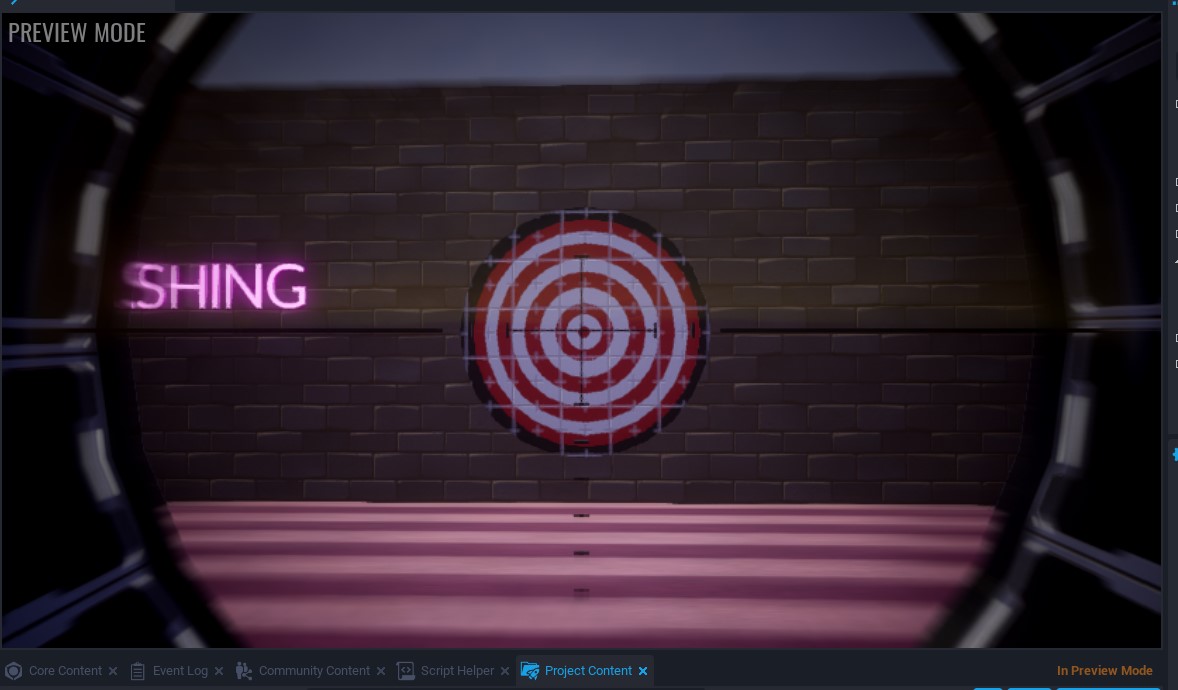
If you play an audio file from the Core Content and you do not hear any sound, remember that it is linked to the camera position. If you are far from that camera, in another area of your map, move to the main camera area and you will start to listen to it. That is setup by default but you can change to the player if you need it.
Link to the tutorial template: