Audio Kitbashing in Core
Estimated Completion Time: 10-20 Minutes recommended
CORE VERSION: 1.0.226-prod-s
SUGGESTED PREREQUISITES:There is a preexisting manual for this feature in the documentation I recommend giving a look, it is not required to understand this tutorial!
Tutorial Summary
This tutorial will teach you the fundamentals on how to kitbash audio for various contexts in Core.
By the end, you will have made a door that sounds like you entered a grocery store!
Contents Of This Tutorial:
- Getting Started
- Layers and Sections
- Effects
- Other properties
- Layering
Getting Started
To get started, open up a new project and take a look at the Core Content section of the editor, found on the bottom left next to Project Content and Community Content.
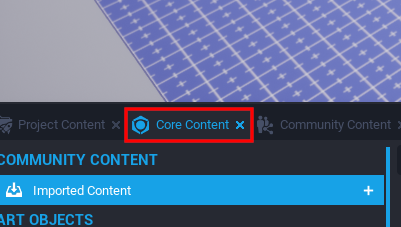
Now you should see a variety of categories listed, we are going to be looking at the audio section.
Next to the categories there is a plus symbol, when a category is clicked it will expand, allowing you to see sub categories. Click on the Audio category.
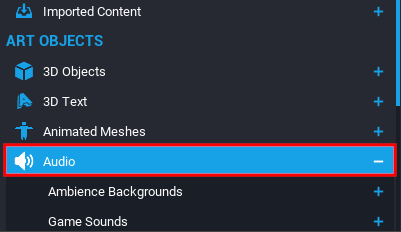
Next, we are going to be looking at the music section!
Layers and Sections
In the music sub category, there is often 2 variants you will encounter of a given track. "The name of the track" Music Construction Kit (Layers), and "The name of the track" Music Construction Kit (Sections).
Layers are one section of the full track, split up into instruments that you can then adjust.
Sections are often the full arrangement. Along with the different parts such as verse, chorus, and variants of them with different instruments added or removed.
Its important to look through the catalogue and become familiar with these differences, it will help you create more interesting and dynamic scenes that help further engage the player.
Find a pair of sections and layers that you enjoy, and drop both into the scene. I used "Arcanas Fall".
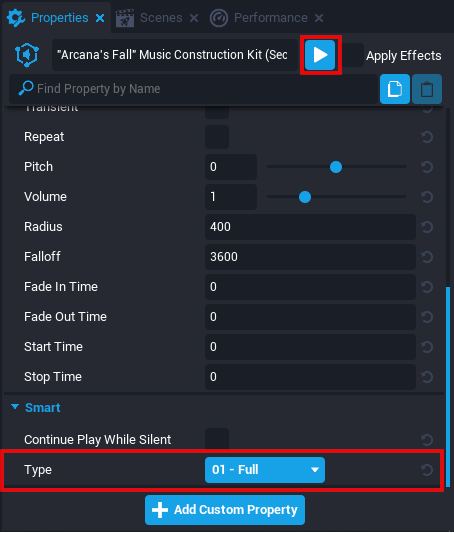
For the sections variant, you will see at the bottom of the list of properties, a property called "Type".
This property is what allows you to select between the various sections of the arrangement. By default, "01 - full" will be selected. Clicking on this property will expand it into a drop down list, try selecting one of the different sections. Press the play button on the top right of the properties window to preview the sections.
For the layers variant, you will see a list of instruments to adjust under the "Smart" property category.
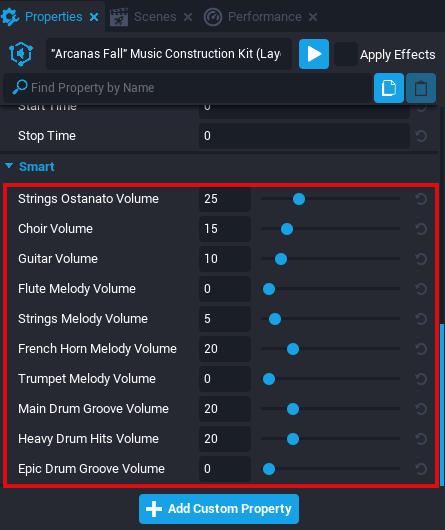
Changing the volumes of these instruments allows you to create your own variant of the track.
Say you don't really like the flute, you can move the slider to 0 and you will not hear it. You can also boost tracks past their default setting. However generally you should not move the sliders past their default values, we don't want to damage the players ear.
Effects
In any given audio asset in Core you will find attenuation, spacialization, and occlusion listed under the properties window.
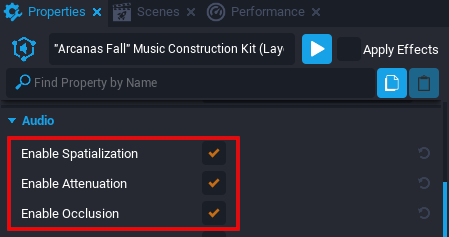
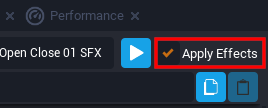
These effects as well as the fades, and start/stop times etc are unable to be heard when you normally hit the preview button. Next to it on the top right corner of the properties window you will see a checkbox for "Apply Effects", checking this box will make sure when you can hear the sound and all of its effects in relation to the preview camera position.
It is very important to get a good understanding of how these effects work if you are to create an immersive and more engaging scene.
-
Spatialization is the separation of audio into channels based on location. For example, if you were to have a car honk sound effect play on the left side of the player camera with spatialization enabled, the player would only hear it in their left ear. If it was in front of the camera they would hear it through both ears, and on the right side they would only hear it in their right ear.
-
Attenuation is the dynamic reduction and increase of volume based on the distance of the sound from the player camera. For example, if you were to play a sound that is far away from the player, it might sound quiet or silent. If the sound was played closer to the player, it would be clearly audible.
-
Occlusion is the reduction of attenuation based on if there is geometry between the player and the sound. For example if you were to play a sound on the other side of a wall, it would sound quieter then if it was in front of the wall.
These effects are very strong and can be a detriment if all enabled, be careful which sounds you enable them on!
Other properties
-
Auto Play if enabled will cause the track to play immediately upon addition to the world. This is helpful for if you have music that is always playing and you don't need a script to start and stop it.
-
Transient if enabled will cause the asset to destroy itself after the tracks completion. This is helpful for temporary effects and if you don't want to use the Life Span property.
-
Repeat if Enabled will cause the track to replay itself after the tracks completion. Helpful for background music and effects such as breathing, and mining.
-
Pitch when adjusted will change the pitch of the track. At 0 its unchanged, every 100 or -100 changes the pitch by one half-step.
-
Volume when adjusted changes how loud the track is. At 1.0 its at normal volume, at .5 its at half volume.
-
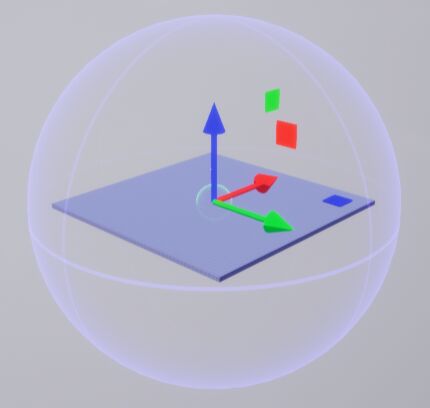
Radius is the distance at which the track plays at full volume, any further and the track will attenuate based on the set falloff. You can see the Radius visually in the editor by (when the track is selected) the green sphere around the asset.
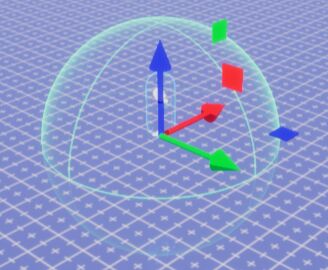
- Falloff is the distance at which you will no longer be able to hear the track. As you enter the falloff distance and start getting closer to the radius, the attenuation will increase until you reach the radius distance, at which it will be at full attenuation. You can see the Falloff distance visually in the editor by (when the track is selected) the blue sphere
-
Fade in time is the number in seconds used to determine how long it will take to increase the volume from 0 to 1 when the track is played.
-
Fade out time is the number in seconds used to determine how long it will take to decrease the volume from 0 to 1 when the track is stopped.
-
Start time when set to any number other then 0 will skip the track ahead that many seconds when played.
-
Stop time when set to any number other then 0 will stop the track that many seconds from when the track starts, including any fade out time.
-
Continue Play While Silent when enabled will allow the track to continue playing even when you set the volume to 0.
Layering
The most important part of kitbashing is of course combining 2 or more things into something new, this also applies to audio. Even when designing something as simple as a door opening, or a sword unsheathing, giving your sounds layers can really push your project that extra mile.
Lets design a door opening for a shop.
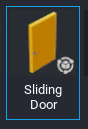
Lets first drag out a door that we are going to modify. Search for "Sliding Door" in Core Content, and drag the template into your scene.
Time to find what sound effects we are going to be using. Search for "door /audio" in Core Content. Using "/audio" after "door" will filter out anything that isn't an audio asset, so we only see what we need.
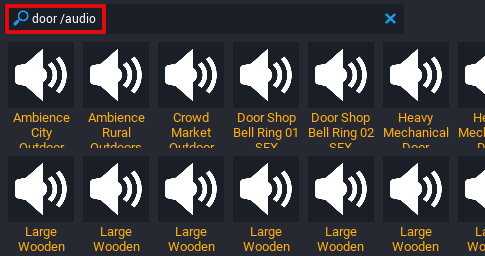
House Shop Digital Synth Chime Doorbell 02 SFX and Sliding Door On Carpet Open Close 01 SFX sounded great, so lets drag them out into our scene, and position them near the door.

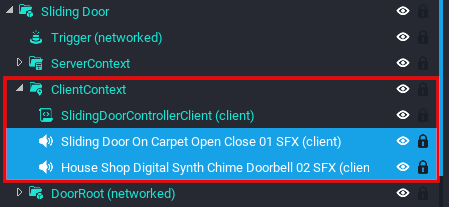
Next, lets expand the "Sliding Door" group and look inside of its client context, here you will see the audio this door is using, replace the tracks with the ones we dragged in. Audio should always be placed in a client context. This is because you often get no delay from when the audio is played and when the player hears it, and you obviously save on networked object count. When dragging in your audio the editor will warn you that you will need to de-instance the door, hit "Deinstance and Reparent!"
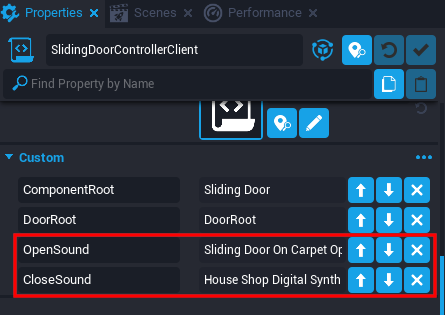
Next, click on the script and fill in the properties with your audio by dragging the tracks on to each property.
All that's left is a couple lines of code.
We are going to take advantage existing properties, use the Play() function, and re order which track is played when.
Open the script, and look at lines 48 and 52, where they say "OPEN_SOUND:Play()" and CLOSE_SOUND:Play(), add the other to where its missing, so on both if-then statements have both open and close sounds playing at once, this is on purpose as we are simply taking advantage of existing properties.
Lines 47 through 55 should now look like this
    if doorOffset ~= 0.0 and previousOffset == 0.0 and OPEN_SOUND then
		OPEN_SOUND:Play()
		CLOSE_SOUND:Play()
	end

	if doorOffset == 0.0 and previousOffset ~= 0.0 and CLOSE_SOUND then
		CLOSE_SOUND:Play()
		OPEN_SOUND:Play()
	end
Great! So now when you press play and move into the door, it should sound like you entered a shop.
Congratulations on completing the tutorial 
You can find a sample project including the door, and some examples of how audio can be used in Core under "Audio Kitbashing in Core" in the Community Projects section when creating a new project.
The Door can also be found on CC separately under "Kitbashing Door".
For more information on the properties and functions associated with audio, check out the Audio section of the Core Documentation (linked at the top of the page). Make sure to check out the examples too, they will help you understand how its all used in context!