Here's a utility that does the math to scale and position a 3D object attached to the screen so that you can control where on the screen it is and how wide it appears on the screen. This is achieved using CoreObject:AttachToLocalView() and some math involving your aspect ratio, screen resolution and camera FOV to calculate the necessary screen offset and distance from the camera.
Source: https://pastebin.com/taLPhiRb
Source (if that link is lost)
--[[
	ScreenObject v1.0 by Waffle

	screenObject = ScreenObject.New(object[, dimensionTable]) attaches a given object to the screen and allows for configuration of its size and position.
	screenObject.objectWidth is the width of the object in world space. This is used to determine how to scale it on the screen.
	screenObject.pixelWidth is how many pixels wide the object will be on-screen, given that objectWidth is accurate.
	screenObject.pixelPosX is the horizontal distance from the top left corner of the screen
	screenObject.pixelPosY is the vertical distance from the top left corner of the screen
	screenObject.faceCamera (false by default) causes the object to look directly at the camera position rather than facing the camera plane.
	These properties are all read-write

	screenObject:UpdatePosition([newDimensionTable]) re-positions the object on the screen.
		Call this after changing any properties, or include the property changes in newDimensionTable
		e.g. screenObject:UpdatePosition({pixelPosX = ..., pixelPosY = ...})

	screenObject:Destroy() destroys the object
]]


local SCREEN_OBJECT_GROUP = script:GetCustomProperty("ScreenObjectGroup")

local ScreenObject = {}
ScreenObject.__index = ScreenObject

function ScreenObject.New(object, dimensionTable)
	local group = World.SpawnAsset(SCREEN_OBJECT_GROUP, {parent = object.parent})
	group:AttachToLocalView()
	object.parent = group
	object:SetRotation(Rotation.New(0, 0, 180))

	local screenObject = setmetatable({
		group = group,
		object = object,
		objectWidth = 100,
		pixelWidth = 200,
		pixelPosX = 1920 / 2,
		pixelPosY = 1080 / 2,
		faceCamera = false
	}, ScreenObject)

	screenObject:UpdatePosition(dimensionTable)

	return screenObject
end

function ScreenObject:UpdatePosition(newDimensionTable)
	for k, v in pairs(newDimensionTable) do
		self[k] = v
	end
	local camera = Game.GetLocalPlayer():GetActiveCamera()
	local fov = camera and camera.fieldOfView or 90

	local resolution = UI.GetScreenSize()
	local xfactor = math.tan(fov * math.pi / 360)
	local yfactor = xfactor * resolution.y / resolution.x
	local depth = .5 * (self.objectWidth / self.pixelWidth) * resolution.x / xfactor

	local xOffset =  xfactor * depth * (self.pixelPosX/resolution.x * 2 - 1)
	local yOffset = -yfactor * depth * (self.pixelPosY/resolution.y * 2 - 1)

	local screenOffset = Vector3.New(depth, xOffset, yOffset)
	self.object:SetPosition(screenOffset)
	if self.faceCamera then
		self.object:SetRotation(Rotation.New(-screenOffset, Vector3.UP))
	end
end

function ScreenObject:Destroy()
	self.group:Destroy()
end

return ScreenObject
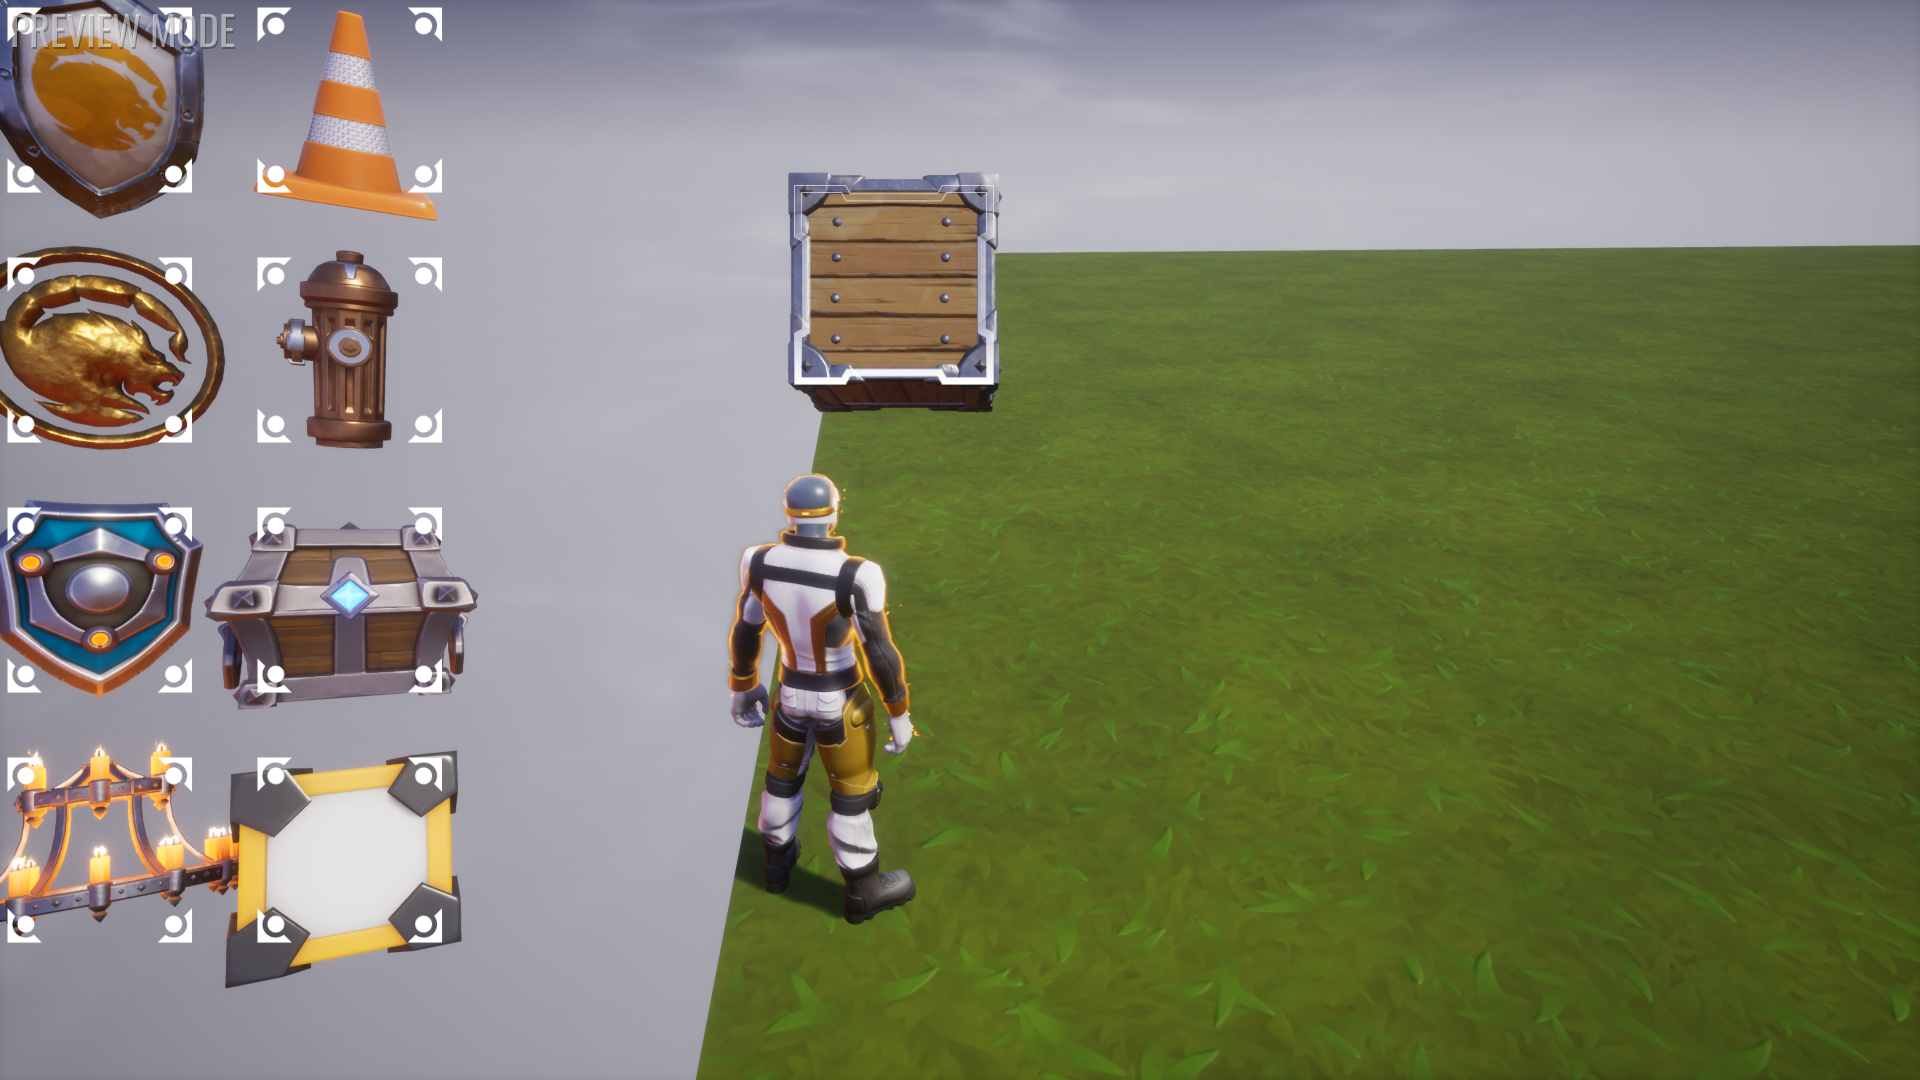
If objects are clipping things in the world then you can just make them smaller and they'll be brought closer to the camera so that they take up the same amount of space on the screen. It is necessary to define the width of the object in world space, and this can be difficult because it's different from the scale. For instance, a cube mesh with a scale of (1, 1, 1) is 100cm wide in world space.
One caveat here is that objects near the sides of the screen are still using the same perspective as your camera, so they will be skewed like you are looking at them from an angle, because you are. There's an option to toggle the objects to always face the camera, which has its own perspective skewing problems. Perhaps in the future there will be support for a method to embed different viewports onto the screen.
Since there's no way to directly access the exact size of an object in the world, or the exact positions and dimensions of a UI element on the screen, it's necessary to manually specify where the object should appear on the screen and how big it is in order for it to be placed properly. Sometime in the future if these are ever conveniently accessible, this utility could be made easier to use by just taking a 3d element and a UI element and putting them together.