ESTIMATED COMPLETION TIME: 20 Minutes.
CORE VERSION: 1.0.224.
SUGGESTED PREREQUISITES: basic knowledge of Lua and Core Editor.
TUTORIAL SUMMARY:
A hands-on tutorial on the usage of Lua modules in Core engine. (All scripts can be found in the "Modules Tutorial Scripts" template in CC).
EXPECT TO LEARN:
- what modules are;
- how do they benefit your projects;
- how to write and use them in Core.
Introduction to Modules: What Are They and How They Make Everything Better
Overview
A module is a special type of script that is tremendously helpful in terms of code organization and reusability.
Let’s assume you have a snippet of code that you are definitely going to use not just once, but in several different situations. Think of money rewards, or achievement acknowledgements, or even NPCs’ behavioral patterns – anything you may want to use multiple times on multiple different occasions in your project.
Replicating the same function again and again not only is time-consuming and inefficient, but also makes it harder for you to manage your code. Let’s say, you’ve decided to change something about the money rewards that player receives – you will have to iterate through every script of your game where rewards are involved and make the necessary change in every single one (and hope you didn’t miss any, or, even worse, didn’t introduce a bug).
A much better way in terms of efficiency and control is a module script. It is a library that stores functions and variables specifically intended to be reused. A module does not need instantiation – you do not place it into your project’s hierarchy, but instead load it directly from your Project Content with a require() command issued from another script.
Code in your module can be accessed by other scripts – so, in our example, you can call your money-reward-giving function from different places and use it for multiple purposes: quest completion, pickup collection, enemy killing, whatever takes your fancy.
Structure of a module
As a rule of thumb, every module starts with:
local YourModuleName = {}
and ends with:
return YourModuleName
The starting line creates an empty table that will serve as a container in which your functions and variables will be placed.
The finishing line lets other scripts access your table and use the code stored in there.
Scope and good practices
Variables and functions that are only used inside the module should be defined as local. It is considered a good practice; it is slightly faster (all local values are stored in Lua registers, while global values are kept as fields of a table).
A variable or a function that is going to be used outside the module should look like this: ModuleName.valueName.
local Rewards =  {}

-- Usable only within the module
local rewardAmount = 100

-- Usable in other scripts
function Rewards.giveReward(player)
    player.Money = player.Money + rewardAmount
end

return Rewards
Another way is to define all variables and functions as local and create a returning table at the end of the module for those of them that you want to use in other scripts.
local rewardAmount = 100
local function giveReward(player)
        player.Money = player.Money + rewardAmount
end

return {
    giveReward = giveReward
}
In our case we just need one function, so we may even do without an export table.
local rewardAmount = 100

local function giveReward(player)
    player.Money = player.Money + rewardAmount
    end

return giveReward
A module is basically like a large function, it can return any value you need it to return.
Modules are often used for loading data – configuration data in particular. In such a case it can look even as simple as this:
return {
    SESSION_DURATION = 20,
    MAX_SLOTS = 5
}
For this tutorial we will stick to a standard, probably most familiar module structure, the one we started with: creating a table in the beginning of the module, filling it in with variables and functions and returning this filled-up table in the end.
Using modules in other scripts
Let’s modify our module to make it a bit more interesting. Instead of making the reward value a constant, we add it as a second parameter to our function. And throw in a couple of other things.
local Rewards = {}

function Rewards.giveReward(player, rewardAmount)
    if Environment.IsServer() then
        -- get the current amount of the player's money
        local  currentAmount = player:GetResource("PlayerMoney")
        -- add the reward and save the new amount
        player:SetResource("PlayerMoney", currentAmount + rewardAmount)
        -- print a message into the console
        print(rewardAmount, " gold added to the player's resources")
        end

    if Environment.IsClient() and player == Game.GetLocalPlayer() then
        -- show a text message ingame
        local  message = "You've received " .. rewardAmount .. " gold coins! Yahoo!"
        local  pos = Game.GetLocalPlayer():GetWorldPosition() + Vector3.UP * 150
        UI.ShowFlyUpText(message, pos,
                        {duration = 3, color = Color.GREEN, isBig = true})
    end
end

return Rewards
You can require() your module both from a server-side and client-side script. We may use this to do different things for different Core contexts in the same function.
When our giveReward function is called, what it will do server-side is add the reward to the player’s resources, and client-side it will show a client-only onscreen text message to the player who received the reward.
Now let’s set up a simple scene in the editor.
-
Start a new project if you haven’t already.
-
Add a Trigger to the Hierarchy (shortcut 9).
NOTE: You may want to press V to turn editor gizmos on, otherwise your newly added trigger will remain invisible to you.
-
Then, under the Core Content tab, find a Ball object and add it as a child to your trigger – just to see where you need to be headed when you hit Play.
-
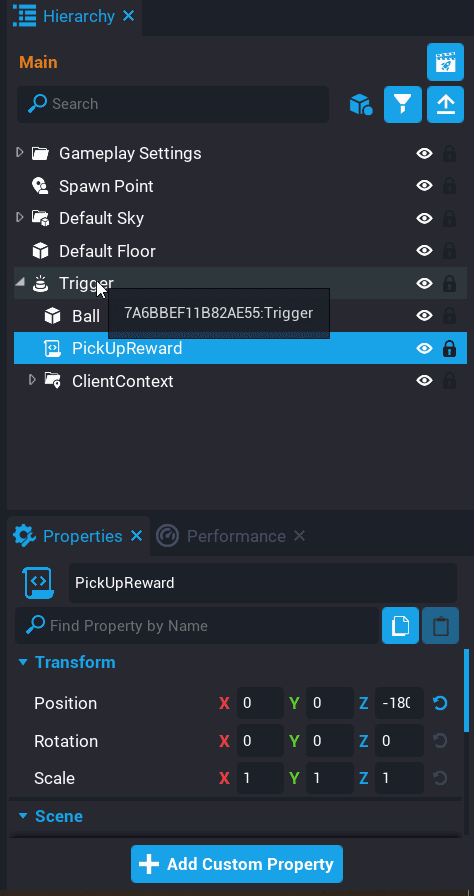
Now create a script, call it PickUpReward. Add the trigger as a custom property to this script (the easiest way to do it is select a script in the Hierarchy and then drag and drop the trigger onto the Properties tab below).
Unlike regular scripts, modules do not run by themselves. They must be loaded into another script with the help of the require method. Require has only one parameter – in Core it’s the asset ID of the module (in original Lua it’s the name of module). The simplest thing to get an asset ID would be to right-click on the module in the Project Content tab and select “Copy MUID”; alternatively, you can add the module as a custom property to your script).
Create a variable in your PickUpReward script:
local Rewards = require("<your module asset ID>")
This is the way the module is going to be loaded.
Now we add some code:
local Rewards = require("<your module asset ID>")
local TRIGGER = script:GetCustomProperty("RewardTrigger"):WaitForObject()
local rewardAmount = 100
local onscreenMessageDuration = 3
local isRewardReceived
local eventListener

local function OnBeginOverlap(_trigger, player)

    -- unsubscribe from the beginOverlapEvent temporarily to avoid spamming
    eventListener:Disconnect()
    eventListener = nil

    -- check if it was a Player type object that interacted with the trigger
    if not player or not player:IsA("Player") then return end

    -- if the reward has been already received, show the corresponding message
    -- to the local player, resubscribe to beginOverlapEvent and exit the function
    if isRewardReceived then
        if Environment.IsClient() then
            LOCAL_PLAYER = Game:GetLocalPlayer()
            if player == LOCAL_PLAYER then
                local message = "No rewards for you!"
                local pos = LOCAL_PLAYER:GetWorldPosition() + Vector3.UP * 150
                UI.ShowFlyUpText(message, pos, {
                    duration = onscreenMessageDuration,
                    color = Color.RED,
                    isBig = true
                })
            end

            -- resubscribe to the beginOverlapEvent after onscreen message disappears
            Task.Wait(onscreenMessageDuration)
            eventListener = TRIGGER.beginOverlapEvent:Connect(OnBeginOverlap)
        end
        return
    end

    -- all the checks above are done, we may now call the function from RewardsModule
    Rewards.giveReward(player, rewardAmount)

    isRewardReceived = true

    -- resubscribe to the beginOverlapEvent after onscreen message disappears
    Task.Wait(onscreenMessageDuration)
    eventListener = TRIGGER.beginOverlapEvent:Connect(OnBeginOverlap)
end

-- subscribe to event
eventListener = TRIGGER.beginOverlapEvent:Connect(OnBeginOverlap)
What we do here is:
First off, we subscribe to a beginOverlapEvent – i.e., make the script listen for interactions with the trigger.
When some object touches this trigger, we:
- temporarily cancel our subscription in order to have a little pause between this interaction and the next one;
    eventListener:Disconnect()
    eventListener = nil
- check if the object that interacted with the trigger is of a Player data type (it’s only players that we are intending to give rewards to);
if not player or not player:IsA("Player") then return end
- if it is indeed a Player, we check if the reward has been already received or not (since we are planning to give it out only once – to the player who got there first);
if isRewardReceived then
- if the reward has been already received, we show the client-side onscreen refusal message to the person who is interacting with the trigger, resubscribe to the event and exit the function;
        if Environment.IsClient() then
            LOCAL_PLAYER = Game:GetLocalPlayer()
            if player == LOCAL_PLAYER then
                local message = "No rewards for you!"
                local pos = LOCAL_PLAYER:GetWorldPosition() + Vector3.UP * 150
                UI.ShowFlyUpText(message, pos, {
                    duration = onscreenMessageDuration,
                    color = Color.RED,
                    isBig = true
                })
            end
            Task.Wait(onscreenMessageDuration)
            eventListener = TRIGGER.beginOverlapEvent:Connect(OnBeginOverlap)
- and only if the reward is yet to be given away, we finally run the function from our module, set isRewardReceived variable to true and resubscribe to the event.
    Rewards.giveReward(player, rewardAmount)
    isRewardReceived = true
    Task.Wait(onscreenMessageDuration)
    eventListener = TRIGGER.beginOverlapEvent:Connect(OnBeginOverlap)
That’s almost it. The only thing left to do is add a Client Context and copy-paste your PickUpReward script inside of it to take care of client-side effects.
Now we can hit RUN and test if everything is working as it is supposed to.

Is it? Great!
Bonus chapter: Lua class as a module
Modules in Lua are usually used for defining classes. This is highly convenient because it lets you easily transfer your code from one project to another.
The most popular and most flexible method to define a Lua class is by using metatables.
- We start as before, by creating an empty table:
lua local Account = {}
- Next, we assign this table to the
__indexmetamethod.
This will allow us to use the class’s table as a metatable for all future instances of the class. How exactly this is done, will be explained below.
Account.__index = Account
- Next, we write a constructor for our class. By Core convention we call it New.
function Account.New(balance)
    -- create and initialize a new instance of Account
    local account = {balance = balance or 0}

    -- make Lua look up the missing field in Account.__index
    setmetatable(account, Account)

    return account
end
- We also write a few methods that operate on instances. In Lua, methods that take
selfas a first argument are defined with a colon (:) with theselfargument made implicit.
function Account:Withdraw(amount)
    self.balance = self.balance – amount
    return self.balance
end

function Account:Deposit(amount)
    self.balance = self.balance + amount
    return self.balance
end
- And we finish by returning our class.
return Account
- Now we can import this module from another script with
require, create an instance of Account, and invoke a class method on it.
local Account = require("<asset ID of your Account module>")
local wealthyPirateAcc = Account.New(1000000)
wealthyPirateAcc:withdraw(10001)
How do we do it? The methods that we call are stored in the class, not on the instance - so when we write wealthyPirateAcc:withdraw(10001), we are in fact requesting an absent field and should, as we might think, get a nil.
But the trick here is that before returing nil for a field that is absent from a table, Lua first searches for the __index metamethod. In case it is not found, the result value will indeed be nil; if, however, __index is found and is itself a table, the value will be looked up in this other table (in our case, this other table is Account).
NOTE: if you are not yet familiar with the concept of metatables, for now just remember that your classes won't work without the following line:
ClassName.__index = ClassNamewhere ClassName is a table.